1. Introduction
This manual provides detailed instructions for the installation, operation, and maintenance of your GSPUSA TMD1EM35 Dryer Timer Kit with Knob. This product is designed as a replacement part for various dryer models. Please read all instructions carefully before proceeding with installation or use to ensure proper function and safety.
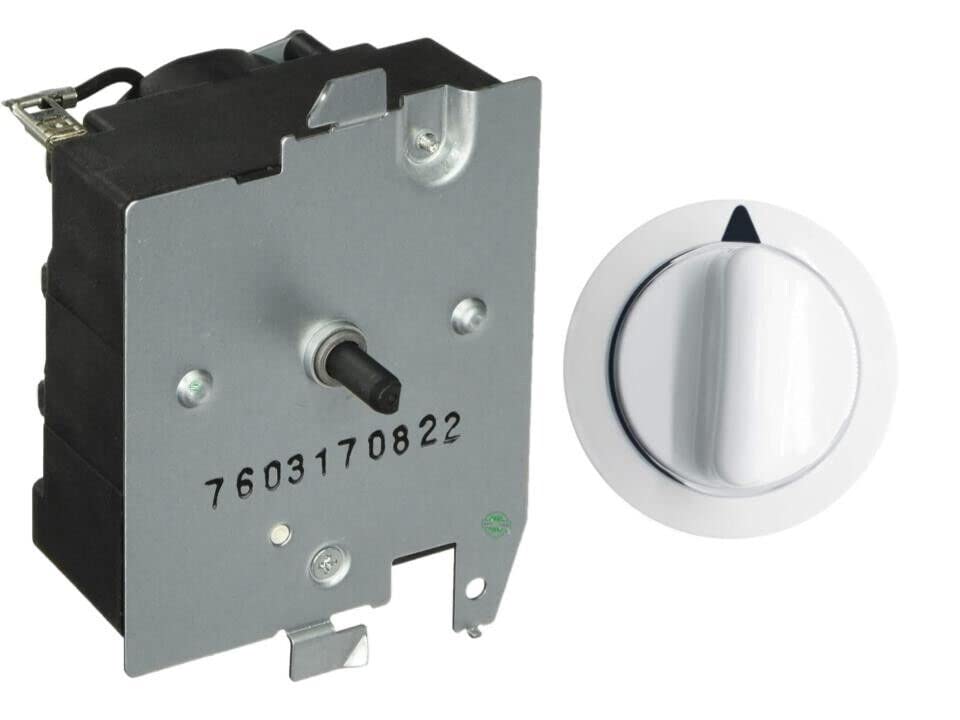
Image 1.1: GSPUSA TMD1EM35 Dryer Timer Kit with Knob. This image shows the complete dryer timer unit, including the timer mechanism and the control knob.
2. Safety Information
WARNING: Appliance repair can involve electrical hazards. Incorrect installation or repair can result in electric shock, fire, or other personal injury or property damage. It is strongly recommended that installation be performed by a qualified professional.
- Disconnect Power: Always ensure the appliance's power supply is completely disconnected before attempting any repair or installation. This includes flipping the circuit breaker to the OFF position and unplugging the power cord from the wall outlet.
- Gas Dryers: If you have a gas dryer, turn off the gas supply valve to the dryer or to your entire house before beginning work.
- Wear Protective Gear: Use appropriate personal protective equipment, such as gloves and safety glasses.
- Follow Instructions: Adhere strictly to all instructions provided in this manual and any accompanying video guides.
- Verify Compatibility: Before ordering or installing, always compare the new part with your old part number and model specifications to ensure compatibility.
3. Product Overview
The GSPUSA TMD1EM35 Dryer Timer Kit is a non-OEM replacement part manufactured to OEM standards. It includes the dryer timer module and a compatible control knob. This timer is designed to be a direct fit for various dryer models, replacing older serial numbers and designs.
3.1. Key Features
- New design compatible with TMD1EM35 and other replacement models.
- Made from high-quality materials to OEM specifications.
- Works with most top brand models.
- Compatible with 110V or 120V USA/Canada models (50 and 60 hertz).
- Direct fit for old and new serials, often without needing additional wiring.
3.2. Component Identification

Image 3.1: Back view of the GSPUSA TMD1EM35 Dryer Timer. This image displays the rear of the timer unit, showing the mounting plate and the shaft for the control knob.
4. Installation (Replacement Guide)
The following steps outline the general procedure for replacing a dryer timer. Always refer to your specific dryer model's service manual for precise instructions and diagrams. Professional installation is recommended.
4.1. Verify Part Compatibility
It is crucial to verify that the TMD1EM35 timer is the correct replacement for your dryer. Compare your old part number with the new part. While the physical appearance may differ due to new manufacturing designs, the functionality and fit should be compatible.

Image 4.1: Comparison of old and new dryer timer designs. This image illustrates how a new part design (left) can replace an older design (middle) while maintaining perfect fit and function. A dryer cycle dial is also shown (right).
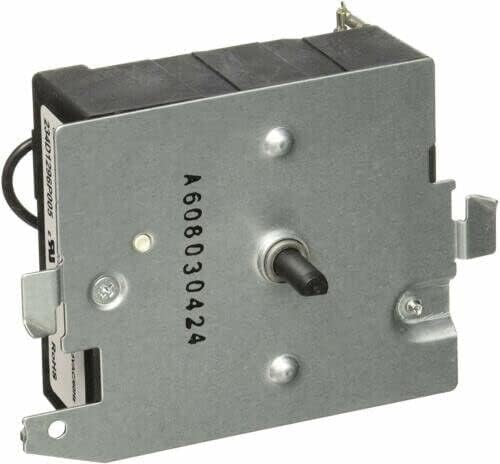
Image 4.2: Correct vs. Incorrect Dryer Timer Types. This image highlights the importance of comparing terminal connectors and part numbers to ensure the correct replacement part is selected, showing examples of correct and incorrect fits.
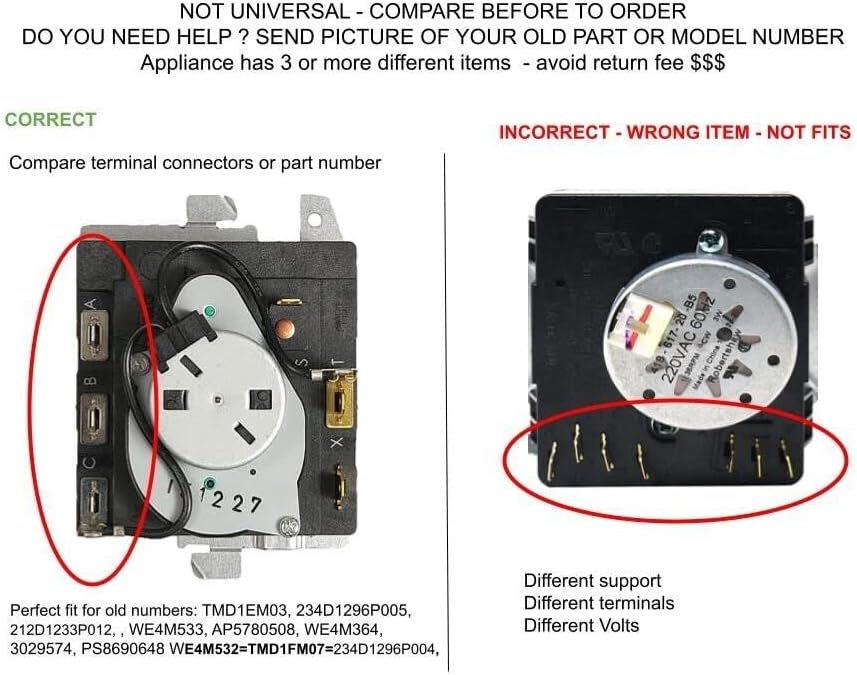
Image 4.3: Guide for selecting the correct dryer timer part. This image uses an "apple vs. orange" analogy to emphasize that not all parts are universal, and advises sending a picture of your old part or model number if unsure.
4.2. Installation Steps
For a visual guide, please refer to the instructional video below. The video demonstrates the process of selecting the correct timer and its replacement.
Video 4.1: How to Choose and Replace a Dryer Timer. This video provides a step-by-step guide on identifying the correct dryer timer and the general procedure for its replacement.
- Step 1: Disconnect Power. Before starting, shut off the electricity to the dryer at the breaker box and unplug the power cord from the wall. For gas dryers, also turn off the gas supply.
- Step 2: Remove the Knob. Carefully remove the control knob from the timer shaft. A thin tool like a putty knife can assist in prying it off if it's stuck.
- Step 3: Access the Timer. Remove the panel control cover to expose the timer and its wiring. This usually involves unscrewing a few screws.
- Step 4: Document Wiring. Before disconnecting any wires, take a clear picture of the timer and its connections. This will serve as a reference for reassembly.
- Step 5: Disconnect and Remove Old Timer. Unscrew the mounting screws holding the old timer in place. Carefully unplug each wire connector, one by one, referring to your picture to ensure you remember their positions.
- Step 6: Install New Timer. Position the new TMD1EM35 timer in place. Plug in the wire connectors color by color, matching them to the positions documented in your picture. Ensure all connections are secure.
- Step 7: Reassemble. Secure the new timer with its mounting screws. Reattach the panel control cover and then the control knob.
- Step 8: Restore Power. Once everything is securely reassembled, restore the electricity and gas (if applicable) to the dryer.
5. Operation
The GSPUSA TMD1EM35 Dryer Timer functions identically to the original timer it replaces. To operate your dryer:
- Load Dryer: Place your laundry into the dryer drum.
- Select Cycle: Turn the timer knob to select the desired drying cycle (e.g., Cottons, Permanent Press, Timed Dry). The specific cycles and their durations are determined by your dryer model.
- Start Dryer: Press the start button on your dryer. The timer will advance through the selected cycle.
Refer to your dryer's original user manual for detailed information on specific drying cycles and settings.
6. Maintenance
The TMD1EM35 dryer timer is a sealed unit and requires no internal maintenance. To ensure its longevity and proper function:
- Keep Clean: Periodically wipe the exterior of the control panel and knob with a soft, damp cloth. Avoid abrasive cleaners.
- Gentle Operation: Always turn the control knob gently. Avoid forcing it or rotating it excessively fast, as this can cause premature wear.
- Check Connections: If you experience intermittent issues, ensure all electrical connections to the timer are secure (after disconnecting power).
7. Troubleshooting
If your dryer is not functioning correctly after timer replacement, consider the following common issues:
- Dryer Not Starting:
- Ensure the dryer is plugged in and the circuit breaker is ON.
- Verify that the dryer door is fully closed and latched.
- Check that the timer knob is correctly seated on the timer shaft and engages properly. Sometimes, the knob may fit but not fully engage the timer mechanism.
- Re-check all wire connections to the timer for looseness or incorrect placement.
- Timer Not Advancing:
- This could indicate a faulty timer or an issue with other dryer components (e.g., motor, heating element, thermal fuse) that prevent the cycle from completing.
- Ensure the dryer is actually running (heating and tumbling) when the timer is set.
- No Heat:
- While less common for a timer issue, ensure the correct cycle is selected.
- Check other components like the heating element, thermal fuse, or thermostat.
If troubleshooting steps do not resolve the issue, it is advisable to contact a qualified appliance technician or the product support for further assistance.
8. Specifications
| Model Number: | TMD1EM35 |
| Brand: | GSPUSA |
| Part Number: | TMD1EM35 |
| Material: | Plastic |
| Item Weight: | Approximately 1 pound |
| Product Dimensions: | Approximately 6 x 4 x 4 inches |
| Voltage Compatibility: | 110V or 120V (USA/Canada models) |
| Frequency: | 50 and 60 hertz |
| Included Components: | Dryer Timer Module, Control Knob |
9. Warranty Information
This GSPUSA TMD1EM35 Dryer Timer Kit is covered by a 30-Day Guarantee from the date of purchase. This warranty covers defects in materials and workmanship under normal use. For warranty claims or further details, please contact GSPUSA customer support.
10. Customer Support
If you have any questions regarding the installation, operation, or troubleshooting of your GSPUSA TMD1EM35 Dryer Timer Kit, please contact GSPUSA customer support. When contacting support, please have your product model number (TMD1EM35) and purchase information readily available.
For additional resources and product information, you may visit the GSPUSA Store on Amazon.