1. Important Safety Information
Please read and understand all instructions before beginning installation. Failure to do so may result in electric shock, fire, or other injuries that could be fatal or cause property damage.
- WARNING: To avoid electric shock, ensure power is turned off at the circuit breaker or fuse box before installation.
- All electrical connections must be in accordance with local codes, ordinances, or the National Electric Code (NEC).
- Consult a qualified electrician if you are unsure about the installation process.
- This fixture is designed for indoor use in damp locations.
- Do not attempt to alter the fixture or its components.
2. Package Contents
Verify that all parts are included before proceeding with installation.
- LED Chips (Integrated)
- Installation Kits (Mounting hardware)
- Instruction Manual (This document)
3. Product Specifications
| Feature | Specification |
|---|---|
| Brand | Hamilyeah |
| Model | CL |
| Dimensions | 12"L x 12"W x 3.3"H |
| Material | Anti-rust Metal, LED |
| Wattage | 18 Watts |
| Voltage | 120 Volts (AC) |
| Light Source Type | LED (Integrated) |
| Color Temperature | 3000 Kelvin |
| Brightness | 2200 Lumens |
| Dimmable | Yes (Compatible with most dimmers) |
| Installation Type | Flush Mount |
| Indoor/Outdoor Usage | Indoor (Damp Location Rated) |
| Certifications | ETL Listed (for electrical components) |
4. Installation Instructions (Setup)
Before you begin: Ensure the power is OFF at the circuit breaker. Use a voltage tester to confirm the power is off before touching any wires.
- Prepare the Mounting Plate:
The fixture includes a mounting plate. Attach this plate to your junction box using the provided screws. Ensure it is securely fastened.
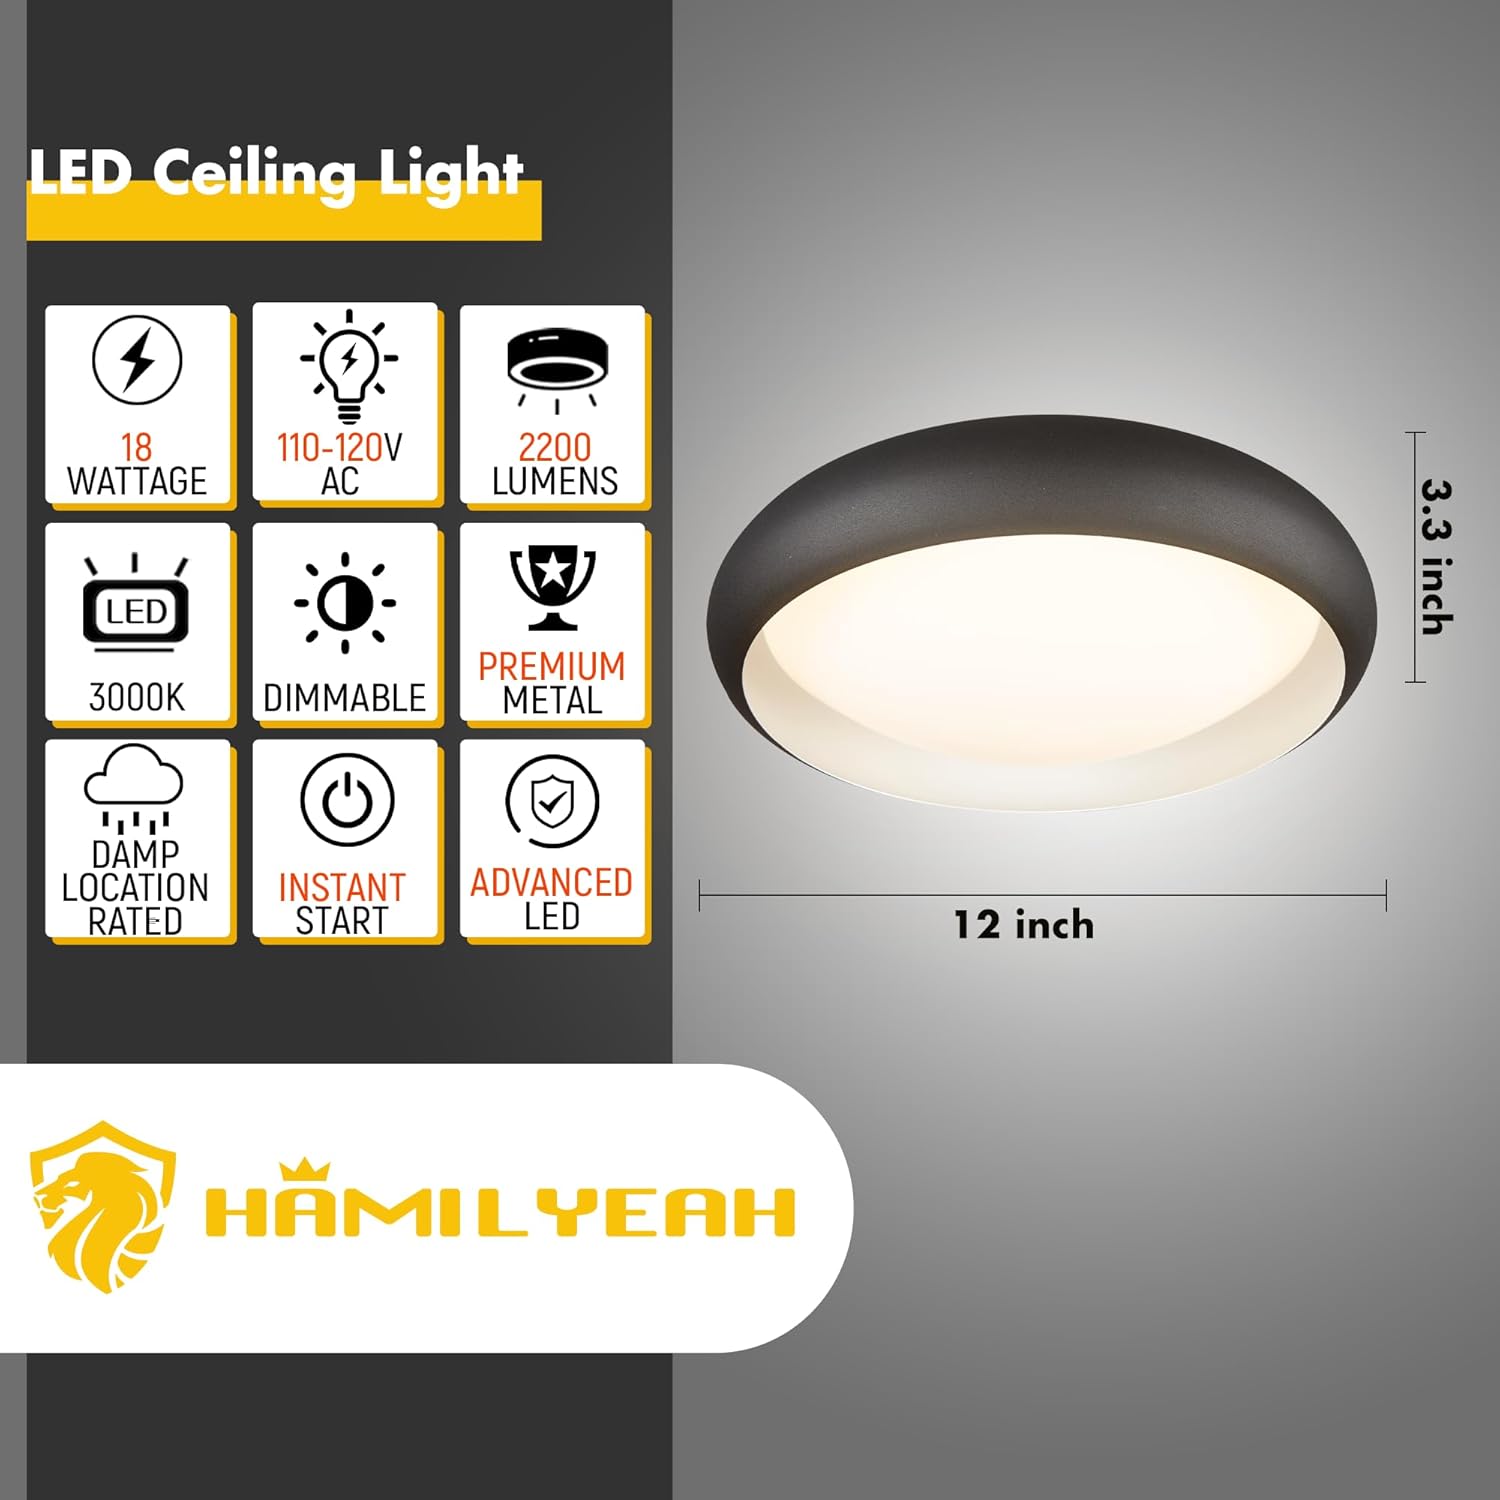
Image 1: Product dimensions and key specifications. This image illustrates the physical size and electrical characteristics of the light fixture.
- Electrical Connections:
Connect the fixture's wires to the corresponding wires from your junction box. Typically, this involves:
- Connect the black wire from the fixture to the black (hot) wire from the junction box.
- Connect the white wire from the fixture to the white (neutral) wire from the junction box.
- Connect the green or bare copper (ground) wire from the fixture to the ground wire from the junction box.
Secure connections with wire nuts. Ensure all wires are tucked neatly into the junction box.
- Mount the Fixture:
Align the fixture with the mounting plate and secure it firmly. This usually involves tightening screws that pass through the fixture into the mounting plate.

Image 2: The Hamilyeah flush mount LED ceiling light installed and illuminated. This shows the light's appearance when operational.
- Restore Power:
Once the fixture is securely installed and all connections are made, restore power at the circuit breaker. Test the light fixture.
Note on older junction boxes: Some older homes may have smaller junction boxes where the LED plate might obstruct mounting holes. In such cases, it may be necessary to carefully disassemble the LED plate from the mounting bracket to access the holes, then reassemble after securing the bracket. If you encounter difficulties, consult a professional electrician.
5. Operating Instructions
This Hamilyeah LED ceiling light is designed for simple operation.
- Power On/Off: Control the light using a standard wall switch connected to the fixture.
- Dimming Function: This fixture is dimmable. If connected to a compatible dimmer switch (sold separately), you can adjust the light intensity to your preference.
Video 1: Hamilyeah Flush Mount LED Ceiling Light Modern. This video demonstrates the light fixture in various room settings, showcasing its aesthetic and functionality.
6. Maintenance
To maintain the appearance and performance of your Hamilyeah LED ceiling light, follow these simple guidelines:
- Cleaning: Ensure power is off before cleaning. Wipe the fixture with a soft, dry, or slightly damp cloth. Do not use abrasive cleaners or solvents, as these can damage the finish or electrical components.
- LED Longevity: The integrated LED chips are designed for long life and do not require replacement.
7. Troubleshooting
If you experience issues with your light fixture, refer to the following common problems and solutions:
| Problem | Possible Cause | Solution |
|---|---|---|
| Light does not turn on. | No power to the fixture. Loose wire connection. Faulty wall switch. | Check circuit breaker/fuse. Ensure power is on. Verify all wire connections are secure (with power off). Test the wall switch with another device or replace it. |
| Light flickers or dims unexpectedly. | Incompatible dimmer switch. Loose wire connection. | Ensure dimmer switch is LED-compatible. Replace if necessary. Check wire connections (with power off). |
| Light is not as bright as expected. | Dimmer setting too low. Incorrect installation. | Adjust dimmer to maximum brightness. Review installation steps to ensure proper wiring. |
8. Warranty and Support
Warranty: Hamilyeah provides a 1-year hassle-free warranty for this product. This warranty covers defects in materials and workmanship under normal use.
Customer Support: If you have any questions, require assistance, or need to claim warranty service, please contact Hamilyeah customer support. You can typically reach us through your purchase platform by navigating to "Your Orders," finding your order in the list, selecting "Problem with Order," and choosing the relevant topic.
For more information, visit the official Hamilyeah store: Hamilyeah Store