1. Introduction
Thank you for choosing the UAVvvGo HDRC-H12 4K Folding HD Aerial Drone. This drone is designed for both beginners and experienced pilots, offering a stable flight experience with advanced features such as a 4K HD camera, real-time FPV transmission, and intelligent flight modes. Please read this manual thoroughly before operating the drone to ensure safe and correct usage.
The HDRC-H12 drone features a 120° wide-angle 4K HD camera with adjustable angles, capable of capturing high-quality videos and clear aerial photos. Its Wi-Fi real-time transmission FPV system allows you to connect the drone to your smartphone, displaying the view directly on your screen for an immersive flying experience and precise photo/video capture.
2. Safety Guidelines
Operating a drone requires responsibility. Adhere to the following safety guidelines to prevent accidents and ensure a safe flight experience:
- Local Regulations: Always comply with local aviation laws and regulations.
- Pre-Flight Check: Ensure the drone, remote control, and batteries are fully charged and in good working condition before each flight.
- Environmental Conditions: Fly in open areas, away from people, animals, buildings, and power lines. Avoid flying in strong winds, rain, or snow.
- Line of Sight: Maintain visual line of sight with the drone at all times.
- Battery Safety: Use only approved chargers and batteries. Do not overcharge or puncture batteries.
- Propeller Safety: Keep hands and face away from rotating propellers. Ensure propellers are correctly installed and free from damage.
- Age Restriction: This product is intended for adult use.
3. Package Contents
Verify that all items are present in the package:

Image: Contents of the HDRC-H12 Drone package. This includes the H12 UAV, folding remote control, rechargeable battery pack, four fan blades, four protective covers, a USB charging cable, a screwdriver, and an instruction manual.
- H12 UAV x1
- Folding Remote Control x1
- Rechargeable Battery Pack x1
- Fan Blade x4
- Protective Cover x4
- USB Charging Line x1
- Screwdriver x1
- Instruction Manual x1
4. Component Identification
Familiarize yourself with the drone and remote control components.

Image: Detailed view of the HDRC-H12 drone, highlighting key components like the propellers, motors, 4K camera, landing gear, and battery slot.
4.1 Drone Components
- Propellers: For lift and propulsion.
- Motors: Drive the propellers.
- 4K HD Camera: Captures photos and videos.
- Landing Gear: Provides stable landing and protects the camera.
- Battery Compartment: Houses the drone battery.
- LED Indicator Lights: Indicate drone status and orientation.
4.2 Remote Control Components
- Control Sticks: Left stick for throttle/yaw, right stick for pitch/roll.
- Power Button: Turns the remote control on/off.
- One-Key Take-off/Landing Button: Initiates automatic take-off or landing.
- Headless Mode Button: Activates headless flight mode.
- Return Home Button: Initiates automatic return to the take-off point.
- Speed Switch: Adjusts flight speed (low/medium/high).
- Phone Holder: Secures your smartphone for FPV viewing.
5. Setup
5.1 Battery Installation and Charging
- Drone Battery: Insert the rechargeable battery pack into the drone's battery compartment until it clicks securely into place.
- Remote Control Batteries: Open the battery cover on the back of the remote control. Insert 3 AAA batteries (included) according to the polarity markings. Close the cover.
- Charging: Connect the drone battery to the USB charging cable. Plug the USB cable into a 5V/1A USB adapter (not included). The indicator light on the charging cable will show charging status. Do not leave batteries unattended while charging.
5.2 Propeller and Protective Cover Installation
- Propellers: Match the propellers with the corresponding motor shafts (usually marked A and B). Press them down firmly until they are secure. Ensure they rotate freely.
- Protective Covers: Attach the protective covers to the drone's arms, snapping them into place around the propellers. This helps protect the propellers during minor impacts.
5.3 App Download and Connection
- Download App: Scan the QR code in the instruction manual or search for the designated drone app on your smartphone's app store.
- Power On: Power on the drone and then the remote control.
- Wi-Fi Connection: On your smartphone, go to Wi-Fi settings and connect to the drone's Wi-Fi network (e.g., "H12-XXXXXX").
- Launch App: Open the drone app. You should see the live camera feed from the drone.
6. Operating Instructions
6.1 Power On and Calibration
- Power On: Press and hold the power button on the drone until the indicator lights turn on. Then, press the power button on the remote control.
- Pairing: Push the left control stick (throttle) up to the maximum position, then pull it down to the minimum position. The drone's indicator lights will stop flashing, indicating successful pairing.
- Gyro Calibration: Place the drone on a flat, level surface. Push both control sticks to the bottom-right corner simultaneously for a few seconds. The drone's lights will flash rapidly and then become solid, indicating successful calibration.
6.2 Take-off and Landing
- Manual Take-off: After calibration, push both control sticks to the bottom-left and bottom-right corners simultaneously to unlock the motors. Then, slowly push the left control stick (throttle) upwards to take off.
- One-Key Take-off: Press the One-Key Take-off/Landing button. The drone will automatically take off and hover at a set altitude.
- Manual Landing: Slowly pull the left control stick (throttle) downwards until the drone lands.
- One-Key Landing: Press the One-Key Take-off/Landing button again. The drone will automatically descend and land.
6.3 Flight Controls and Special Features
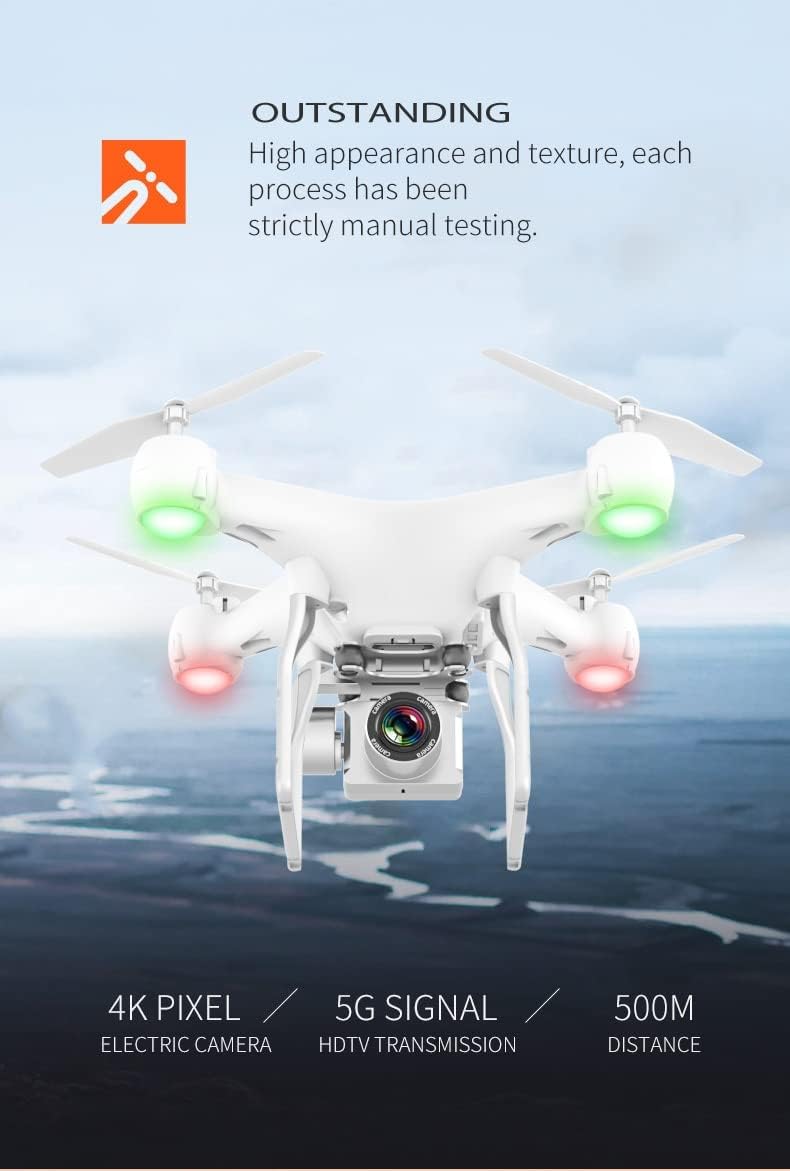
Image: An overview of the HDRC-H12 drone's key features, including its 4K camera, barometric height hold, one-key return, speed control, trajectory flight, app control, extended endurance, real-time transmission, electric camera, one-click take-off/landing, headless mode, and 360-degree roll.
- Throttle (Left Stick Up/Down): Controls altitude.
- Yaw (Left Stick Left/Right): Rotates the drone horizontally.
- Pitch (Right Stick Up/Down): Moves the drone forward/backward.
- Roll (Right Stick Left/Right): Moves the drone left/right (sideways).
- Headless Mode: Press the Headless Mode button. In this mode, the drone's front direction is always the same as the remote control's front, regardless of the drone's actual orientation.
- One-Key Return: Press the Return Home button. The drone will automatically fly back towards its take-off point.
- Speed Control: Use the Speed Switch button to cycle through different flight speeds (low, medium, high) for varying flight conditions.
- 3D Flip: Fly the drone to a height of at least 3 meters. Press the 3D Flip button, then push the right control stick in the desired flip direction (forward, backward, left, or right).
- Trajectory Flight: In the app, draw a flight path on your screen, and the drone will follow the specified route.
6.4 Camera Operation
- Photo/Video: Use the dedicated buttons on the remote control or within the app to take photos or start/stop video recording.
- FPV (First Person View): The live camera feed will be displayed on your connected smartphone via the app.
- Adjustable Camera Angle: The camera angle can be adjusted manually before flight or electronically via the remote/app (if supported by the specific model variant).
7. Maintenance
Regular maintenance ensures the longevity and optimal performance of your drone.
- Cleaning: Use a soft, dry cloth to clean the drone body and camera lens. Avoid using harsh chemicals.
- Propeller Inspection: Regularly check propellers for cracks, bends, or damage. Replace damaged propellers immediately using the provided screwdriver and spare parts.
- Battery Care: Store batteries in a cool, dry place. Do not fully discharge or overcharge batteries. If storing for extended periods, charge them to approximately 50-60%.
- Motor Inspection: Ensure motors are free from debris and can spin freely.
- Arm Replacement: The H12 drone's arms are replaceable. If an arm or motor is damaged, it can be replaced to restore functionality.
8. Troubleshooting
If you encounter issues, refer to the following common problems and solutions:
| Problem | Possible Cause | Solution |
|---|---|---|
| Drone does not power on | Low battery; Battery not installed correctly | Charge drone battery; Reinstall battery securely |
| Remote control does not respond | Low remote battery; Not paired; Out of range | Replace AAA batteries; Re-pair drone and remote; Fly within operational range |
| Drone drifts during flight | Gyro not calibrated; Uneven surface during calibration | Perform gyro calibration on a flat surface |
| No FPV feed on phone | Wi-Fi not connected; App not open; Drone too far | Connect to drone's Wi-Fi; Open app; Fly closer to drone |
| Propellers not spinning | Motors locked; Damaged propeller/motor | Unlock motors (see 6.2); Inspect and replace damaged parts |
9. Specifications
| Feature | Detail |
|---|---|
| Brand | UAVvvGo |
| Model | H12 Drone |
| Product Dimensions | 33 x 33 x 15 cm |
| Item Weight | 1.2 kg |
| Camera | 4K HD, 120° Wide-angle, Adjustable Angle |
| Special Features | Flashing Light, 360 Degree Flip, Headless Mode, One-Key Return, Fixed Height Mode, Speed Control, Trajectory Flight |
| Remote Control Batteries | 3 AAA batteries (included) |
| Mirror Adjustment | Remote Control |
| Age Range (Description) | Adult |
10. Warranty and Support
For warranty information or technical support, please refer to the contact details provided with your purchase or visit the official UAVvvGo website. Keep your proof of purchase for any warranty claims.