1. Introduction
Thank you for choosing the HITBOX 140A MIG Welder, model HIM200. This multi-process inverter welding machine is designed for versatility, offering Flux Core MIG, Stick (ARC), Lift TIG, and Spool Gun welding functions. Its compact design and intelligent synergic control make it suitable for a wide range of welding applications, from DIY projects to professional use. Please read this manual thoroughly before operation to ensure safe and efficient use of your welder.
2. Safety Information
Welding can be dangerous. Always follow safety precautions to prevent injury or damage. This section outlines general safety guidelines. Refer to local regulations and industry standards for comprehensive safety practices.
- Electric Shock: Can kill. Ensure proper grounding. Do not touch live electrical parts. Wear dry welding gloves.
- Fumes and Gases: Can be hazardous to your health. Keep your head out of the fumes. Use ventilation or exhaust to remove fumes from the breathing zone.
- Arc Rays: Can burn eyes and skin. Wear a welding helmet with a proper shade filter. Wear appropriate protective clothing.
- Fire and Explosion: Welding can cause fire or explosion. Keep combustibles away from the welding area. Have a fire extinguisher readily available.
- Hot Parts: Can cause severe burns. Allow equipment to cool before touching.
- Noise: Excessive noise can damage hearing. Wear ear protection.
- Maintenance: Disconnect power before servicing. Only qualified personnel should perform repairs.
3. Package Contents
Upon unpacking, please verify that all items listed below are included and in good condition:
- 1X HITBOX MIG Welding Machine (HIM200)
- 1X Split Welding Gun (MIG Torch)
- 1X Electrode Holder (for Stick/ARC welding)
- 1X Grounding Clamp
- 1X Brush
- 2X Nozzles
- 1X 0.5KG Flux Wire


4. Product Features
4.1. Synergy & Compact Design
The HIM200 features a One-Knob intelligent control system. This system automatically compensates and adjusts the welding current and wire feed speed, simplifying the welding process for optimal results. Its lightweight and compact design ensures portability and ease of handling.

4.2. Multi-Process Capability (4-in-1)
This welder supports four primary welding processes:
- Flux Core MIG: Gasless MIG welding, ideal for outdoor use and mild steel.
- Stick (ARC/MMA): For welding with coated electrodes.
- Lift TIG: For precise welding of thin materials (TIG torch not included).
- Spool Gun: Compatible for aluminum welding (Spool gun not included).

4.3. Safety Protection Features
The HITBOX HIM200 is equipped with multiple safety features to protect both the user and the machine:
- Overcurrent Protection: Automatic shutdown if current exceeds safe limits.
- Overvoltage Protection: Protects against damage from excessive voltage.
- Overheating Protection: The machine will automatically shut down if it overheats. The fan cooling system helps reduce dust ingress and extends service life.
- VRD (Voltage Reduction Device): Reduces open-circuit voltage for increased safety in Stick/MMA mode.
- IP21S Tested: Provides protection against solid objects over 12mm and vertically falling water drops.

4.4. Quality Wire Feeder
The welder features a flared design for easier wire feeding, ensuring smooth and consistent wire delivery for Flux Core welding. It is suitable for Flux Core Wire .030"-.035" (0.8mm-0.9mm).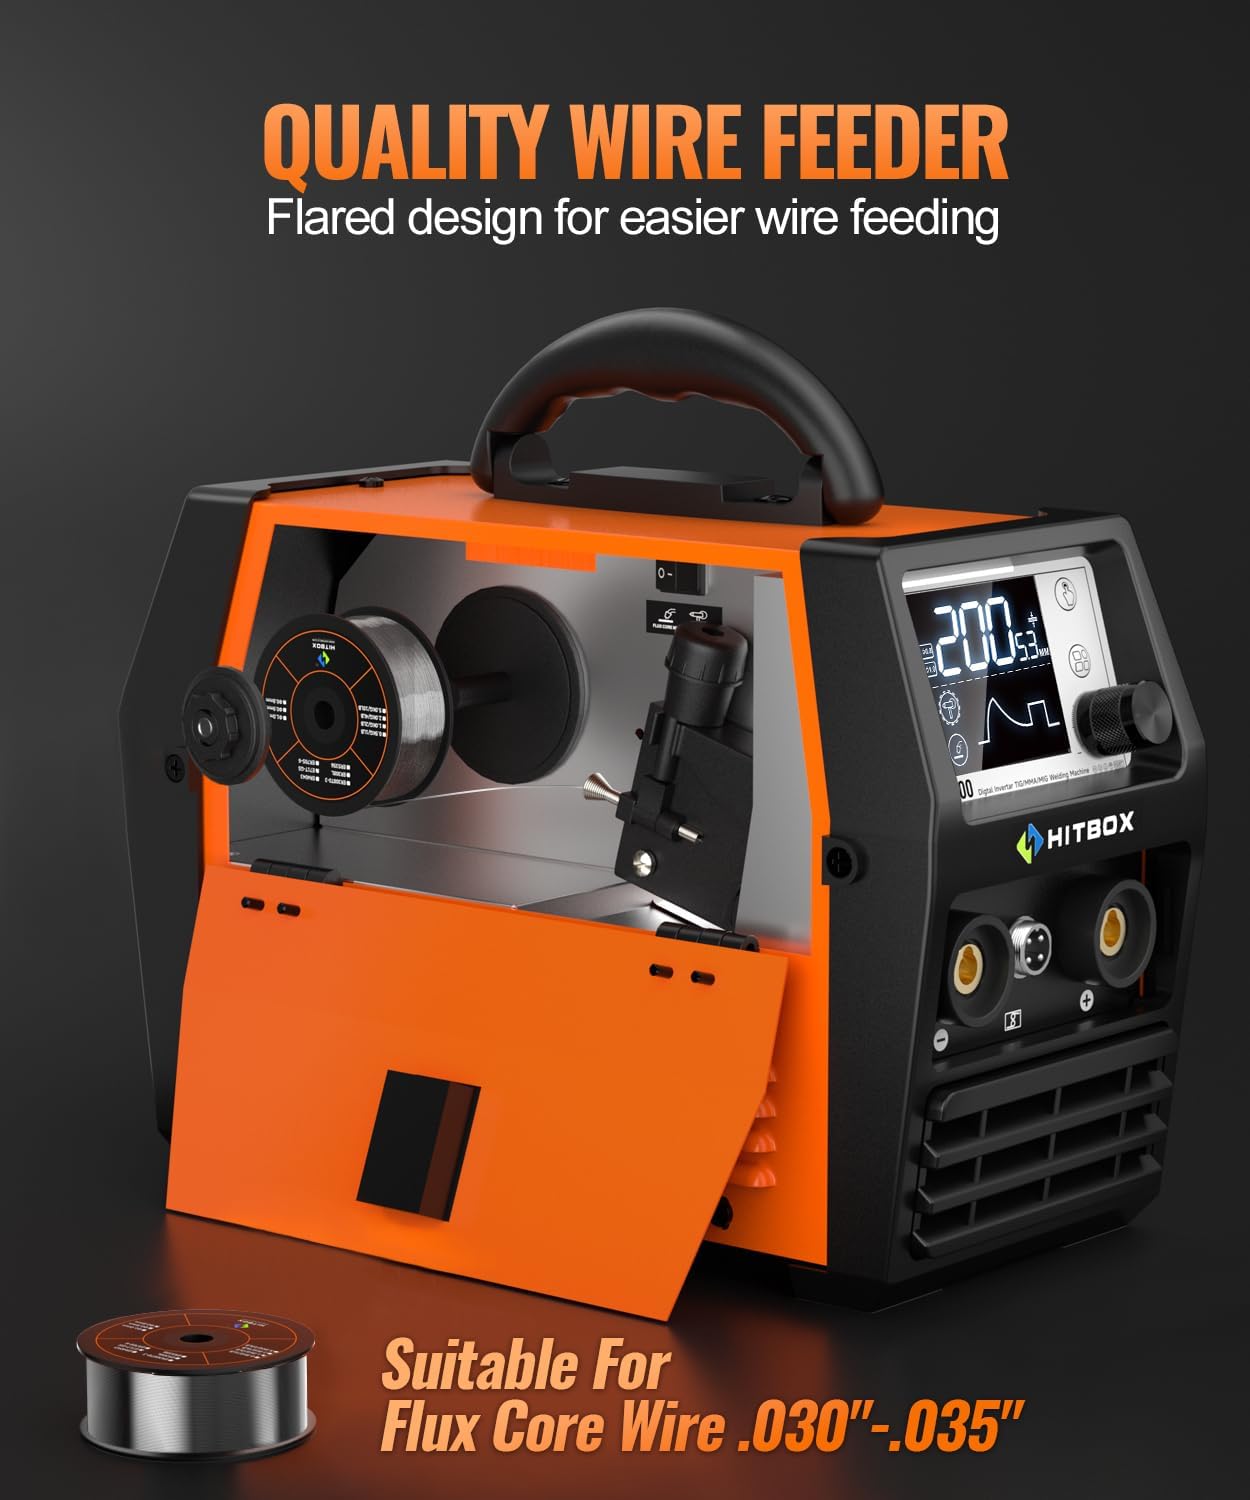
5. Setup
Before operating the welder, ensure it is properly set up according to these instructions.
5.1. Panel Instruction

- Digital LCD Screen: Displays welding parameters and settings.
- Mode Button: Selects welding process (MIG, Stick, Lift TIG).
- Function Button: Toggles between different functions or settings within a mode.
- Rotate and Confirm Knob: Adjusts parameters and confirms selections.
- '+' Pole: Positive output terminal.
- 4-Pin Socket: For connecting a spool gun (optional accessory).
- '-' Pole: Negative output terminal.
- Power Switch: Turns the welder ON/OFF.
- Fan: Cooling fan for internal components.
5.2. Power Connection
The HIM200 is a dual voltage machine (110V/220V). Ensure the power source matches the welder's requirements and is properly grounded. Use the appropriate power cord and adapter if necessary.
5.3. Accessory Connection
Connect the welding accessories based on the desired welding mode. Pay close attention to polarity.
- Ground Clamp: Always connect the ground clamp securely to the workpiece or welding table.
- MIG Gun (Flux Core/Gasless): Connect the MIG gun to the appropriate terminal. For Flux Core welding, the MIG gun is typically connected to the negative (-) terminal, and the ground clamp to the positive (+) terminal.

- Stick/MMA/ARC: Connect the electrode holder to the positive (+) terminal and the ground clamp to the negative (-) terminal for most common electrodes (DCEN). Some electrodes may require reverse polarity (DCEP).
- Lift TIG: Connect the TIG torch (not included) to the negative (-) terminal and the ground clamp to the positive (+) terminal.

- Spool Gun: Connect the spool gun (not included) to the 4-pin socket and the appropriate power terminal (usually positive for aluminum).

5.4. Wire Installation (for MIG/Flux Core)
- Open the wire feeder compartment.
- Place the wire spool onto the spindle, ensuring it rotates freely.
- Feed the wire through the guide tube and into the drive rollers.
- Close the drive roller tension arm and adjust the tension knob. The tension should be firm enough to feed the wire without slipping, but not so tight as to deform the wire.
- With the MIG gun pointed away from yourself and others, press the trigger to feed the wire through the gun liner until it exits the contact tip.
6. Operating
This section provides general operating instructions for each welding mode.
6.1. General Operation
- Ensure all connections are secure and correct for the desired welding mode.
- Turn on the welder using the Power Switch (8).
- Use the Mode Button (2) to select the desired welding process (MIG, Stick, Lift TIG).
- Use the Rotate and Confirm Knob (4) to adjust welding parameters such as current (amperage) and wire feed speed (for MIG). The synergic control will assist in setting optimal parameters.
- Perform a test weld on scrap material to verify settings before welding your actual workpiece.

6.2. MIG Welding (Flux Core/Gasless)
This mode uses flux-cored wire, eliminating the need for shielding gas. It's ideal for outdoor welding and dirty or rusty materials.
- Ensure MIG gun is connected to the negative (-) terminal and ground clamp to the positive (+) terminal.
- Select MIG mode on the display.
- Adjust current and wire feed speed using the synergic control knob. The display will show recommended settings based on wire diameter and material thickness.
- Maintain a consistent stick-out and travel speed for optimal results.
6.3. Stick (ARC/MMA) Welding
This mode uses coated electrodes. The HIM200 features Arc Force, Anti-Stick, Hot Start, and VRD for enhanced performance and safety.
- Connect the electrode holder and ground clamp with correct polarity (typically electrode holder to positive, ground to negative).
- Select Stick/MMA mode.
- Adjust the welding current (amperage) based on the electrode type and diameter.
- Arc Force: Helps prevent the electrode from sticking and maintains arc stability.
- Anti-Stick: Reduces the current if the electrode sticks, making it easier to remove.
- Hot Start: Provides a temporary increase in current at the start of welding to ensure easy arc ignition.
- VRD (Voltage Reduction Device): Reduces the open-circuit voltage for increased safety when not welding.

6.4. Lift TIG Welding
This mode provides precise control for welding thin materials. A TIG torch (not included) and shielding gas are required for this process.
- Connect the TIG torch to the negative (-) terminal and ground clamp to the positive (+) terminal.
- Select Lift TIG mode.
- Adjust welding current.
- To initiate the arc, gently touch the tungsten electrode to the workpiece and then lift it slightly.
6.5. Spool Gun Operation
The HIM200 is compatible with a spool gun (not included), which is typically used for welding softer metals like aluminum.
- Connect the spool gun to the 4-pin socket and the appropriate power terminal.
- Ensure the correct wire type and shielding gas (if required for the material) are used with the spool gun.
- Select Spool Gun mode (if available as a distinct mode, otherwise use MIG mode with appropriate settings).
7. Maintenance
Regular maintenance ensures the longevity and optimal performance of your welding machine.
- Cleaning: Periodically clean the internal components of the welder using dry, compressed air. Ensure the power is disconnected before cleaning.
- Fan Vents: Keep the fan vents clear of obstructions to ensure proper airflow and prevent overheating.
- Cable Inspection: Regularly inspect all welding cables, connections, and the power cord for damage. Replace any worn or damaged parts immediately.
- MIG Gun Maintenance: Clean the contact tip, nozzle, and diffuser regularly. Replace worn contact tips and nozzles as needed. Ensure the liner is free of kinks and debris.
- Storage: Store the welder in a clean, dry environment when not in use.
8. Troubleshooting
This section provides solutions to common issues you might encounter.
| Problem | Possible Cause | Solution |
|---|---|---|
| Welder does not power on | No power supply; Power switch off; Faulty power cord/plug | Check power outlet; Ensure power switch is ON; Inspect and replace power cord if damaged. |
| No arc/Poor arc ignition | Improper ground connection; Incorrect polarity; Wrong settings; Worn contact tip/electrode | Ensure ground clamp is secure; Verify correct polarity for mode; Adjust current/voltage settings; Replace contact tip/electrode. |
| Wire feed issues (MIG) | Incorrect wire tension; Kinked liner; Clogged contact tip; Wrong drive roller size | Adjust wire tension; Inspect and straighten/replace liner; Clean/replace contact tip; Ensure correct drive rollers are installed. |
| Overheat indicator on | Exceeded duty cycle; Blocked fan vents; High ambient temperature | Allow welder to cool down; Clear fan vents; Operate in a cooler environment. |
| Excessive spatter | Incorrect voltage/wire speed; Dirty workpiece; Incorrect stick-out | Adjust settings; Clean workpiece; Adjust stick-out. |
If you encounter issues not listed here or if the problem persists after troubleshooting, please contact HITBOX customer service for assistance.
9. Specifications
Detailed technical specifications for the HITBOX HIM200 MIG Welder.
| Specification | Value |
|---|---|
| Model Number | HIM200-US |
| Input Voltage | 110V/220V Dual Voltage |
| Rated Output Current | 200A (Actual welding effect 140A) |
| Output Current Range | 30-200A |
| Duty Cycle | 30%-140A at 40°C |
| Welding Processes | Flux Core MIG, Stick (ARC/MMA), Lift TIG, Spool Gun (compatible) |
| Item Weight | 8.8 pounds (approx. 9.92 lbs with accessories) |
| Product Dimensions | 7.48 x 5.91 x 11.02 inches (approx. 12.59 x 5.9 x 9.45 inches) |
| Country of Origin | China |
| Insulation Class | H |
| Protection Class | IP21S |


10. Warranty and Support
HITBOX offers a 2-year warranty for this product. If you are not satisfied with your purchase or require technical assistance, please feel free to consult our customer service team. When contacting support, please provide your order number for faster service.
For further information or support, please visit the official HITBOX store or contact their customer service directly.
- HITBOX Store: Visit HITBOX Store on Amazon


