UAVvvGo H12 drone
UAVvvGo HDRC-H12 4K Folding Drone User Manual
Model: H12 Drone
1. Introduction
Thank you for choosing the UAVvvGo HDRC-H12 4K Folding Drone. This manual provides essential information for the safe operation, setup, and maintenance of your drone. Please read this manual thoroughly before operating the drone to ensure a safe and enjoyable flight experience.
The H12 drone is equipped with a 120° wide-angle 4K HD camera, featuring adjustable angles for capturing high-quality videos and clear aerial photos. Its Wi-Fi real-time transmission FPV system allows you to connect the drone to your smartphone, displaying the view directly on your device for an immersive aerial perspective.
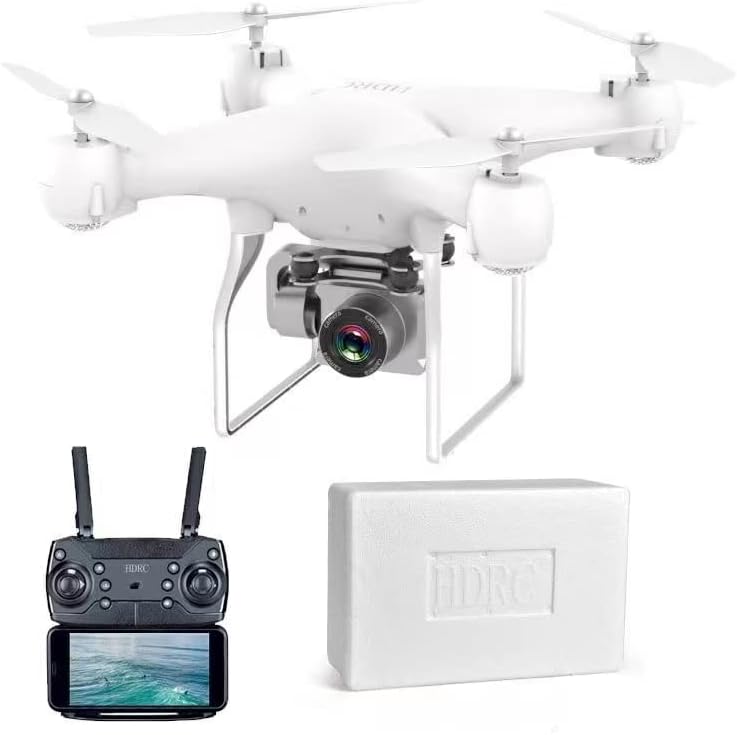
Image 1.1: UAVvvGo HDRC-H12 4K Folding Drone, remote control, and battery box.
2. Package Contents
Please verify that all items listed below are included in your package:
- H12 UAV x1
- Folding Remote Control x1
- Rechargeable Battery Pack x1
- Fan Blade x4 (Spare)
- Protective Cover x4
- USB Charging Cable x1
- Screwdriver x1
- User Manual x1
- Foam Box x1
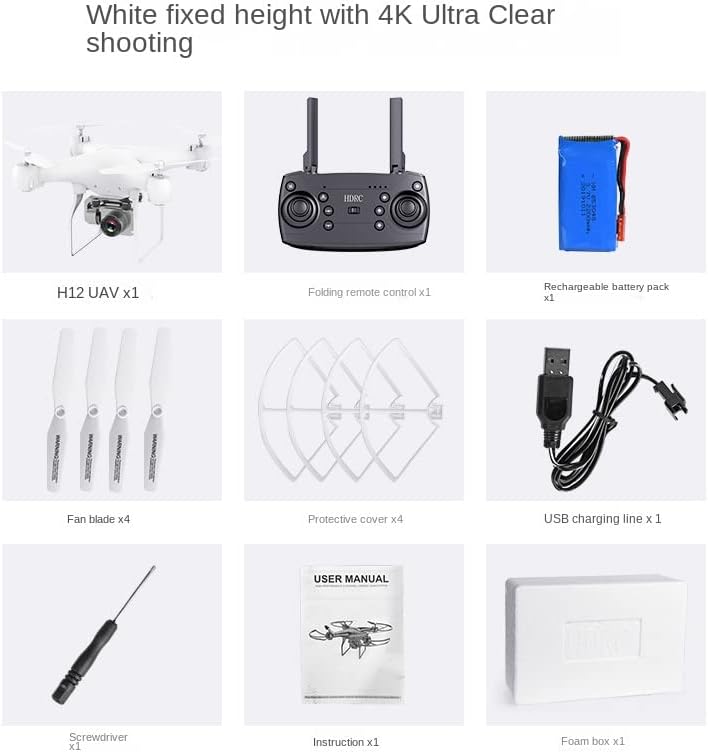
Image 2.1: All components included in the H12 drone package.
3. Setup Guide
3.1 Charging the Drone Battery
- Connect the rechargeable battery pack to the USB charging cable.
- Plug the USB charging cable into a standard USB power adapter (5V/1A recommended).
- The indicator light on the charging cable will show the charging status. Refer to the cable's specific instructions for light indications.
- Once fully charged, disconnect the battery. Do not overcharge.
3.2 Installing Drone Battery
- Ensure the drone is powered off.
- Locate the battery compartment on the drone.
- Insert the fully charged battery pack into the compartment, ensuring it is securely seated.
- Close the battery compartment cover.
3.3 Installing Remote Control Batteries
The remote control requires 3 AAA batteries (included). Open the battery compartment on the back of the remote control, insert the batteries according to the polarity markings, and close the cover.
3.4 Attaching Propellers and Protective Covers
- Identify the 'A' and 'B' marked propellers and match them to the corresponding motor shafts on the drone.
- Gently push and twist the propellers onto the motor shafts until they are secure.
- Attach the protective covers to the drone's arms, ensuring they snap into place to guard the propellers.
3.5 Unfolding the Drone
The H12 drone features a folding design for portability. Gently unfold the drone arms until they lock into their extended position. Ensure all arms are fully extended before flight.
3.6 App Installation and Connection
- Scan the QR code in the included quick start guide or search for the designated app in your smartphone's app store.
- Install the app on your smartphone.
- Power on the drone.
- On your smartphone, go to Wi-Fi settings and connect to the drone's Wi-Fi network (usually named 'H12-XXXXXX').
- Open the app. The live camera feed should appear, indicating a successful connection.
4. Operating Instructions
4.1 Power On and Pairing
- Place the drone on a flat, level surface.
- Power on the drone. The indicator lights will flash.
- Power on the remote control.
- Push the left joystick (throttle) up once, then pull it down once. The drone's lights will become solid, indicating successful pairing.
4.2 Calibration
After pairing, push both joysticks to the bottom-left or bottom-right corners simultaneously for a few seconds to calibrate the gyroscope. The drone lights will flash rapidly and then become solid, indicating successful calibration.
4.3 Basic Flight Controls
The H12 drone features an easy-to-fly design with fixed height mode for stable hovering.
- One-Button Take-off/Landing: Press the dedicated one-button take-off/landing button on the remote control. The drone will automatically ascend to a certain height or descend and land.
- Ascend/Descend: Use the left joystick (throttle) to control altitude. Push up to ascend, pull down to descend.
- Forward/Backward: Use the right joystick to move the drone forward or backward.
- Left/Right Sideways Flight: Use the right joystick to move the drone left or right sideways.
- Rotate Left/Right: Use the left joystick to rotate the drone clockwise or counter-clockwise.

Image 4.1: Key features and flight modes of the H12 drone.
4.4 Advanced Features
- Headless Mode: Activate headless mode by pressing the dedicated button. In this mode, the drone's front direction will be the same as the remote control's orientation, simplifying flight control regardless of the drone's actual heading.
- One-Key Return: Press the one-key return button, and the drone will automatically fly back towards the take-off point. Ensure a clear path for return.
- 3D Flip: Fly the drone to a sufficient height (at least 3 meters). Press the 3D flip button, then push the right joystick in any direction to perform a 360-degree flip.
- Speed Control: The remote control typically has buttons to adjust flight speed (low, medium, high).
4.5 Camera Operation
The 4K HD camera allows for high-quality aerial photography and videography.
- Taking Photos: Press the photo button on the remote control or within the app to capture a still image.
- Recording Videos: Press the video button on the remote control or within the app to start/stop video recording.
- FPV (First Person View): The live camera feed is transmitted to your smartphone via Wi-Fi, allowing you to see what the drone sees in real-time.

Image 4.2: The H12 drone's 4K Ultra Clear Camera in action.
5. Maintenance
5.1 Cleaning
Regularly clean your drone with a soft, dry cloth. Avoid using harsh chemicals or solvents that could damage the components.
5.2 Propeller Replacement
If a propeller is damaged, replace it immediately using the provided screwdriver and spare fan blades. Ensure the correct 'A' and 'B' propellers are installed on their respective motor shafts.
5.3 Battery Care
- Store batteries in a cool, dry place away from direct sunlight and extreme temperatures.
- Do not fully discharge the battery before storing for extended periods. Charge it to about 50-60%.
- If the battery swells or shows signs of damage, discontinue use and dispose of it properly.
5.4 Replaceable Drone Arm
The H12 drone features replaceable arms. If a motor or arm is damaged, it can be replaced, allowing the drone to fly again without needing a full replacement.
6. Troubleshooting
| Problem | Possible Cause | Solution |
|---|---|---|
| Drone does not power on | Battery not charged or incorrectly installed | Charge the drone battery fully and ensure it is correctly inserted. |
| Remote control does not respond | Remote control batteries low or incorrectly installed; Not paired | Replace AAA batteries; Ensure correct polarity; Re-pair drone and remote control. |
| Drone flies erratically or drifts | Gyroscope not calibrated; Damaged propeller | Perform gyroscope calibration; Check and replace any damaged propellers. |
| No FPV video feed on phone | Not connected to drone's Wi-Fi; App not open or crashed | Ensure phone is connected to the drone's Wi-Fi network; Restart the app and drone. |
| Drone cannot take off | Low battery; Propellers blocked or incorrectly installed | Charge drone battery; Check propellers for obstructions and correct installation. |
7. Specifications
| Feature | Detail |
|---|---|
| Brand | UAVvvGo |
| Model | H12 drone |
| Product Dimensions | 33 x 33 x 15 cm |
| Item Weight | 1.2 kg |
| Camera | 4K HD, 120° wide-angle, adjustable |
| FPV Transmission | Wi-Fi Real-time |
| Drone Battery | Rechargeable (details not specified) |
| Remote Control Batteries | 3 AAA batteries (included) |
| Special Features | 360 Degree Flip, One-Key Return, Headless Mode, Fixed Height Mode, One-Button Take-off/Landing |
| Mirror Adjustment | Remote Control |
8. Warranty and Support
For warranty information and technical support, please refer to the contact details provided with your purchase or visit the official UAVvvGo website. Keep your proof of purchase for any warranty claims.
Ask a question about this manual
Ask about setup, troubleshooting, compatibility, parts, safety, or missing instructions. Manuals+ will review the question and use this page’s manual context to help answer it.