1. Introduction
This manual provides essential information for the safe and efficient installation, operation, and maintenance of your Harvia Moderna XE Xenio sauna heater. Please read these instructions carefully before installation and use, and keep them for future reference.
The Harvia Moderna XE Xenio is an advanced electric sauna heater designed for home use, featuring an external control panel for precise temperature and time management. This 8 kW model is suitable for medium to large sauna rooms.
2. Safety Information
WARNING: Failure to follow these instructions may result in fire, electric shock, serious injury, or death.
- Installation must be performed by a qualified electrician in accordance with all local and national electrical codes.
- Ensure proper ventilation in the sauna room.
- Do not cover the heater or place any objects on it.
- Use only genuine sauna stones recommended by Harvia.
- Keep children and pets away from the hot heater.
- Never pour water on the heater when it is not hot, as this can damage the heating elements.
- Always disconnect power before performing any maintenance or service.
- The surface of the heater and stones will become extremely hot during operation. Avoid direct contact.
3. Product Overview
The Harvia Moderna XE Xenio sauna heater combines modern design with reliable performance. It is controlled by a separate Xenio control panel, allowing for convenient operation from outside the sauna room.
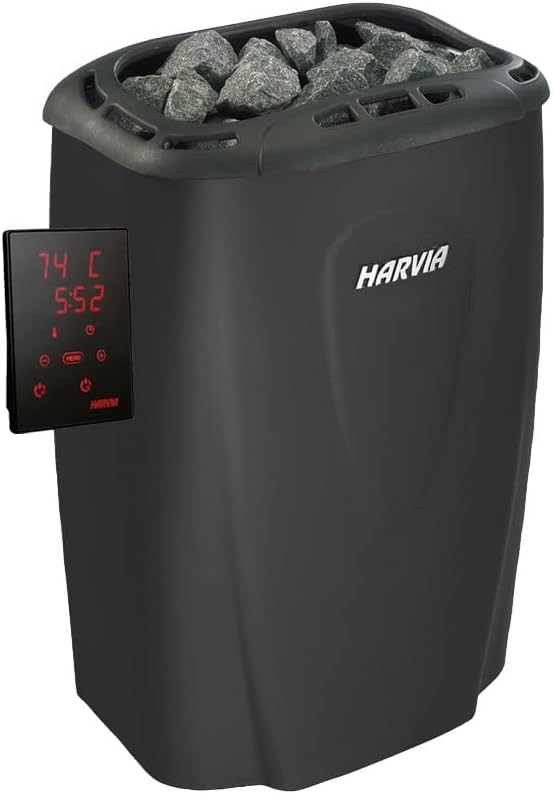
Figure 3.1: The Harvia Moderna XE Xenio sauna heater with its accompanying external control panel. The heater features a sleek black design with a top compartment for sauna stones, while the control panel displays temperature and time settings.
Components:
- Harvia Moderna XE Sauna Heater (8 kW)
- Harvia Xenio Control Panel
- Temperature Sensor
- Connection Cables
- Installation and User Manual (this document)
4. Setup and Installation
Proper installation is crucial for the safe and efficient operation of your sauna heater. Refer to the detailed wiring diagrams provided with the product packaging for electrical connections.
4.1. Heater Placement
Position the heater according to the minimum safety distances specified in the installation instructions. Ensure adequate clearance from walls and benches to prevent fire hazards. The heater should be placed on a non-combustible floor surface.
4.2. Electrical Connection
The Harvia Moderna XE Xenio operates on 230 V/400 V. All electrical connections must be made by a licensed electrician. Ensure the power supply matches the heater's requirements and that appropriate circuit breakers and wiring are used.
4.3. Sauna Stone Placement
Place the sauna stones loosely into the stone compartment of the heater. Do not pack them tightly, as this can impede air circulation and affect heating efficiency. Use only angular, split-face sauna stones designed for electric heaters. Rinse stones before first use to remove any dust.
5. Operating Instructions
The Harvia Xenio control panel provides intuitive control over your sauna experience.

Figure 5.1: A close-up view of the Harvia Xenio control panel. The digital display shows temperature and time, surrounded by touch-sensitive buttons for power, menu navigation, temperature adjustment (+/-), and timer settings.

Figure 5.2: A hand is shown interacting with the Harvia Xenio control panel, specifically pressing the power button. This illustrates the user-friendly interface for activating the sauna heater.
5.1. Powering On/Off
Press the Power button (usually indicated by a circle with a vertical line) on the Xenio control panel to turn the heater on or off.
5.2. Setting Temperature
Use the + and - buttons to adjust the desired sauna temperature. The current temperature and target temperature will be displayed on the screen.
5.3. Setting Operating Time
Press the Menu button to navigate to the timer settings. Use the + and - buttons to set the desired operating time for your sauna session. The heater will automatically shut off after the set time expires.
5.4. Pre-setting Start Time (Delay Start)
The Xenio control panel allows you to pre-set a delay for the heater to start. Consult the specific Xenio control panel manual for detailed instructions on this feature, as button sequences may vary slightly.
6. Maintenance
Regular maintenance ensures the longevity and safe operation of your Harvia sauna heater.
6.1. Cleaning the Heater
Ensure the heater is completely cool and disconnected from power before cleaning. Wipe the exterior surfaces with a damp cloth. Do not use abrasive cleaners or solvents. Periodically remove any dust or debris from the stone compartment.
6.2. Sauna Stone Inspection and Replacement
Inspect the sauna stones at least once a year, or more frequently with heavy use. Stones can crumble over time due to temperature fluctuations. Replace any cracked, crumbling, or significantly reduced stones. This ensures proper air circulation and prevents damage to heating elements. Always use genuine Harvia sauna stones.
6.3. Sensor Maintenance
Ensure the temperature sensor is clean and unobstructed. Do not paint or cover the sensor, as this will affect its accuracy.
7. Troubleshooting
If you encounter issues with your Harvia Moderna XE Xenio heater, refer to the following common problems and solutions. For persistent issues, contact a qualified service technician.
| Problem | Possible Cause | Solution |
|---|---|---|
| Heater does not turn on. | No power supply; circuit breaker tripped; control panel error. | Check power connection and circuit breaker. Ensure control panel is properly connected and powered. |
| Heater does not heat sufficiently. | Incorrect temperature setting; insufficient sauna stones; poor air circulation; faulty heating element. | Increase temperature setting. Add or rearrange sauna stones for better airflow. Inspect heating elements (requires professional). |
| Control panel displays an error code. | Sensor fault; connection issue; internal malfunction. | Refer to the Xenio control panel manual for specific error code meanings. Check sensor connection. Contact service if error persists. |
| Sauna room heats up too slowly. | Sauna room too large for heater; poor insulation; door/window leaks. | Ensure heater power matches room volume. Check sauna room insulation and seal doors/windows. |
8. Specifications
Technical specifications for the Harvia Moderna XE Xenio 8 kW sauna heater.
- Model: Harvia Moderna XE Xenio (8 kW)
- Power Output: 8 kW
- Voltage: 230 V / 400 V
- Dimensions (Heater): 31 cm (width) x 41 cm (depth) x 58 cm (height)
- Weight (Heater): Approximately 1 kg (without stones)
- Manufacturer: Harvia
- ASIN: B0C24SH7RG
- First Available Date: May 25, 2022
9. Warranty and Support
9.1. Warranty Information
Harvia products are manufactured to high standards and come with a manufacturer's warranty. The specific warranty period and terms may vary by region and product. Please retain your proof of purchase for warranty claims. For detailed warranty information, refer to the warranty card included with your product or visit the official Harvia website.
9.2. Customer Support
For technical assistance, spare parts, or service inquiries, please contact your authorized Harvia dealer or visit the Harvia official website for contact information. When contacting support, please have your product model and serial number ready.