Introduction
This user manual provides comprehensive instructions for the setup, operation, and maintenance of your Thmosz Small Safe Box. Designed for securing valuables, this safe features a durable steel construction, digital keypad, and emergency key access. Please read this manual thoroughly before using the product to ensure proper function and security.
Safety Information
- Do not store emergency keys inside the safe. Keep them in a secure, separate location.
- Ensure the safe is placed on a stable, level surface or securely mounted to prevent tipping.
- Keep the digital keypad dry and clean. Avoid using abrasive cleaners.
- Do not attempt to force the safe open if the digital lock malfunctions. Use the emergency key.
- Keep out of reach of children to prevent unauthorized access.
Package Contents
Verify that all components are present in the package:
- Safe box x 1
- Emergency key x 2
- Expansion bolt x 2
- User manual x 1
- Fireproof waterproof money bag x 1
Specifications
| Feature | Detail |
|---|---|
| Brand | Thmosz |
| Product Dimensions | 6.63"D x 8.97"W x 6.63"H |
| Lock Type | Electronic Combination Lock |
| Color | Pink |
| Capacity | 0.25 Cubic Feet |
| Material | Alloy Steel |
| Special Features | Anti-Theft, Combination Lock, Fireproof, Portable |
| Mounting Type | Floor Mount |
| Item Weight | 5 Pounds |
| Water Resistance Level | Waterproof |
Note: Batteries (4 x AA) are required but not included.
Setup
1. Battery Installation
The safe operates on batteries, eliminating the need for complicated wiring or power outlets. To install batteries:
- Locate the battery compartment on the back of the safe's door panel.
- Remove the battery cover.
- Insert 4 x AA batteries (not included), ensuring correct polarity.
- Replace the battery cover securely.
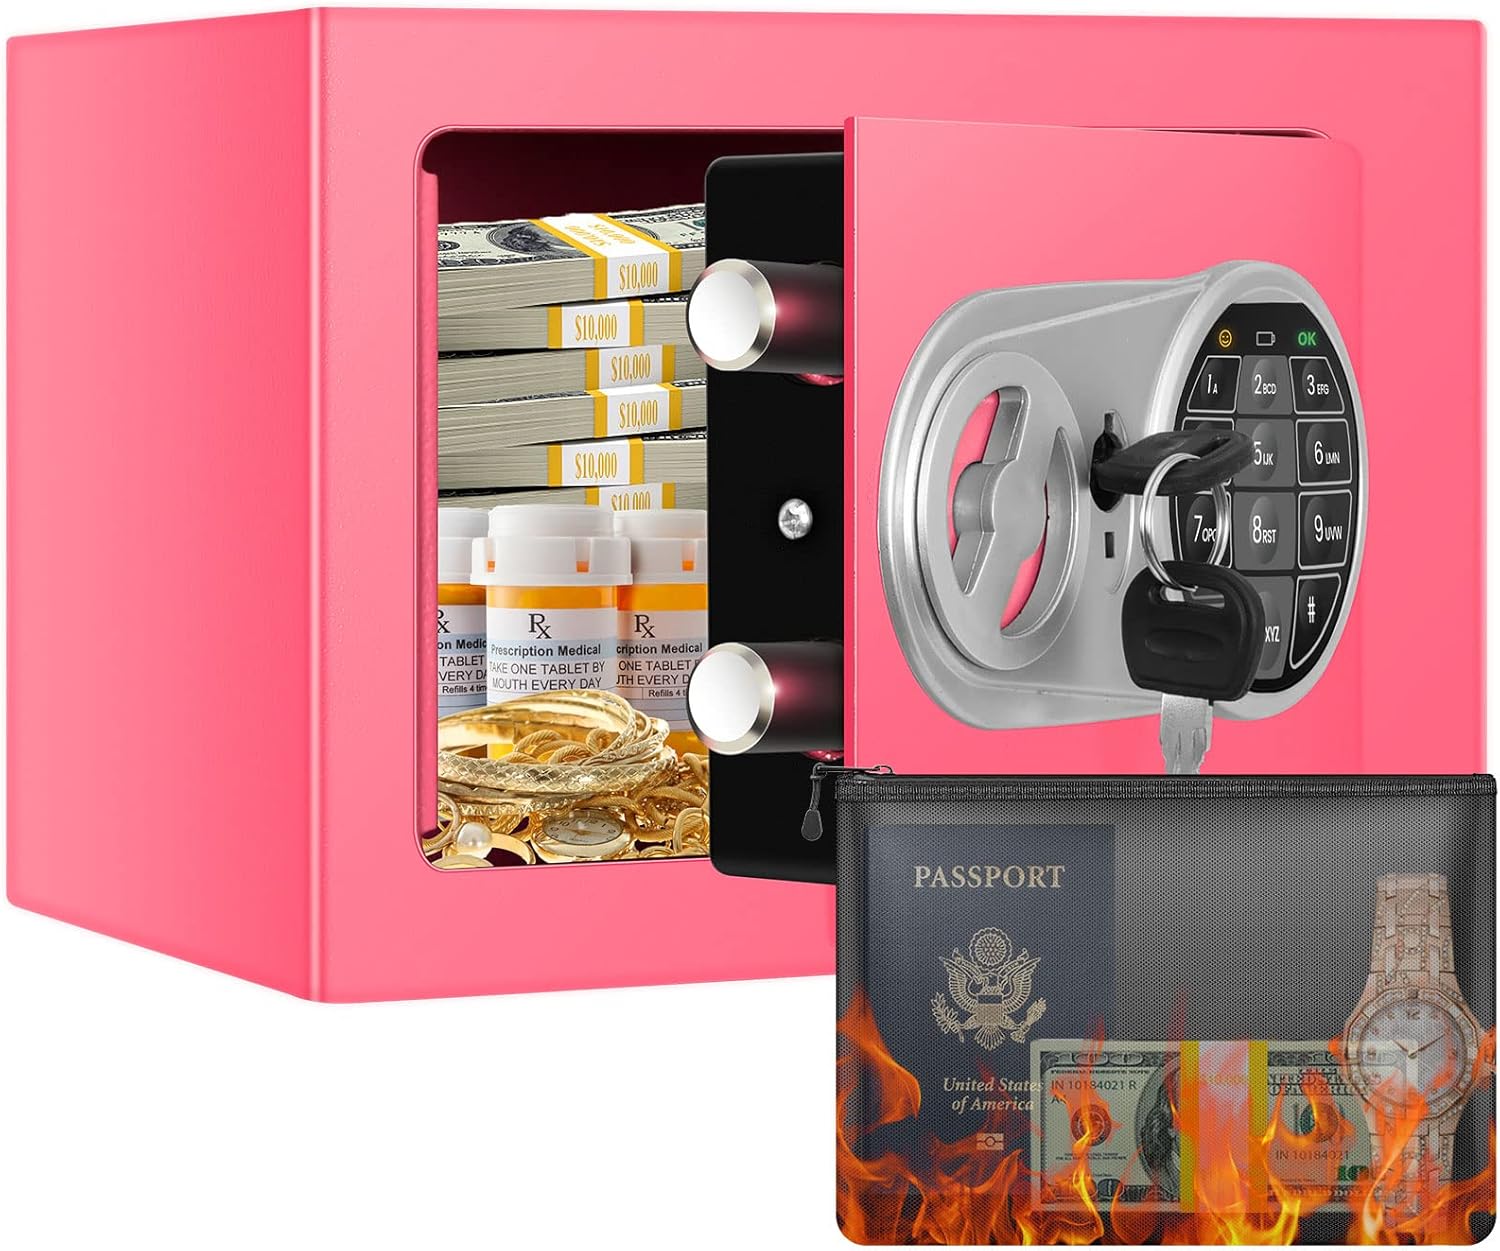
Image: The Thmosz Small Safe Box with its door open, revealing the interior storage space and the digital keypad on the inside of the door. This image illustrates the overall appearance and internal layout of the safe.

Image: A diagram illustrating the easy setup process, including how to remove the emergency key cover, open the safe with the emergency key for the first time, install 4 x AA batteries (not included), and locate the reset button on the left side of the back of the door.
2. Initial Opening (First Use)
For the first use, you will need to open the safe using one of the emergency keys:
- Locate the emergency key cover on the digital panel.
- Remove the cover.
- Insert one of the provided emergency keys into the keyhole.
- Turn the key to the right while simultaneously turning the knob to open the door.
3. Mounting the Safe
The safe features pre-drilled holes in the bottom and back, allowing for permanent wall or floor mounting to enhance security and prevent theft.
- Choose a suitable location for mounting (e.g., wall, floor, inside a cabinet).
- Mark the drilling points through the pre-drilled holes on the safe.
- Drill holes into the wall or floor at the marked positions.
- Secure the safe using the provided expansion bolts.

Image: A visual guide demonstrating the three steps for wall or floor mounting the safe, showing how to mark, drill, and secure the safe to a surface to prevent theft.
Operating Instructions
1. Setting/Changing Passcode
To set or change your personal passcode:
- With the safe door open, locate the reset button on the left side of the back of the door.
- Press the reset button. The indicator light on the keypad will illuminate.
- Input your desired 1-9 digit password on the digital keypad.
- Press the "#" key to confirm and save your new password.

Image: A visual guide detailing two ways to unlock the safe: using the emergency key and turn knob, or by entering a password and turning the knob. It also shows how to set a new password by pressing the reset button and inputting 1-9 digits.
2. Opening the Safe
There are two methods to open your safe:
Method 1: Digital Keypad
- Enter your personalized passcode on the digital keypad.
- Press the "#" key to confirm.
- Within 5 seconds, turn the knob clockwise to open the safe door.
Method 2: Emergency Key
This method is for initial setup, forgotten passcodes, or low battery situations.
- Remove the emergency key cover on the digital panel.
- Insert one of the emergency keys into the keyhole.
- Turn the key to the right while simultaneously turning the knob to open the door.

Image: A clear illustration demonstrating the two primary methods for unlocking the safe: using the emergency key in conjunction with the turn knob, or by entering the digital password followed by turning the knob.
3. Automatic Locking System
For enhanced security, the safe is equipped with an automatic locking system:
- If an incorrect password is entered three consecutive times, the system will automatically lock for 20 seconds.
- During this lockout period, the keypad will be unresponsive.
- After 20 seconds, the keypad will reset, allowing for another attempt.

Image: This image highlights the automatic locking system, which activates after three consecutive incorrect entries, locking the keypad for 30 seconds. It also visually reinforces the safe's anti-drilling and anti-prying features, emphasizing its wear-resistant and durable construction.
Maintenance
- Cleaning: Wipe the exterior with a soft, damp cloth. Avoid harsh chemicals or abrasive materials that could damage the finish.
- Battery Replacement: Replace batteries promptly when the low battery indicator light appears or if the keypad becomes unresponsive.
- Interior Care: The safe includes a soft cushion at the bottom to prevent valuables from being scratched. Ensure it remains in place.
- Fireproof Bag: The included fireproof waterproof money bag provides additional protection for sensitive documents. Store it properly within the safe.

Image: The Thmosz Small Safe Box is shown alongside its fireproof money bag, with visual elements suggesting fire resistance. This highlights the added protection for documents and valuables against fire.
Troubleshooting
| Problem | Possible Cause | Solution |
|---|---|---|
| Safe does not open with passcode. | Incorrect passcode entered; low batteries; keypad locked. | Re-enter correct passcode. Replace batteries. Wait 20 seconds if keypad is locked due to multiple incorrect entries. Use emergency key. |
| Keypad is unresponsive. | Low or dead batteries; keypad locked. | Replace batteries. Wait for the 20-second lockout period to end. |
| Safe door does not close properly. | Obstruction in the door frame; locking bolts not fully retracted. | Check for any obstructions. Ensure the knob is fully turned to retract bolts before closing. |
Warranty and Support
Thmosz provides a 120-day unreasonable return and lifetime warranty service for this product. If you encounter any issues or have questions regarding your safe, please contact Thmosz customer support. We are committed to resolving any problems within 24 hours.
For support, please refer to the contact information provided on the product packaging or the official Thmosz website.