1. Introduction
This manual provides essential instructions for the safe and proper assembly, installation, operation, and maintenance of your vidaXL Door Canopy. Please read this manual thoroughly before beginning installation and retain it for future reference.
The vidaXL Door Canopy is designed to provide protection for your front door, porch, or outdoor areas from various weather conditions such as rain, snow, and hail. It features a sturdy construction with polycarbonate sheets and ABS brackets.
2. Safety Information
- Read all instructions: Ensure you understand all assembly and installation steps before proceeding.
- Use appropriate tools: Gather all necessary tools as specified in the assembly section.
- Two-person assembly recommended: For safety and ease of installation, it is advisable to have at least two people for assembly and mounting.
- Wall suitability: Ensure the mounting surface (wall) is structurally sound and suitable for supporting the canopy's weight and resisting wind loads. Consult a professional if unsure.
- Weather conditions: Avoid installation during strong winds, heavy rain, or other adverse weather conditions.
- Heavy snowfall warning: This canopy cannot withstand heavy snowfall. In areas prone to heavy snow, it is recommended to remove snow accumulation promptly to prevent damage.
- Secure all fasteners: Ensure all screws, bolts, and other fasteners are securely tightened to prevent loosening and potential hazards.
- Check local building codes: Verify that the installation complies with all local building codes and regulations.
3. Package Contents
Before beginning assembly, verify that all parts listed below are present and undamaged. If any parts are missing or damaged, contact vidaXL customer service.


Images above show typical components. Actual quantity and size may vary based on product dimensions.
- Polycarbonate sheets (quantity varies by length)
- ABS brackets (quantity varies by length)
- Aluminum front and back bars (quantity varies by length)
- Rubber seals
- Fixing screws and wall anchors
- Connecting strips (for multi-panel canopies)
4. Setup and Installation
Tools Required: Drill, measuring tape, level, pencil, screwdriver, hammer (if using wall anchors).
- Prepare the Wall:
Choose a suitable location above your door or window. Ensure the wall surface is clean, flat, and capable of supporting the canopy. Mark the desired height and width for installation.
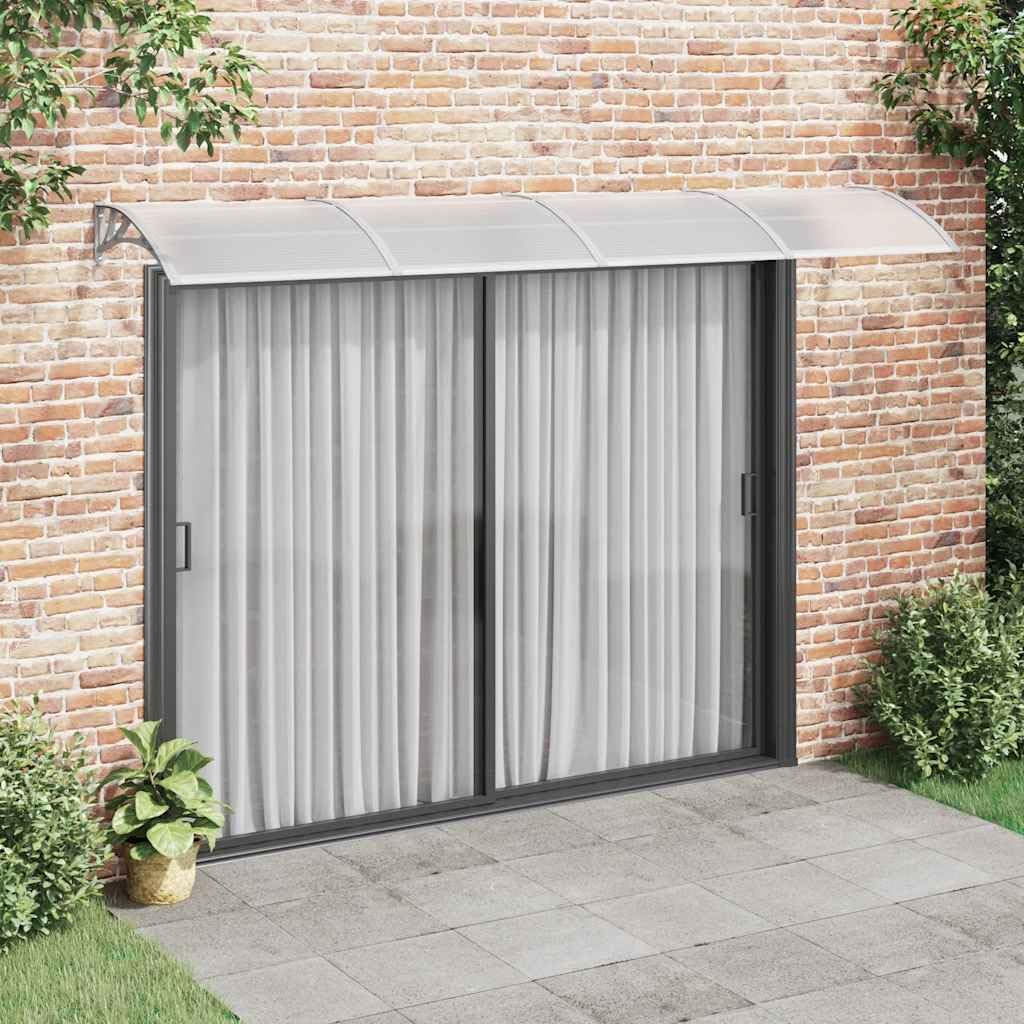
Image: Example of a vidaXL door canopy installed above a sliding glass door.
- Assemble the Canopy on the Ground:
It is highly recommended to assemble the canopy on a flat, stable surface before lifting it onto the wall. This prevents damage to the polycarbonate sheets and simplifies the process.
- Insert the polycarbonate sheets into the grooves of the ABS brackets. Ensure the protective film is removed from both sides of the sheets.
- Slide the aluminum front and back bars onto the edges of the polycarbonate sheets and into the bracket grooves.
- If your canopy consists of multiple panels, use the connecting strips to join the sections securely. Apply rubber seals as instructed to prevent water ingress.

Image: An assembled vidaXL door canopy, ready for wall mounting.
- Mark Drilling Points:
Hold the assembled canopy against the wall at the desired installation height. Use a level to ensure it is straight. Mark the drilling points through the holes in the ABS brackets onto the wall.

Image: Detail of an ABS bracket showing the pre-drilled mounting holes.
- Drill Holes and Insert Anchors:
Drill holes at the marked points using an appropriate drill bit for your wall type (e.g., masonry bit for brick/concrete). Insert the wall anchors into the drilled holes.
- Mount the Canopy:
Align the canopy's brackets with the drilled holes and secure it to the wall using the provided fixing screws. Tighten all screws firmly, but do not overtighten to avoid damaging the brackets.
- Final Checks:
Ensure the canopy is securely mounted and stable. Check for any gaps between the canopy and the wall that might allow water ingress. Apply silicone sealant if necessary (not included).
5. Operating Instructions
The vidaXL Door Canopy is a passive protective structure and does not require active operation. Once installed, it provides continuous shelter from weather elements.
- Weather Protection: The canopy is designed to protect your entrance from rain, light snow, and hail.
- Sun Shade: It also offers a degree of shade from direct sunlight, helping to reduce heat and UV exposure to your door or window.
6. Maintenance
Regular maintenance will extend the lifespan and appearance of your door canopy.
- Cleaning: Clean the polycarbonate sheets and brackets periodically with mild soap and water. Use a soft cloth or sponge to avoid scratching the surface. Rinse thoroughly with clean water. Avoid abrasive cleaners or harsh chemicals.
- Inspection: Periodically inspect all mounting points, screws, and connections for tightness. Retighten any loose fasteners. Check for any signs of wear, damage, or cracking in the polycarbonate sheets or brackets.
- Snow Removal: In regions with snowfall, promptly remove accumulated snow from the canopy to prevent excessive weight buildup, which can lead to structural damage. The canopy is not designed to withstand heavy snowfall.
- Drainage: Ensure that water drains freely from the canopy and does not pool on the surface or against the wall. Clear any debris that might obstruct drainage.
7. Troubleshooting
| Problem | Possible Cause | Solution |
|---|---|---|
| Water dripping from canopy joints | Inadequate sealing of polycarbonate sheets or connecting strips. | Apply a weather-resistant silicone sealant along the edges of the polycarbonate sheets where they meet the brackets and connecting strips. Ensure rubber seals are correctly installed. |
| Canopy feels loose or wobbly | Mounting screws are loose or wall anchors are not secure. | Check and retighten all mounting screws. If anchors are loose, consider using larger anchors or relocating the canopy if the wall material is compromised. |
| Polycarbonate sheets appear cloudy or discolored | Exposure to harsh chemicals or prolonged UV degradation. | Clean with mild soap and water. Avoid harsh cleaners. While the material is weather-resistant, extreme conditions over time can affect appearance. Replacement sheets may be available from vidaXL. |
| Difficulty assembling panels | Protective film not removed, or panels are not aligned correctly. | Ensure all protective films are removed. Carefully align panels with grooves. Do not force components; check for obstructions. |
8. Specifications
| Feature | Detail |
|---|---|
| Brand | vidaXL |
| Model Number | 153595 |
| Dimensions (W x D x H) | 137.8" x 39.4" x 0.2" (Polycarbonate thickness) |
| Material | Polycarbonate sheets, ABS brackets, Aluminum bars |
| Color | Gray and White |
| Item Weight | 19.76 pounds (8.98 kg) |
| Assembly Required | Yes |
| Weather Resistance | Weather-resistant, corrosion-resistant. Cannot withstand heavy snowfall. |

Image: Technical drawing showing the dimensions of the canopy (137.8" length, 39.4" depth).
9. Warranty and Support
For warranty information, product support, or to order replacement parts, please contact vidaXL customer service directly. Refer to your purchase documentation for specific warranty terms and conditions.
You can visit the official vidaXL store for more information: vidaXL Store on Amazon


