AODELAN ZTC-100
AODELAN Wireless Shutter Release Timer Zoom Controller User Manual
Model: ZTC-100
1. Product Overview
The AODELAN Wireless Shutter Release Timer Zoom Controller (Model ZTC-100) is a versatile remote control designed for Sony cameras and camcorders. It offers comprehensive control over your camera's shutter, zoom, and advanced timing functions, enabling precise photography and videography, including time-lapse, long exposure, and continuous shooting, while minimizing camera shake.
2. Package Contents
Upon opening the package, verify that all the following items are included:

Image: The complete AODELAN Wireless Shutter Release Timer Zoom Controller kit, including the main remote, receiver, two sync cables, and two wrist straps.
- 1 x AODELAN Wireless Shutter Release Timer Zoom Controller (Transmitter)
- 1 x Wireless Receiver
- 1 x Coiled Mini-USB to Micro-USB Sync Cable
- 1 x Coiled Mini-USB to 2.5mm Jack Sync Cable
- 2 x Wrist Straps
- 1 x Instruction Manual
3. Product Features
- Wireless Operation: Provides remote control for shutter release, zoom, and timer functions, reducing camera shake.
- Comprehensive Timer Functions: Supports time-lapse shooting, long exposure, interval shooting, and customizable number of shots.
- Precise Zoom Control: Dedicated "W" (wide-angle) and "T" (telephoto) buttons for smooth and fast zoom adjustments.
- Multiple Shutter Modes: Includes single shooting, continuous shooting, and Bulb mode for extended exposures.
- Video Recording: Dedicated button for starting and stopping video recording.
- DORMANCY Function: Allows turning off camera functions to conserve power.
- GRID LINES Display: Button to display grid lines on compatible camera screens for composition assistance.
- LCD Display with Backlight: Clear display for settings and status, with backlight for low-light conditions.
- Ergonomic Design: Comfortable to hold and operate.
4. Parts Identification
4.1. Transmitter (Remote Controller)

Image: Labeled diagram of the AODELAN Wireless Shutter Release Timer Zoom Controller (Transmitter).
- Lock/Light Button: Locks controls or activates backlight.
- Status Lamp: Indicates operational status.
- LCD Display Panel: Shows current settings and timer information.
- Direction Buttons (Up/Down/Left/Right): Used for navigation and adjusting values.
- TIMER START/STOP Button: Turns on/off the unit, starts/stops timing programs. Long press to power on/off.
- SET Button: Confirms selections and enters setting modes.
- DORMANCY Button: Toggles camera dormancy mode.
- GRID LINES Button: Toggles grid lines display on compatible cameras.
- Zoom Buttons (W/T): "W" for wide-angle zoom out, "T" for telephoto zoom in.
- Shutter-release Button: Half-press to focus, full-press to take a picture. Long press (3+ seconds) to lock shutter for continuous shooting or Bulb mode.
- Record Button: Starts and stops video recording.
4.2. Receiver

Image: Labeled diagram of the AODELAN Wireless Receiver.
- Eyelet for Strap: Attachment point for wrist strap.
- ON/OFF Button: Powers the receiver on or off.
- Code Setting Button: Used for pairing if automatic pairing fails.
- Terminal for Connecting Cable (Mini USB): Port for connecting to the camera.
- Status Lamp: Indicates receiver status (e.g., power, connection).
- Battery Chamber Cover: Access to the battery compartment.
- Locking Ring: Secures the receiver to a hot shoe or cold shoe mount.
- Cold Shoe Mounting Foot: Allows attachment to a camera's hot shoe or cold shoe.
- 1/4-20 Tripod Socket Hole: Standard tripod thread for mounting on tripods or other accessories.
5. Setup
5.1. Battery Installation
Both the transmitter and receiver require 2 x AAA 1.5V batteries (not included). To install:
- Locate the battery chamber cover on the back of both the transmitter and receiver.
- Slide or open the cover.
- Insert 2 AAA batteries into each unit, ensuring correct polarity (+/-) as indicated inside the compartment.
- Close the battery chamber cover securely.
5.2. Powering On and Pairing
To power on the transmitter, long-press the TIMER START/STOP button. To power on the receiver, press its ON/OFF button. The units are designed to pair automatically upon power-up. If pairing does not occur, refer to the troubleshooting section.
5.3. Connecting to Camera
The controller supports both wired and wireless connections.

Image: Illustration showing the wired and wireless connection methods for the remote controller with a camera.
- Wireless Connection:
- Attach the receiver to your camera's hot shoe or cold shoe mount using its mounting foot.
- Connect one end of the appropriate sync cable (Mini-USB to Micro-USB or Mini-USB to 2.5mm Jack) to the receiver's "Terminal for Connecting Cable" (Mini USB port).
- Connect the other end of the sync cable to your camera's remote control port.
- Ensure both the transmitter and receiver are powered on and paired.
- Wired Connection (Optional):
The transmitter can also be directly connected to the camera using one of the provided sync cables, bypassing the receiver. This is useful if you prefer a direct connection or if the receiver is not needed for certain functions.
- Connect one end of the appropriate sync cable to the transmitter's Mini USB port (usually located on the side or bottom).
- Connect the other end of the sync cable to your camera's remote control port.
6. Operating Instructions
6.1. Basic Shutter Release
- Half-Press: Press the Shutter-release Button halfway down to activate autofocus.
- Full-Press: Press the Shutter-release Button fully down to take a single picture.
- Continuous Shooting: Set your camera to continuous shooting mode. Press and hold the Shutter-release Button for more than 3 seconds to lock the shutter and enable continuous shooting until released.
- Bulb Mode: For long exposures beyond standard shutter speeds, set your camera to Bulb mode. Press and hold the Shutter-release Button for more than 3 seconds to open the shutter. Press again to close it.
6.2. Zoom Control

Image: The "W" and "T" buttons for zoom control on the remote controller.
- Press the "W" button to zoom out (wide-angle view).
- Press the "T" button to zoom in (telephoto view).
- Pressing the zoom button fully can increase the zoom speed.
6.3. Timer Settings
The controller offers advanced timer functions for precise control over your shots. Use the Direction Buttons to navigate and adjust values, and the SET Button to confirm.

Image: The LCD display illustrating the various timer settings: SELF (delay), LONG (exposure time), INTV (interval time), and No. (number of shots).
- SELF (Delay Time): Sets the delay before the shutter releases.
- Range: 0 seconds to 99 hours, 59 minutes, 59 seconds (in 1-second increments).
- LONG (Exposure Time): Sets the duration of the shutter opening for long exposures.
- Range: 0 seconds to 99 hours, 59 minutes, 59 seconds (in 1-second increments).
- INTV (Interval Time): Sets the time between consecutive shots in a sequence.
- Range: 1 second to 99 hours, 59 minutes, 59 seconds (in 1-second increments).
- No. (Number of Shots): Sets the total number of photos to be taken in a sequence.
- Range: 1 to 399 shots.
- Set to "--" for unlimited shots.
To start a programmed timing sequence, press the TIMER START/STOP button.
6.4. Other Functions
- Video Record: Press the Record Button to start video recording. Press again to stop.
- DORMANCY Button: Press this button to turn off the camera's function, which can help conserve battery life for both the camera and the remote. Press again to reactivate.
- GRID LINES Button: Press this button to display grid lines on your camera's LCD screen, assisting with composition. Press again to hide them.
- Lock/Light Button: Short press to activate the LCD backlight. Long press to lock the buttons on the remote to prevent accidental presses.
7. Compatibility
The AODELAN Wireless Shutter Release Timer Zoom Controller is compatible with a wide range of Sony cameras and camcorders. Please ensure your camera model is listed below for full compatibility.
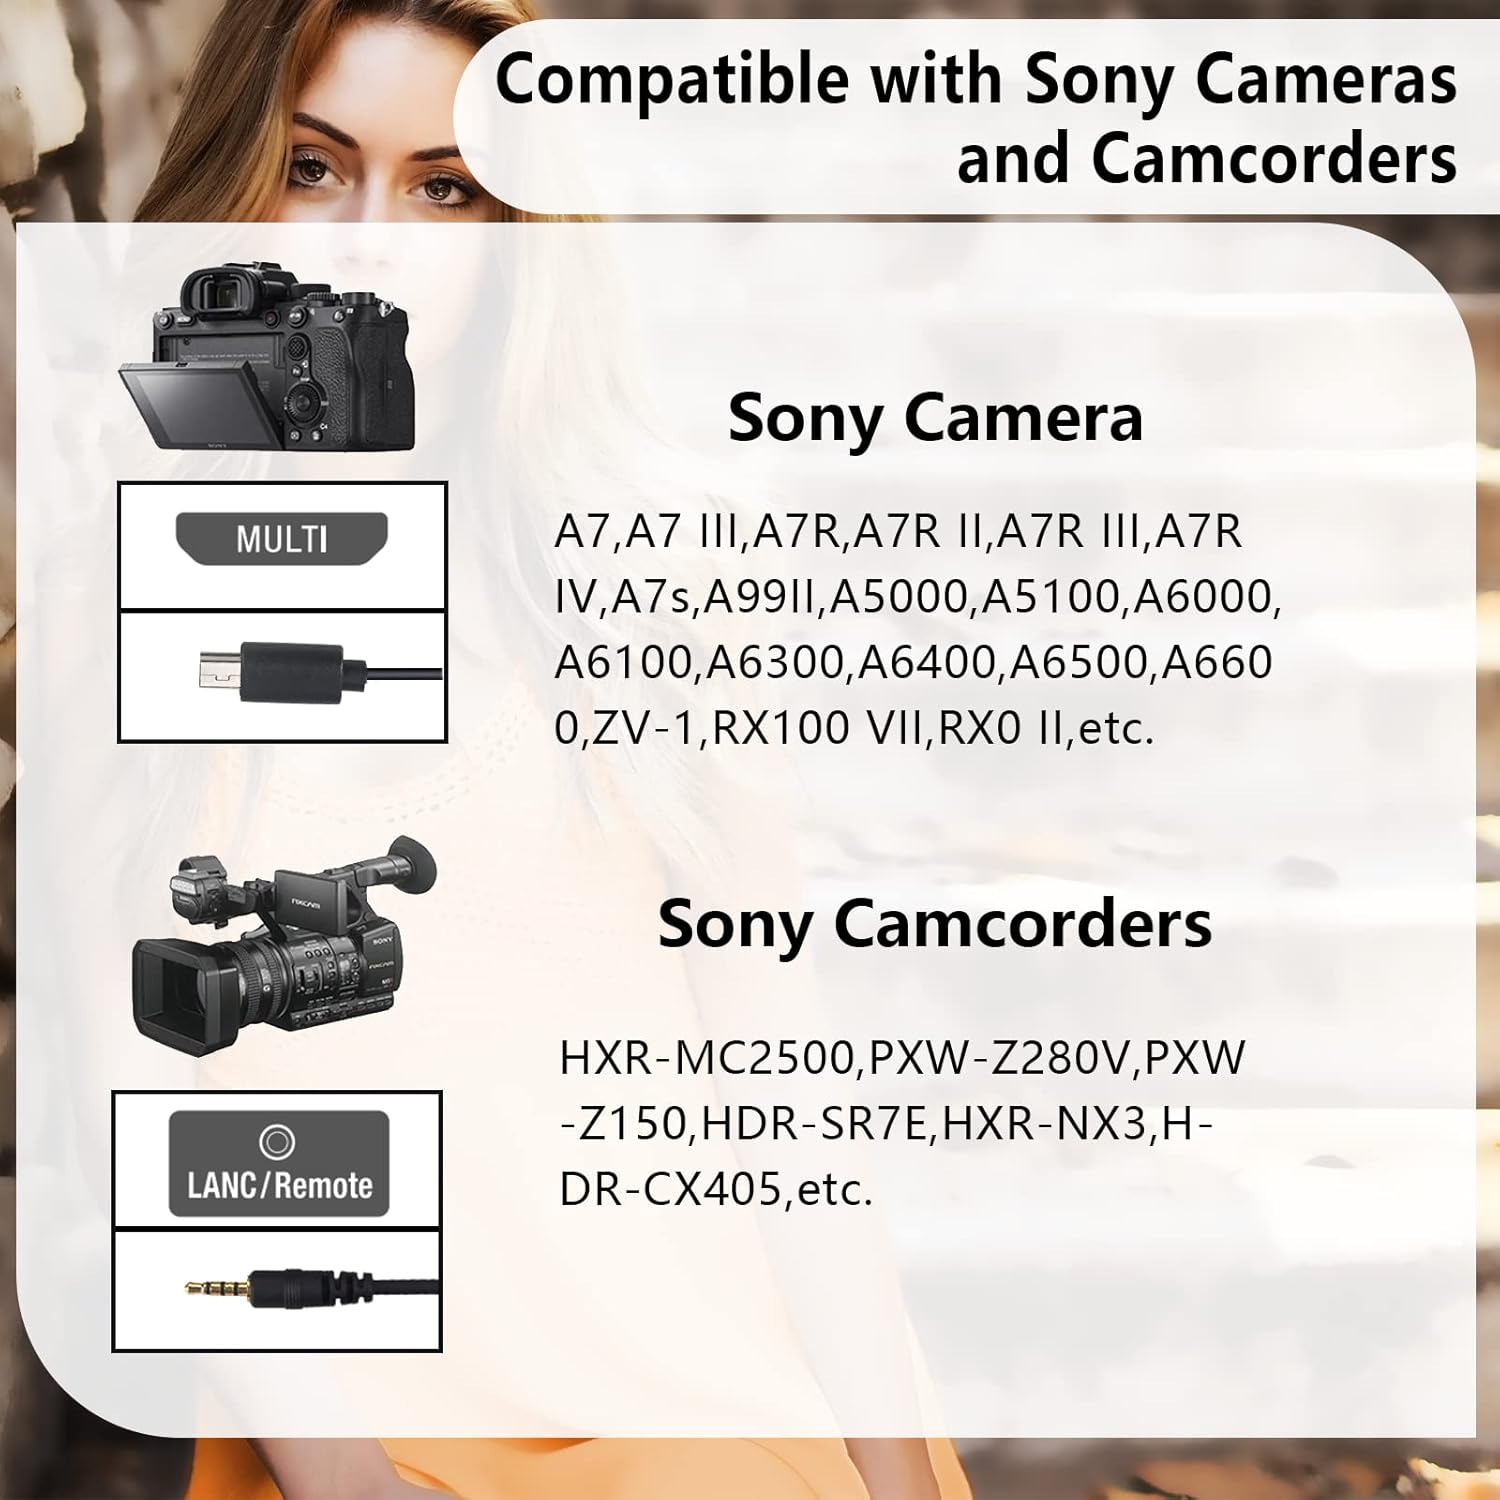
Image: A visual guide to compatible Sony camera and camcorder models.
- Sony Cameras (Multi-port connection):
- A7, A7 III, A7R, A7R II, A7R III, A7R IV, A7s, A99 II
- A5000, A5100, A6000, A6100, A6300, A6400, A6500, A6600
- ZV-1, RX100 VII, RX0 II
- Sony Camcorders (LANC/Remote connection):
- HXR-MC2500, PXW-Z280V, PXW-Z150
- HDR-SR7E, HXR-NX3, HDR-CX405
- And other models with compatible Multi-port or LANC/Remote terminals.
8. Maintenance
- Cleaning: Use a soft, dry cloth to clean the surface of the controller and receiver. Do not use liquid cleaners or solvents.
- Storage: When not in use for extended periods, remove the batteries from both units to prevent leakage. Store in a cool, dry place away from direct sunlight.
- Battery Replacement: Replace batteries when the LCD display becomes dim or the units fail to respond. Always replace all batteries in a unit at the same time with new ones of the same type.
- Handle with Care: Avoid dropping the units or subjecting them to strong impacts.
9. Troubleshooting
| Problem | Possible Cause | Solution |
|---|---|---|
| Unit does not power on. | Batteries are dead or incorrectly installed. | Check battery polarity and replace with fresh AAA batteries. |
| Remote does not control camera wirelessly. | Units not paired; receiver not connected to camera; camera not in remote mode; interference. | Ensure both units are powered on. Check sync cable connection to receiver and camera. Verify camera settings for remote control. Move away from sources of interference. If pairing fails, try re-pairing using the Code Setting Button on the receiver (refer to manual for specific re-pairing steps if needed). |
| Zoom function not working. | Camera/lens not compatible with remote zoom; incorrect camera settings. | Ensure your camera and lens support remote zoom control. Check camera's zoom settings. |
| Timer functions not executing. | Incorrect timer settings; timer not started. | Review and adjust SELF, LONG, INTV, and No. settings. Press the TIMER START/STOP button to initiate the program. |
| LCD display is dim or blank. | Low battery; backlight off. | Replace batteries. Press the Lock/Light button to activate the backlight. |
10. Specifications
| Model Number | ZTC-100 |
| Brand | AODELAN |
| Color | Black |
| Power Source | 2 x AAA batteries (Transmitter), 2 x AAA batteries (Receiver) |
| Compatible Devices | Sony Cameras and Camcorders (refer to Compatibility section for specific models) |
| Max Number of Supported Devices | 1 (one camera/camcorder at a time) |
| Item Weight | 6.7 ounces (approx. 190g) |
| Package Dimensions | 6.65 x 3.98 x 1.34 inches (approx. 16.9 x 10.1 x 3.4 cm) |
| Date First Available | April 19, 2023 |
11. Warranty and Support
For warranty information and technical support, please visit the official AODELAN website or contact their customer service. The official website address is www.aodelan.net.
Please retain your purchase receipt as proof of purchase for warranty claims.
Ask a question about this manual
Ask about setup, troubleshooting, compatibility, parts, safety, or missing instructions. Manuals+ will review the question and use this page’s manual context to help answer it.