1. Introduction
This manual provides instructions for the installation and maintenance of Adviace replacement burner tubes and flame tamers for compatible Nexgrill 4-burner gas grills. These parts are designed to restore your grill's performance by replacing worn or rusted components, ensuring even heat distribution and efficient operation.
Regular inspection and replacement of these components are crucial for maintaining optimal grilling results and extending the lifespan of your grill.
2. Compatibility
These replacement parts are compatible with the following Nexgrill 4-burner gas grill models:
- Nexgrill 720-0925P
- Nexgrill 720-0925
- Nexgrill 720-0882A
- Nexgrill 720-0896
- Nexgrill 720-0896B
- Nexgrill 720-0896E
- Nexgrill 730-0896
Important: Always measure your existing burner tubes and flame tamers and compare them with the specifications provided in this manual to ensure a correct fit before purchasing and installing.

This image illustrates several Nexgrill grill models, including 6-burner, 5-burner, and 4-burner configurations, with their respective model numbers. It serves as a visual guide for identifying compatible grill types for these replacement parts. Please verify your specific grill model number for accurate compatibility.
3. Package Contents
Each package contains the following items:
- 4 x Stainless Steel Burner Tubes
- 4 x Porcelain Steel Flame Tamers (Heat Plates)

This image displays the complete set of replacement parts: four stainless steel burner tubes and four black porcelain steel flame tamers. These components are designed to replace the internal heating elements of your gas grill.
4. Safety Information
Before beginning any maintenance or replacement work on your gas grill, observe the following safety precautions:
- Disconnect Gas Supply: Always turn off the gas supply at the propane tank or natural gas line before working on the grill.
- Allow Grill to Cool: Ensure the grill is completely cool to the touch to prevent burns.
- Wear Protective Gear: Use gloves to protect your hands from sharp edges and debris.
- Work in a Well-Ventilated Area: If any gas residue is present, ensure proper ventilation.
- Keep Children and Pets Away: Ensure a safe working environment.
5. Installation Instructions
Follow these general steps to replace your grill's burner tubes and flame tamers. Specific grill models may vary slightly.
- Preparation: Ensure the grill is cool and the gas supply is disconnected. Open the grill lid.
- Remove Cooking Grates and Heat Diffusers: Carefully lift out the cooking grates and any existing heat diffusers or warming racks. Set them aside.
- Remove Old Flame Tamers: Lift out the old flame tamers (heat plates). These may be rusted or corroded. Dispose of them properly.
- Remove Old Burner Tubes: Locate the fasteners or pins holding the burner tubes in place. Carefully detach the burner tubes from the gas valve orifices and the rear support. Some models may require unscrewing a single screw at the back of each burner.
- Clean Grill Interior: While the components are removed, clean any debris, grease, or rust from the grill's firebox.
- Install New Burner Tubes: Align the new stainless steel burner tubes with the gas valve orifices at the front and the support brackets at the back. Ensure they are securely seated.
- Install New Flame Tamers: Place the new porcelain steel flame tamers over the burner tubes. Ensure they rest correctly on their support ledges or pins.
- Reinstall Cooking Grates: Carefully place the cooking grates back into position.
- Test for Gas Leaks: Reconnect the gas supply. Before lighting, perform a leak test by applying a soapy water solution to all gas connections. If bubbles appear, tighten the connection and retest. Do not use the grill if a leak is detected.
- Functionality Test: Light the grill and observe the flame pattern. The flames should be even and blue.

This image contrasts heavily rusted, old flame tamers with new, pristine replacement flame tamers. It visually demonstrates the typical condition of parts requiring replacement and the appearance of the new components.
6. Operating Principles
The replacement burner tubes and flame tamers work together to ensure efficient and even heating for your gas grill:
- Burner Tubes: These stainless steel tubes deliver gas from the valves and distribute it through precisely drilled holes, creating consistent flames across the cooking surface. This design ensures even heat distribution for optimal cooking.
- Flame Tamers (Heat Plates): Positioned above the burner tubes, these porcelain steel plates serve multiple functions. They protect the burners from dripping grease, prevent flare-ups by vaporizing drippings, and evenly disperse heat upwards towards the cooking grates, contributing to a more uniform cooking temperature.

This image highlights the 'Even-Heat System' provided by the angled flame tamers. It shows how they distribute heat uniformly, prevent flare-ups, and vaporize food drippings to infuse smoky flavor into food.

This image demonstrates how gas smoothly enters the burner tube and is dispersed through orderly holes, creating a consistent and evenly spread flame for uniform heating of food.
7. Maintenance
Proper maintenance of your replacement parts will ensure their longevity and your grill's performance:
- Regular Cleaning: After each use, allow the grill to cool. Scrape off any food residue from the flame tamers. Periodically, remove the flame tamers and burner tubes for a more thorough cleaning.
- Inspect Burner Holes: Ensure the small holes on the burner tubes are clear of debris. Use a wire brush or a stiff wire to clear any blockages.
- Check for Corrosion: While stainless steel and porcelain steel are durable, inspect for any signs of corrosion or damage. Replace parts if significant wear is observed.
- Storage: If the grill will not be used for an extended period, consider covering it to protect components from the elements.
8. Troubleshooting
If you experience issues after installing the replacement parts, consider the following:
- Uneven Flames or Low Heat:
- Check if burner tube holes are clogged. Clean them if necessary.
- Ensure burner tubes are correctly seated over the gas valve orifices.
- Verify that the gas supply is fully open and the tank is not empty.
- Flare-ups:
- Ensure flame tamers are properly positioned over the burner tubes.
- Clean excess grease buildup from the flame tamers and firebox.
- Parts Do Not Fit:
- Double-check your grill model number against the compatibility list.
- Re-measure your original parts and compare them with the specifications provided in this manual.
9. Specifications
| Component | Dimension | Material |
|---|---|---|
| Burner Tubes | 15 inches (length) x 5/8 inches (diameter) | Stainless Steel (Non-Magnetic) |
| Flame Tamers | 14 9/16 inches (length) x 3 1/4 inches (width) | Porcelain Steel |

This image provides a visual representation of the dimensions for both the burner tube (15 inches long, 5/8 inch diameter) and the flame tamer (14 9/16 inches long, 3 1/4 inches wide). These measurements are critical for ensuring proper fit.

This image emphasizes the non-magnetic stainless steel construction of the burner tube, indicating its high quality, strength, and resistance to rust and burn-through for long-lasting performance.
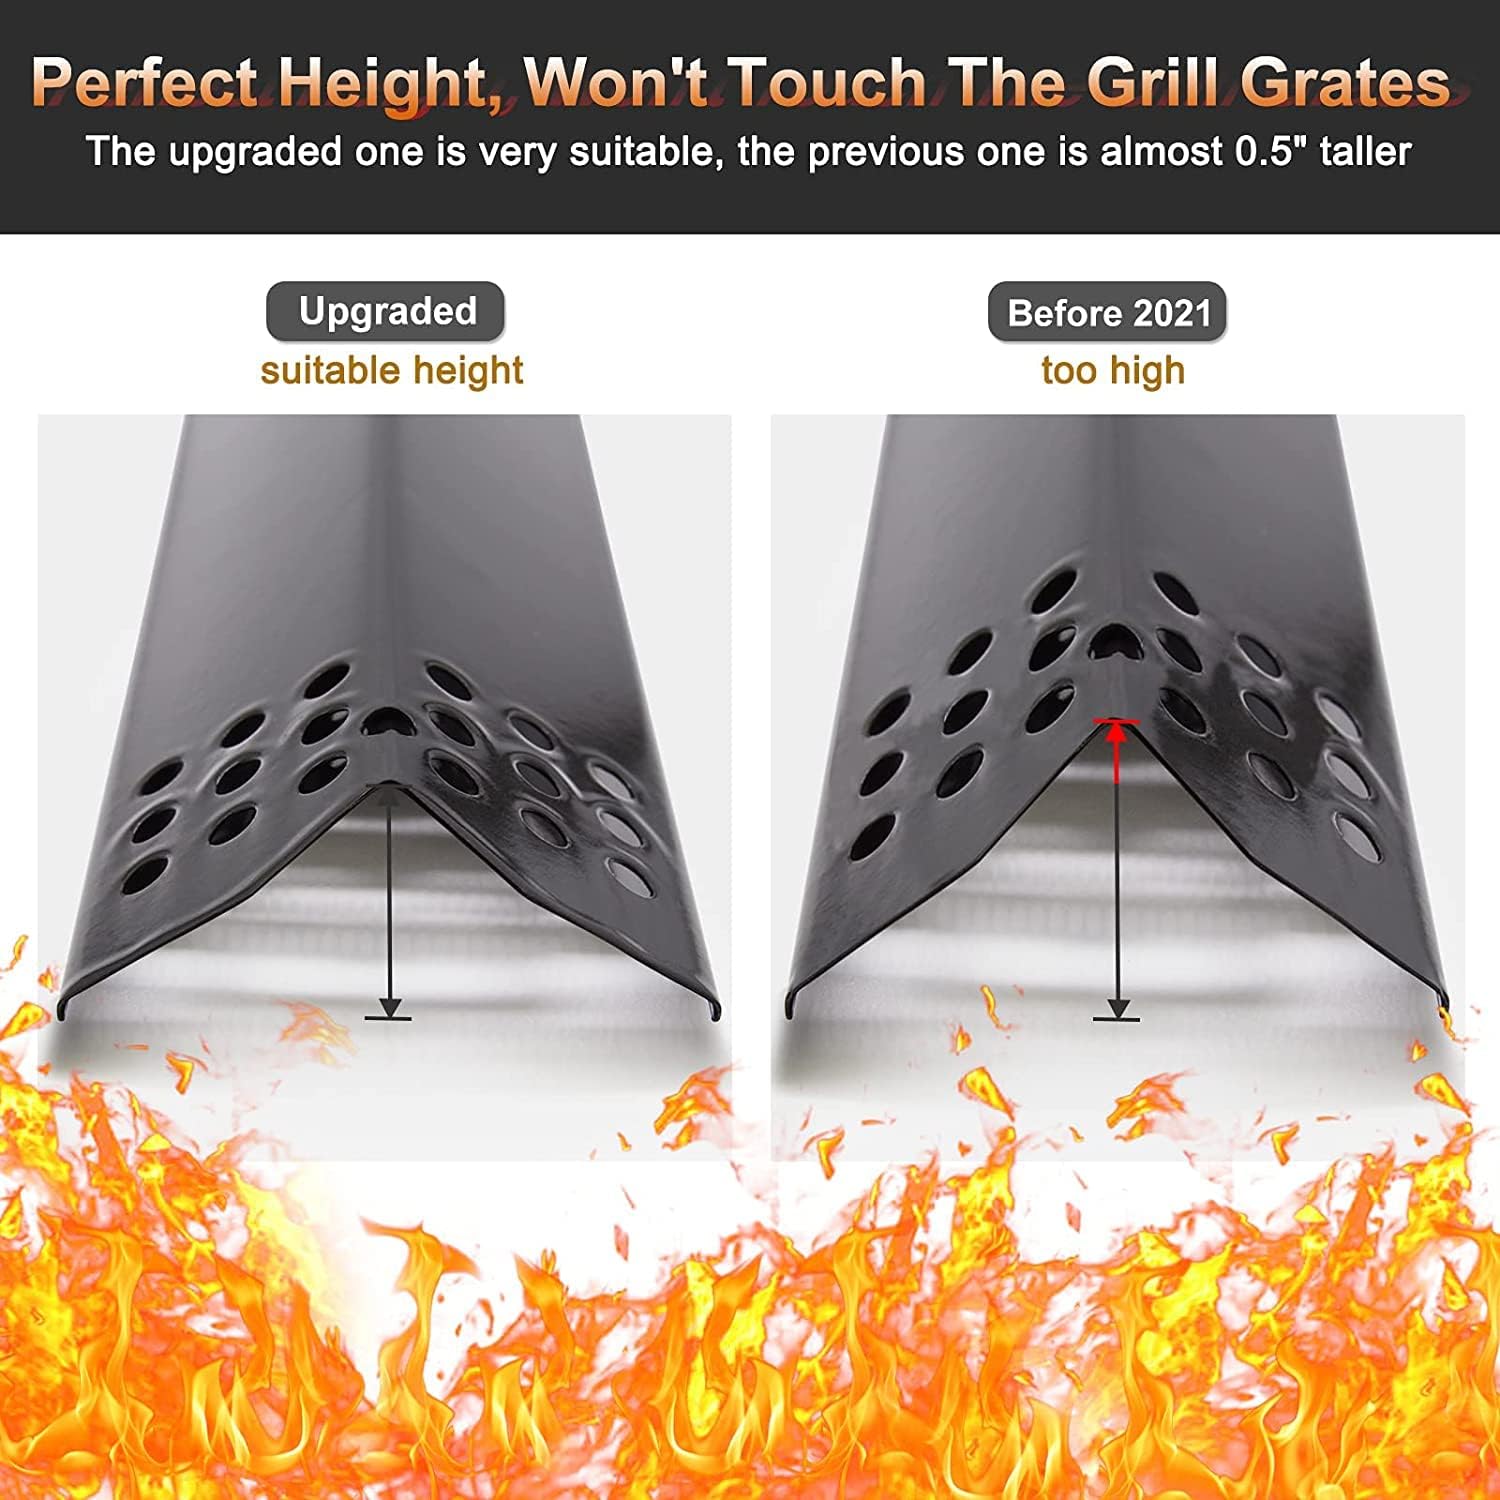
This image compares the height of an upgraded flame tamer, which is designed for a suitable fit, with an older version that was approximately 0.5 inches taller. The upgraded design ensures it will not touch the grill grates.
10. Warranty and Support
Specific warranty details for Adviace replacement parts are not provided in this manual. For warranty inquiries or technical support, please refer to the product packaging or contact Adviace customer service directly through their official channels or the retailer where the product was purchased.