ICECASA ISR-60BM
ICECASA 60" W Commercial Refrigerator Sandwich & Salad Prep Table User Manual
Model: ISR-60BM
For Restaurant, Bar, Shop, etc.
1. Introduction and Product Overview
Thank you for choosing the ICECASA 60" W Commercial Refrigerator Sandwich & Salad Prep Table. This manual provides essential information for the safe and efficient operation, maintenance, and troubleshooting of your new appliance. Please read it thoroughly before installation and use.
This commercial-grade unit is designed for professional food service environments, offering a spacious refrigerated storage area and a convenient top section for food preparation with multiple pans. Its robust stainless steel construction ensures durability and ease of cleaning.

Image: Front view of the ICECASA 60" W Commercial Refrigerator Sandwich & Salad Prep Table, showcasing its stainless steel exterior, two doors, and top prep area with covers.
Key Features:
- Powerful Refrigeration: Equipped with a high-performance compressor and fan cooling system to maintain consistent temperatures between 33°F and 41°F.
- Automatic Defrost: Features an electric defrost system that activates automatically every 4 hours to prevent frost buildup.
- Intelligent Temperature Control: LCD digital display for precise temperature monitoring and adjustment.
- Durable Construction: Full stainless steel exterior and interior for longevity and easy cleaning.
- User-Friendly Design: Auto-closing doors with a 90-degree stay-open feature for convenience during busy periods. Includes 24 food pans and a full-length cutting board.
- Mobility: Heavy-duty wheels with brakes for easy movement and secure placement.
2. Safety Instructions
WARNING: To reduce the risk of fire, electric shock, or injury, read and follow all safety instructions before operating this appliance.
Electrical Safety:
- Ensure the power supply matches the unit's requirements (115V/60Hz, 1.8A).
- Always plug the unit into a dedicated, grounded electrical outlet. Do not use extension cords or adapter plugs.
- Do not operate the unit with a damaged power cord or plug. If damaged, contact qualified service personnel.
- Never unplug the unit by pulling on the cord. Grasp the plug firmly and pull it straight out of the outlet.
- Disconnect power before cleaning, servicing, or moving the unit.
General Safety:
- This appliance is intended for commercial use only.
- Do not store explosive substances such as aerosol cans with a flammable propellant in this appliance.
- Keep ventilation openings in the appliance enclosure or in the built-in structure clear of obstruction.
- Do not use mechanical devices or other means to accelerate the defrosting process, other than those recommended by the manufacturer.
- Do not damage the refrigerant circuit. This unit uses R290 refrigerant. Only qualified personnel should service the refrigerant system.
- Do not use electrical appliances inside the food storage compartments of the appliance, unless they are of the type recommended by the manufacturer.
- Ensure the unit is placed on a level, stable surface capable of supporting its weight (251 lbs net, 336 lbs gross).
- Maintain adequate clearance around the unit for proper ventilation and heat dissipation.
3. Setup and Installation
Unpacking:
- Carefully remove all packaging materials, including tape and protective film.
- Inspect the unit for any shipping damage. Report any damage to the carrier immediately.
- Retain packaging materials for future transport if needed.
Placement:
- Choose a location with a strong, level floor capable of supporting the unit's weight.
- Ensure adequate air circulation around the unit. Avoid placing it near heat sources or in direct sunlight.
- Allow at least 6 inches of clearance from walls or other equipment for proper ventilation.
Caster Installation:
- The unit comes with heavy-duty wheels. Attach them securely to the bottom of the unit.
- Once in desired position, engage the brakes on the casters to prevent movement.
Initial Cleaning:
- Before first use, clean the interior and exterior surfaces with a mild soap and water solution. Rinse thoroughly and dry.
- Clean the included food pans and cutting board before placing them in the unit.
Pan and Cutting Board Installation:
- Place the provided 24 (1/6 size) food pans into the top section of the prep table.
- The full-length cutting board (9.3" deep x 0.5" thick) can be placed on the side rail for convenient food preparation.
- The extra airdust panel under food containers helps prevent food from dropping into the refrigeration unit.

Image: A close-up view of hands installing the metal rails for the food pans in the top section of the prep table.

Image: The 60" W prep table shown with the included 24 food pans and the full-length cutting board.
Power Connection:
- After positioning and cleaning, plug the unit into a dedicated, grounded 115V/60Hz electrical outlet.
- Allow the unit to run for at least 2-4 hours empty to reach the desired temperature before loading with food.
4. Operating Instructions
Temperature Control:
- The unit features an intelligent LCD digital temperature display.
- The recommended operating temperature range is 33°F to 41°F (0.5°C to 5°C).
- To adjust the temperature, refer to the specific instructions for the CAREL digital temperature controller, typically involving pressing a 'SET' button and using arrow keys.
- Monitor the display to ensure the desired temperature is maintained.
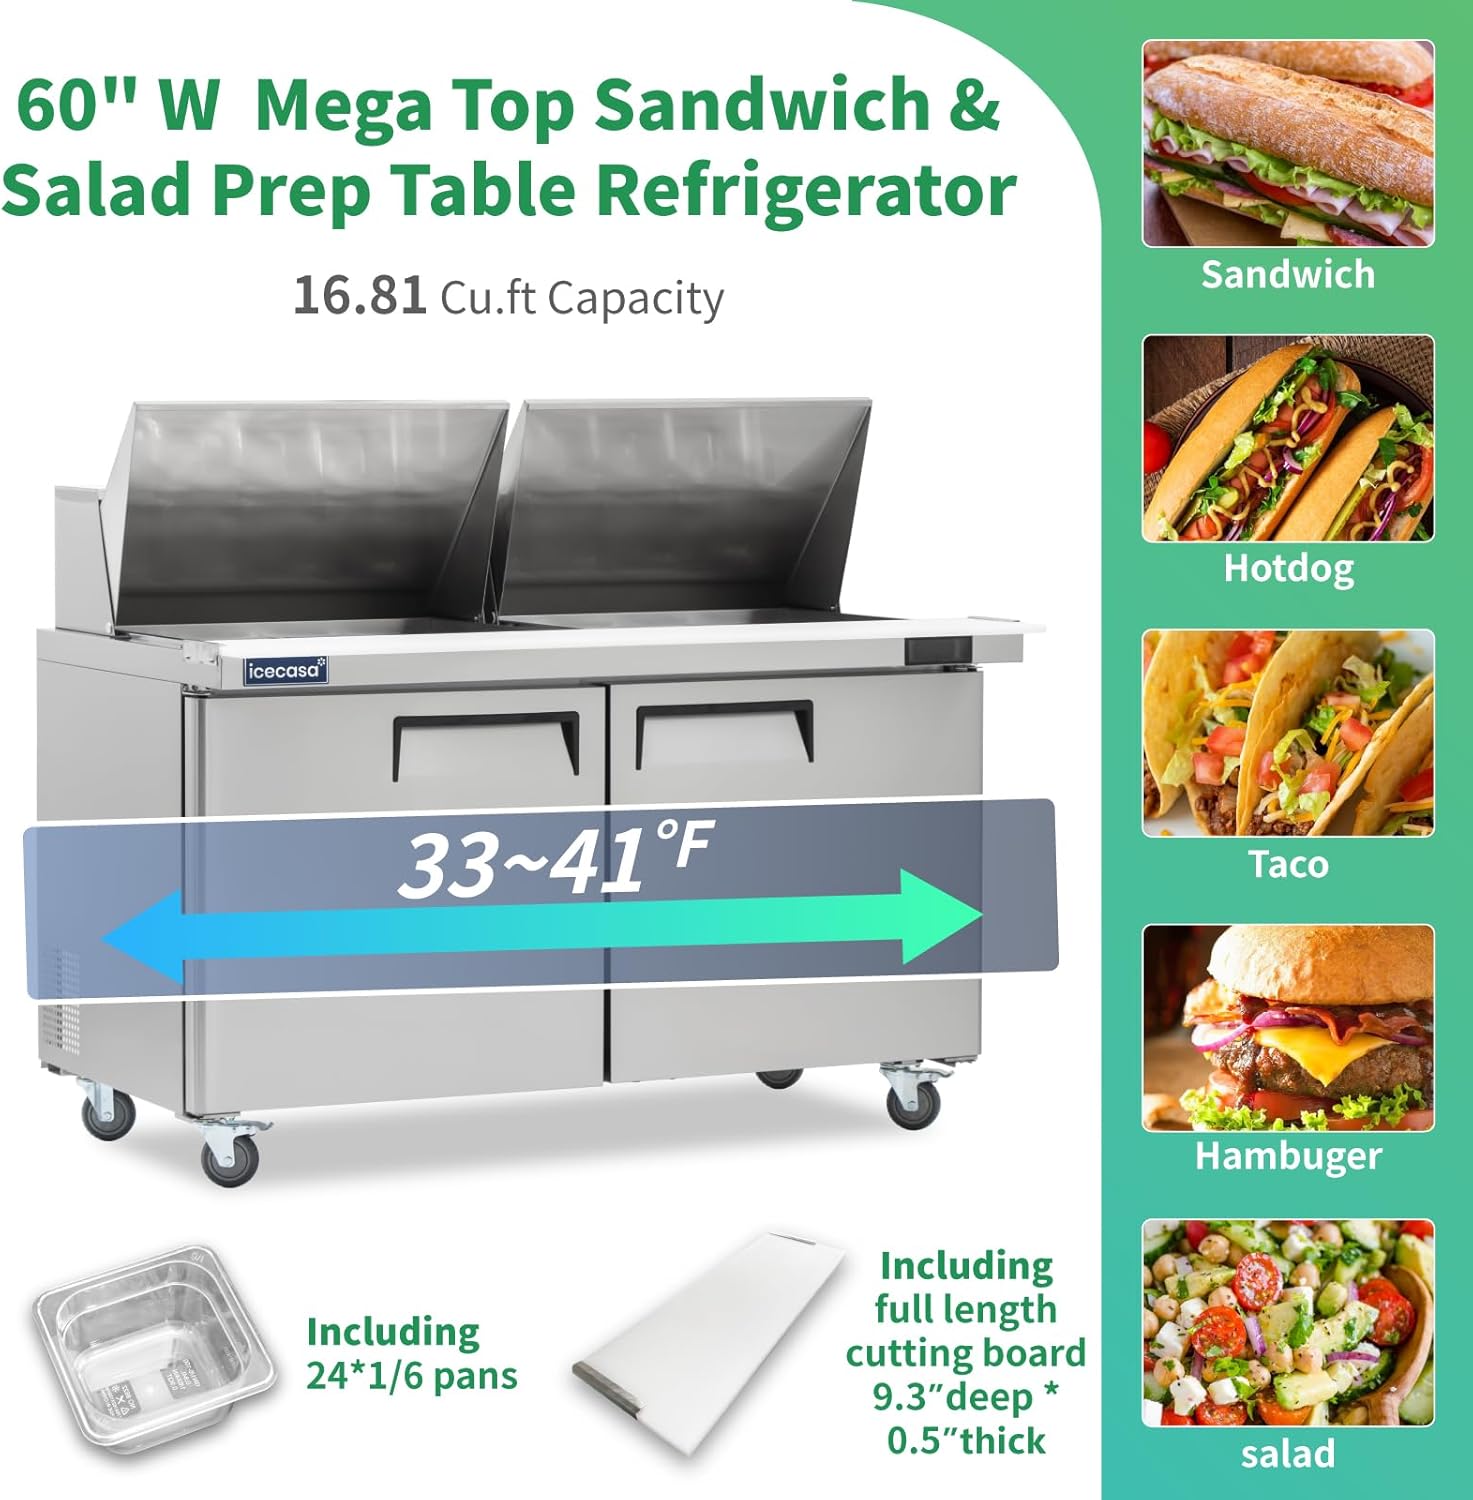
Image: Diagram illustrating the 33-41°F temperature range and 16.81 Cu.Ft capacity, along with examples of food items like sandwiches and salads.
Door Operation:
- The doors are designed to auto-close when opened less than 90 degrees.
- When opened beyond 90 degrees, the doors will remain open, which is convenient for loading or unloading items.
- Ensure doors are fully closed to maintain optimal temperature and energy efficiency.
Loading Food:
- Place food items in the provided pans in the top section.
- Utilize the interior shelves for additional refrigerated storage. Each shelf can hold up to 90 lbs.
- Do not overload shelves or block air vents inside the cabinet.

Image: A top-down view of the prep table with various food ingredients in the pans and items being prepared on the cutting board.
5. Maintenance
Regular maintenance ensures the longevity and efficient operation of your ICECASA prep table.
Cleaning the Unit:
- Exterior: Wipe down the stainless steel exterior with a soft cloth and a mild, non-abrasive cleaner. For best results, wipe in the direction of the grain. The special process on the exterior helps prevent fingerprints.
- Interior: Clean the stainless steel interior regularly with a mild soap and water solution. Rinse with clean water and dry thoroughly to prevent water spots.
- Food Pans & Cutting Board: Remove and wash these items after each use according to standard food safety practices.
- Door Gaskets: Inspect and clean door gaskets regularly to ensure a tight seal. A damaged or dirty gasket can lead to temperature fluctuations and increased energy consumption.
Condenser Coil Cleaning:
- The condenser coil should be cleaned every 30 days or as needed, depending on the environment.
- WARNING: Disconnect power to the unit before cleaning the condenser coil.
- Use a stiff brush or vacuum cleaner to remove dust and debris from the condenser fins. A clean condenser ensures efficient cooling and prevents compressor strain.
Automatic Defrost:
- The unit is equipped with an automatic defrost system that activates every 4 hours. This minimizes ice buildup on the evaporator coil.
- Ensure the defrost drain is clear to allow water to evaporate properly.
Shelf Adjustment:
- The two included shelves are adjustable. You can freely adjust their height to accommodate different sized items.
- Ensure shelves are securely seated before loading them with items.

Image: An exploded view showing the stainless steel insulation cover, magnetic gasket, food-grade cutting board, stainless steel interior, airdust panel, and corrosion-resistant shelves.
6. Troubleshooting
Before contacting service, please check the following common issues and solutions:
| Problem | Possible Cause | Solution |
|---|---|---|
| Unit not cooling or not cold enough |
|
|
| Unit is too noisy |
|
|
| Excessive frost buildup |
|
|
| Water on floor around unit |
|
|
If problems persist after attempting these solutions, please contact ICECASA customer support.
7. Specifications
Detailed technical specifications for the ICECASA 60" W Commercial Refrigerator Sandwich & Salad Prep Table (Model: ISR-60BM).
| Specification | Value |
|---|---|
| Brand | ICECASA |
| Model | ISR-60BM |
| Temperature Range | 33°F ~ 41°F (0.5°C ~ 5°C) |
| Refrigerant | R290 |
| Max Ambient Temperature | 100°F (38°C) |
| Defrosting | Automatic |
| Horsepower | 1/5 HP |
| Exterior Dimensions (WxDxH) | 60.2" x 34" x 46.5" |
| Interior Dimensions (WxDxH) | 56.7" x 23.6" x 26.7" |
| Net Weight | 251 lbs |
| Gross Weight | 336 lbs |
| Packing Dimension (WxDxH) | 62.5" x 35.8" x 50.2" |
| Voltage/Frequency | 115V/60Hz |
| Amperage | 1.8A |
| Electrical Cord Length | 70.8 inches |
| Capacity | 16.8 Cubic Feet |
| Number of Doors | 2 |
| Shelves | 2 (each shelf load up to 90 lbs) |
| Certification | ETL Certified |
| Material | Stainless Steel (Exterior & Interior) |

Image: A detailed diagram showing the dimensions (60.2" W, 46.5" H, 34" D) and key components like the high-efficiency compressor, backside evaporator, cooling fan, and digital temperature controller.

Image: An artistic rendering of the compressor, highlighting its role in "Powering Freshness" for the Mega Top Sandwich & Salad Prep Table Refrigerator.
8. Warranty and Customer Support
ICECASA is committed to providing high-quality products and excellent customer service.
Warranty Information:
- Product Certification: All ICECASA products are ETL certified for restaurant open authorization.
- Service Life: ICECASA products are designed for a service life of up to ten years.
- On-Site Maintenance: We provide up to two years of free on-site maintenance service.
- Compressor Maintenance: We offer six years of free compressor maintenance service.
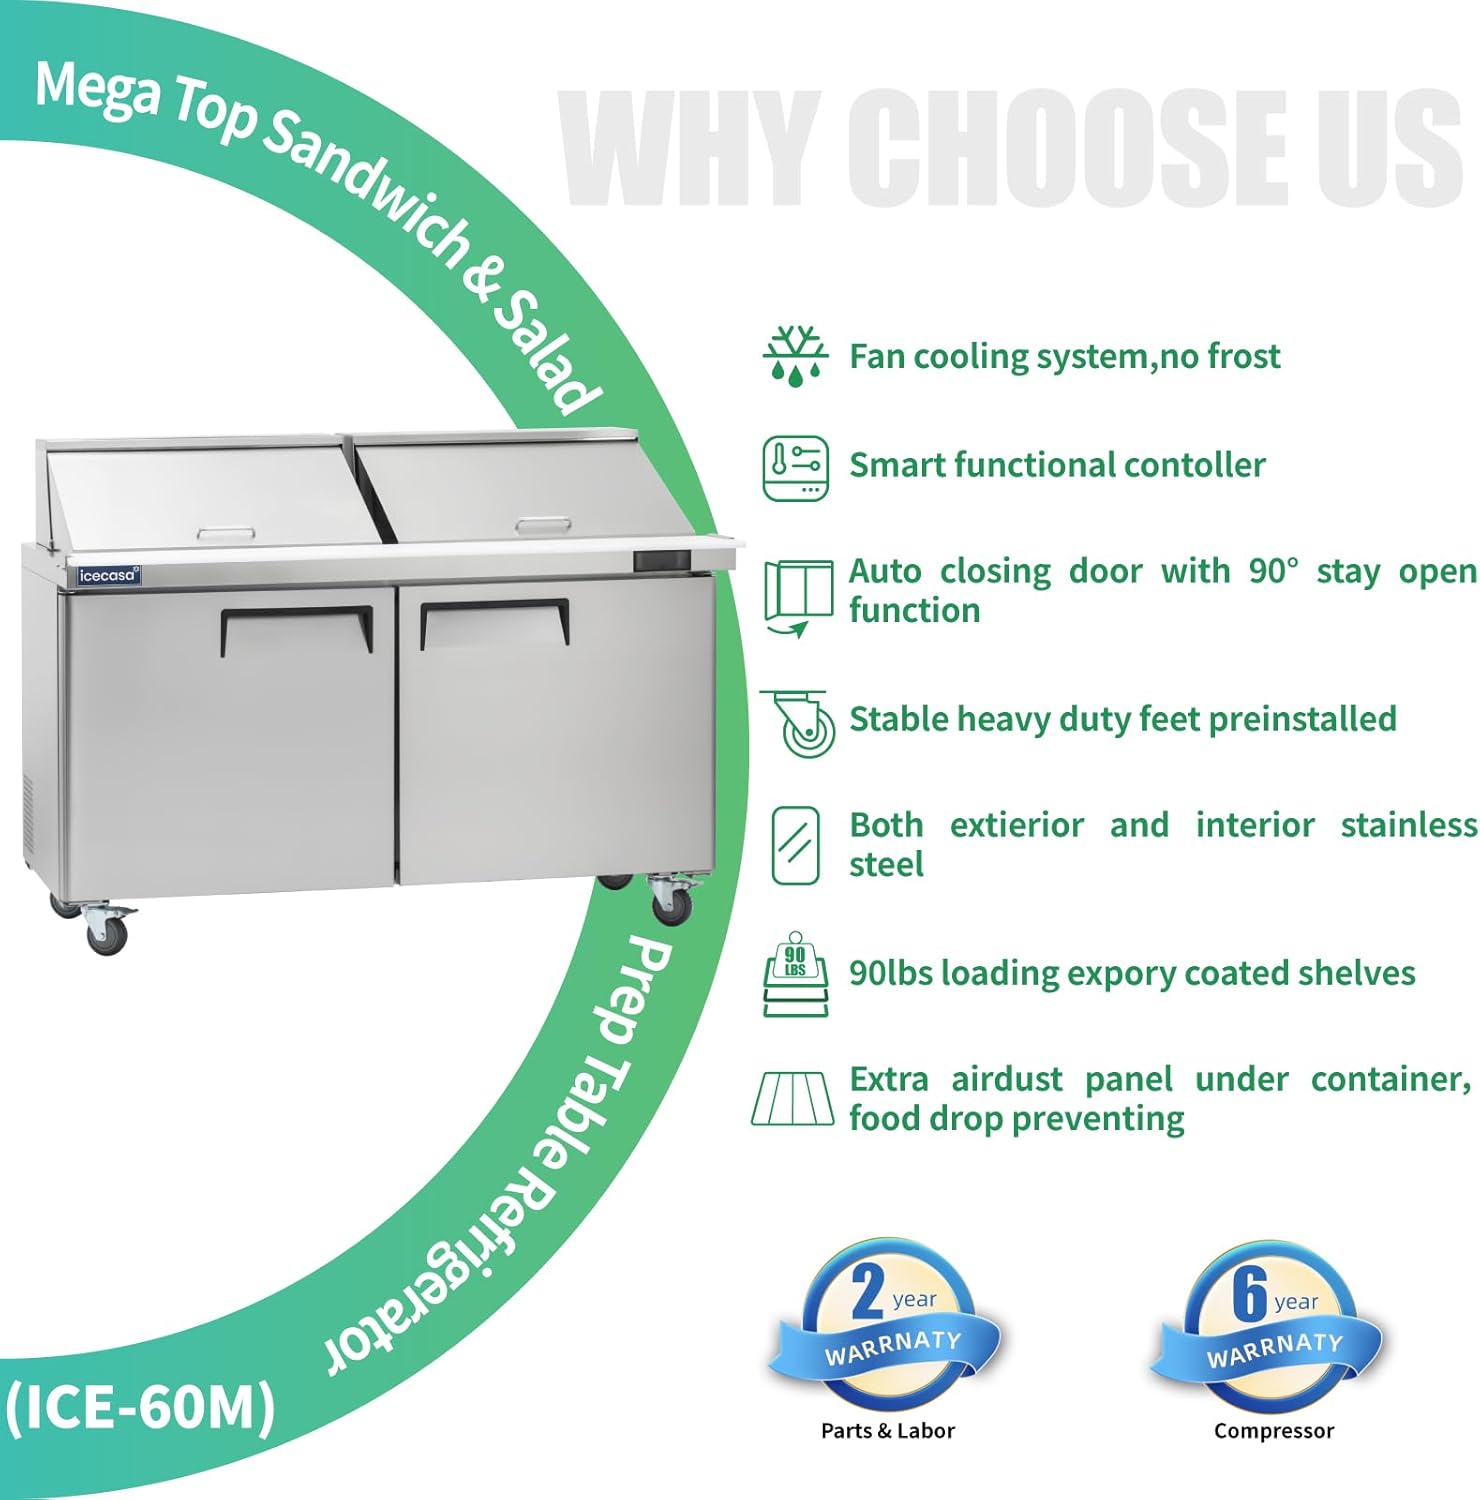
Image: A graphic highlighting key features such as fan cooling, smart controller, auto-closing door, stainless steel construction, 90lbs loading shelves, and warranty details (2-year parts & labor, 6-year compressor).
Contacting Support:
If you have any questions, suggestions, or require service under warranty, please feel free to contact ICECASA customer support. We aim to reply within 12 hours.
For the most current contact information, please refer to the official ICECASA website or your purchase documentation. You can also visit the ICECASA Store on Amazon.
Ask a question about this manual
Ask about setup, troubleshooting, compatibility, parts, safety, or missing instructions. Manuals+ will review the question and use this page’s manual context to help answer it.