X X-HOUSE SJL-MAX
X X-HOUSE Wireless Keyless Garage Door Keypad SJL-MAX Instruction Manual
Model: SJL-MAX
1. Product Overview
The X X-HOUSE Wireless Keyless Garage Door Keypad SJL-MAX provides secure and convenient access to your garage without the need for a remote or key. This keypad is designed for compatibility with a wide range of garage door openers from Chamberlain, LiftMaster, and Craftsman.

Image: The X X-HOUSE Wireless Keyless Garage Door Keypad shown with its retail packaging, highlighting its sleek design and key features.
2. Compatibility
This keypad is compatible with Chamberlain, LiftMaster, and Craftsman garage door openers manufactured after 1993 that feature a color-coded learn button. It supports 310MHz, 315MHz, and 390MHz frequencies.
Important: This keypad is not compatible with DIP Switch type openers or Craftsman Series 100 openers.

Image: Visual representation of the keypad's compatibility with garage door openers featuring Red, Orange, Green, Yellow, and Purple learn buttons.
Compatibility Guide:
| Opener ID | Opener Brand | Learn Button Color | Year | Garage Door Frequency/Technology |
|---|---|---|---|---|
| 1 | LiftMaster, Chamberlain, Craftsman | Yellow | 2011-Current | 310/315/390MHz Security+2.0 |
| 2 | LiftMaster, Chamberlain, Craftsman | Purple | 2005-2014 | 315MHz Security+ |
| 3 | LiftMaster, Chamberlain, Craftsman | Orange/Red | 1997-2003 | 390MHz Security+ |
| 4 | LiftMaster, Chamberlain, Craftsman | Green | 1993-1996 | 390MHz Billion Code |
Table: Detailed compatibility guide for the X X-HOUSE SJL-MAX keypad with various garage door opener models based on learn button color and frequency.
3. Package Contents
Verify that all items are included in your package:
- 1 x Wireless Keypad
- 1 x 9V Battery
- 2 x Mounting Screws
- 1 x User Manual

Image: An illustration showing all components included in the product package: the wireless keypad, a 9V battery, mounting screws, and the user manual.
4. Product Components
Familiarize yourself with the keypad's main components:

Image: A detailed diagram labeling the key parts of the keypad, including the battery cover, digital buttons, reset button, and the 9V battery compartment.
- Battery Cover: Protects the battery compartment.
- Digital Buttons: Used for entering PIN codes and programming.
- Reset Button: Used to clear programming or reset the keypad.
- 9V Battery: Powers the keypad.
- Sliding Protective Cover: Protects the keypad from weather conditions.
5. Setup and Installation
Follow these steps to install and program your wireless keypad.
5.1. Battery Installation
- Slide down the protective cover to reveal the keypad and battery compartment.
- Open the battery cover.
- Insert the provided 9V battery, ensuring correct polarity.
- Close the battery cover.
5.2. Programming the Keypad
The keypad can control up to 3 garage doors independently. Each channel can have a different PIN code.
- Identify your opener's learn button color: Refer to the compatibility guide in Section 2.
- Enter Programming Mode: Press and hold the "*" and "#" buttons simultaneously on the keypad until the backlight flashes.
- Select Channel: Press the number button (1, 2, or 3) corresponding to the channel you wish to program.
- Enter Learn Button Code: Based on your opener's learn button color, enter the corresponding code from the table below:
- Yellow Learn Button: Press 1
- Purple Learn Button: Press 2
- Orange/Red Learn Button: Press 3
- Green Learn Button: Press 4
- Enter PIN Code: Enter your desired 4-digit PIN code (e.g., 1234). Press "#" to confirm.
- Activate Opener's Learn Mode: On your garage door opener unit, press and release the "Learn" button. The indicator light on the opener will illuminate or flash. You have approximately 30 seconds to complete the next step.
- Sync Keypad with Opener: On the keypad, enter your 4-digit PIN code again, then press the "#" button. The garage door opener light should flash or click, indicating successful programming.
- Test Operation: Enter your 4-digit PIN code and press "#". The garage door should activate.
- Repeat for Additional Doors: If you have more garage doors, repeat steps 3-8 for each additional door, selecting a different channel (2 or 3) and a unique PIN code.
Note: If programming fails, ensure you are within range of the opener and that the opener's learn mode is active. You may need to reset the keypad (see Troubleshooting) and try again.
5.3. Mounting the Keypad
Choose a convenient location outside your garage, at least 5 feet above the ground, and away from moving parts of the garage door.
- Mark the desired mounting holes using the keypad as a template.
- Drill pilot holes if necessary.
- Secure the keypad to the surface using the provided screws.
- Ensure the sliding protective cover operates freely.
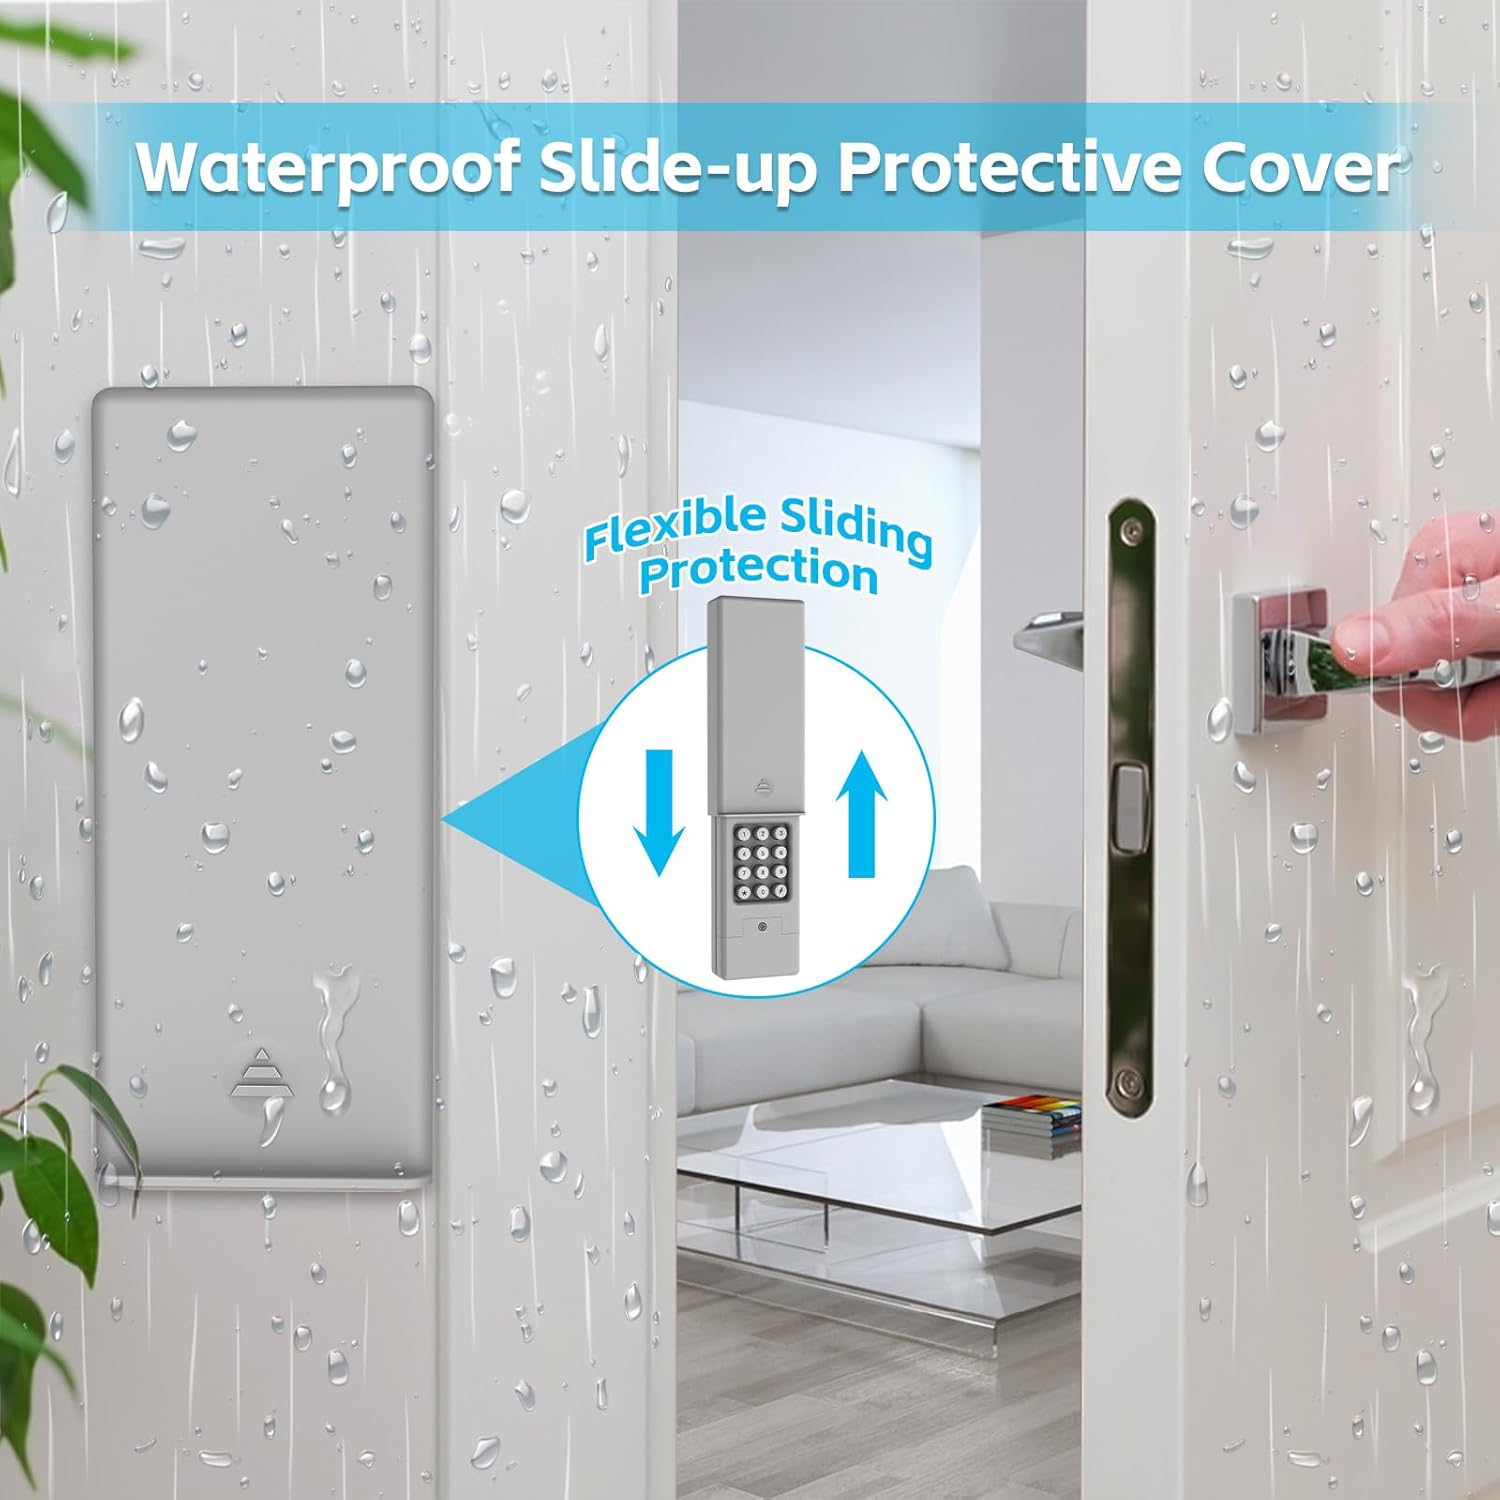
Image: The keypad mounted on a wall, demonstrating the flexible sliding protective cover that shields the buttons from weather elements.
6. Operating Instructions
To operate your garage door using the keypad:
- Slide up the protective cover.
- Enter your 4-digit PIN code.
- Press the "#" button.
The garage door will open or close. The keypad features a backlit display for easy visibility in low-light conditions.

Image: The keypad at night with its buttons illuminated, showcasing the backlit feature and the waterproof slide-up cover protecting the unit from rain.
7. Maintenance
7.1. Battery Replacement
When the keypad's backlight dims or the keypad becomes unresponsive, it's time to replace the 9V battery.
- Slide down the protective cover.
- Open the battery cover on the back of the keypad.
- Remove the old 9V battery.
- Insert a new 9V alkaline battery, ensuring correct polarity.
- Close the battery cover.
Note: Using a fresh alkaline battery is recommended for optimal performance and longevity.
7.2. Cleaning
Clean the keypad's surface with a soft, damp cloth. Avoid using abrasive cleaners or solvents, as these can damage the finish or electronic components.
8. Troubleshooting
| Problem | Possible Cause | Solution |
|---|---|---|
| Keypad does not respond or backlight is dim. | Low or dead battery. | Replace the 9V battery (see Section 7.1). |
| Garage door does not open/close after entering PIN. | Incorrect programming or keypad not synced. |
|
| Keypad loses programming. | Battery removed for too long or low battery. | Replace battery if low. Re-program the keypad. |
| Keypad buttons are sticky or unresponsive. | Dirt or debris under buttons. | Clean the keypad surface (see Section 7.2). |
9. Specifications
- Model: SJL-MAX
- Dimensions: 2.91 x 1.65 x 6.54 inches (7.4 x 4.2 x 16.6 cm)
- Weight: 7.4 ounces (210 grams)
- Power Source: 1 x 9V Battery (Zinc Carbon / Alkaline recommended)
- Supported Frequencies: 310MHz, 315MHz, 390MHz
- Max Supported Devices: 3 garage doors
- Special Features: Backlit keypad, Waterproof sliding cover
- Installation Method: Screw-In

Image: A diagram illustrating the physical dimensions of the keypad in both closed and open positions, with measurements in millimeters.
10. Warranty and Support
X X-HOUSE is committed to providing high-quality, reliable products. All products come with a one-year warranty from the date of purchase.
For technical assistance, troubleshooting, or warranty claims, please contact our customer service team:
- Service Email: smart02@x-house.net
Our 24-hour after-sales service is available to assist you with any problems.
Related Documents - SJL-MAX
 |
Universal Garage Door Keypad JP-MAX Programming and Operation Guide A comprehensive guide to programming, installing, and troubleshooting the JP-MAX Wireless Keyless Garage Door Keypad. Learn how to set PIN codes, connect to various garage door opener brands, and resolve common issues. |
 |
Universal Garage Door Opener Remote - RC-111-MAX Programming Guide Instructions and specifications for the Universal Garage Door Opener Remote (Model RC-111-MAX), detailing programming steps, compatibility, and warranty information for LiftMaster, Chamberlain, and Craftsman openers. |
 |
Chamberlain C870 Smart Garage Door Opener Owner's Manual This owner's manual provides detailed instructions for the Chamberlain C870 Chain Drive Smart Garage Door Opener, covering installation, operation, maintenance, and troubleshooting. Features MyQ® compatibility and battery backup for residential use. |
 |
Smart Garage Door Opener Compatibility and Installation Guide This guide provides essential information on checking compatibility and installing the Smart Garage Door Opener. It includes a detailed compatibility list of manufacturers and models, along with step-by-step installation instructions. |
 |
Refoss RSG100 Smart Garage Door Opener Compatibility Guide Check if your existing garage door opener is compatible with the Refoss RSG100 smart opener. This guide provides compatibility information for numerous brands and models. |
 |
Chamberlain B970 Belt Drive Garage Door Opener Owner's Manual Comprehensive owner's manual for the Chamberlain B970 Belt Drive Smart Garage Door Opener. Covers installation, assembly, operation, maintenance, troubleshooting, and safety features. |
Ask a question about this manual
Ask about setup, troubleshooting, compatibility, parts, safety, or missing instructions. Manuals+ will review the question and use this page’s manual context to help answer it.