1. Introduction
Thank you for choosing the VASAAOSD Metal Pantry Storage Cabinet. This manual provides essential information for the safe assembly, operation, and maintenance of your new cabinet. Please read these instructions thoroughly before beginning assembly and retain them for future reference.
This cabinet is designed for versatile storage in various rooms, including kitchens, dining rooms, living rooms, and home offices. It features durable metal construction, 3C certified safety glass doors, and adjustable shelves to accommodate items of different sizes.
2. Safety Information
- Weight Limit: Do not exceed the maximum weight capacity of 180 pounds per shelf. Overloading can cause instability and damage.
- Anti-Tipping: For safety, it is highly recommended to secure the cabinet to a wall using the provided anti-tipping hardware. This prevents accidental tipping, especially in households with children or pets.
- Assembly: Assembly should ideally be performed by two adults to ensure stability and prevent injury.
- Glass Handling: The cabinet features 3C certified safety glass. Handle glass components with care during assembly to avoid breakage.
- Placement: Place the cabinet on a flat, stable, and level surface. Adjust the feet as necessary to ensure stability.
3. Package Contents
Before assembly, verify that all components listed below are present and undamaged. If any parts are missing or damaged, please contact customer support.
- Cabinet Panels (Top, Bottom, Sides, Back)
- Glass Doors
- Adjustable Shelves (4 pieces)
- Brass Handles
- Adjustable Feet
- Assembly Hardware (screws, bolts, magnetic pads, anti-tipping kit)
- Assembly Tool (screwdriver)
4. Setup and Assembly Instructions
Follow these steps carefully for proper assembly. It is recommended to have a second person assist with assembly.
- Unpack and Identify Parts: Lay out all components on a clean, soft surface to prevent scratches. Identify each part using the numbered labels and the assembly diagram.
- Attach Adjustable Feet: Secure the adjustable feet to the bottom panel of the cabinet. Ensure they are tightened but allow for minor adjustments later.
- Assemble Frame: Connect the side panels to the bottom panel, then attach the back panels. Ensure all connections are secure.
- Install Shelves: Insert the shelf support pins into the desired holes on the side panels. Place the adjustable shelves onto these pins. You can customize the shelf height to fit your storage needs.
- Attach Top Panel: Secure the top panel to the assembled frame.
- Install Glass Doors: Carefully attach the glass doors to the cabinet frame using the provided hinges. Ensure the doors align properly and open/close smoothly.
- Attach Handles: Secure the brass handles to the glass doors.
- Install Magnetic Pads: Apply the magnetic pads to the cabinet frame where the doors close to ensure a secure closure.
- Final Adjustments: Place the cabinet in its desired location. Adjust the feet to level the cabinet and ensure stability. Secure the cabinet to the wall using the anti-tipping hardware.
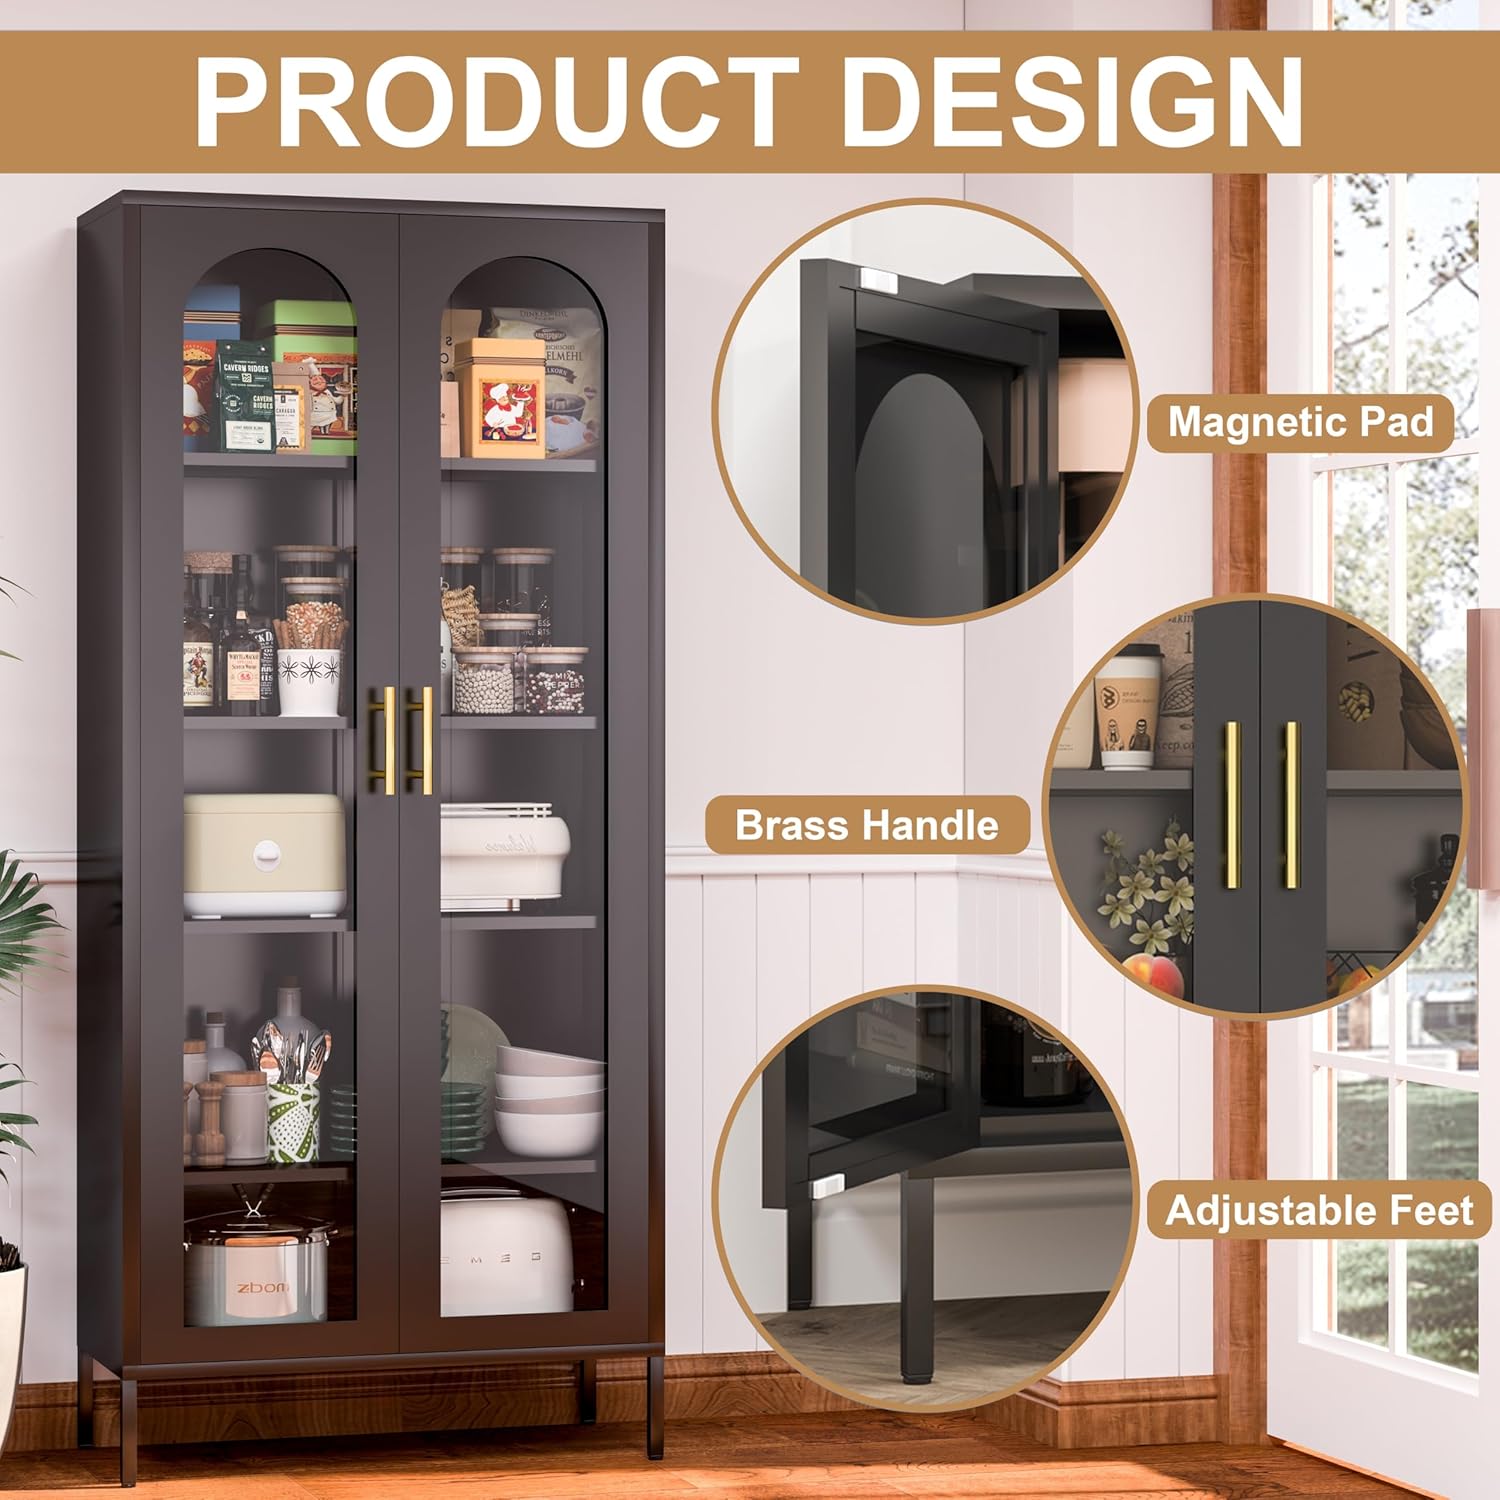
Image: Key design features including magnetic door closure, brass handles, and adjustable feet.

Image: Overview of main features: adjustable feet for leveling, magnetic door design for secure closure, elegant brass handles, and durable 3C certified glass.
5. Operating Instructions
Adjusting Shelves
The cabinet includes four adjustable shelves, allowing you to customize the storage space. To adjust a shelf:
- Empty the shelf of all contents.
- Carefully lift the shelf and remove it from the support pins.
- Relocate the support pins to the desired height holes on the side panels. Ensure pins are inserted securely and are level on both sides.
- Place the shelf back onto the support pins.
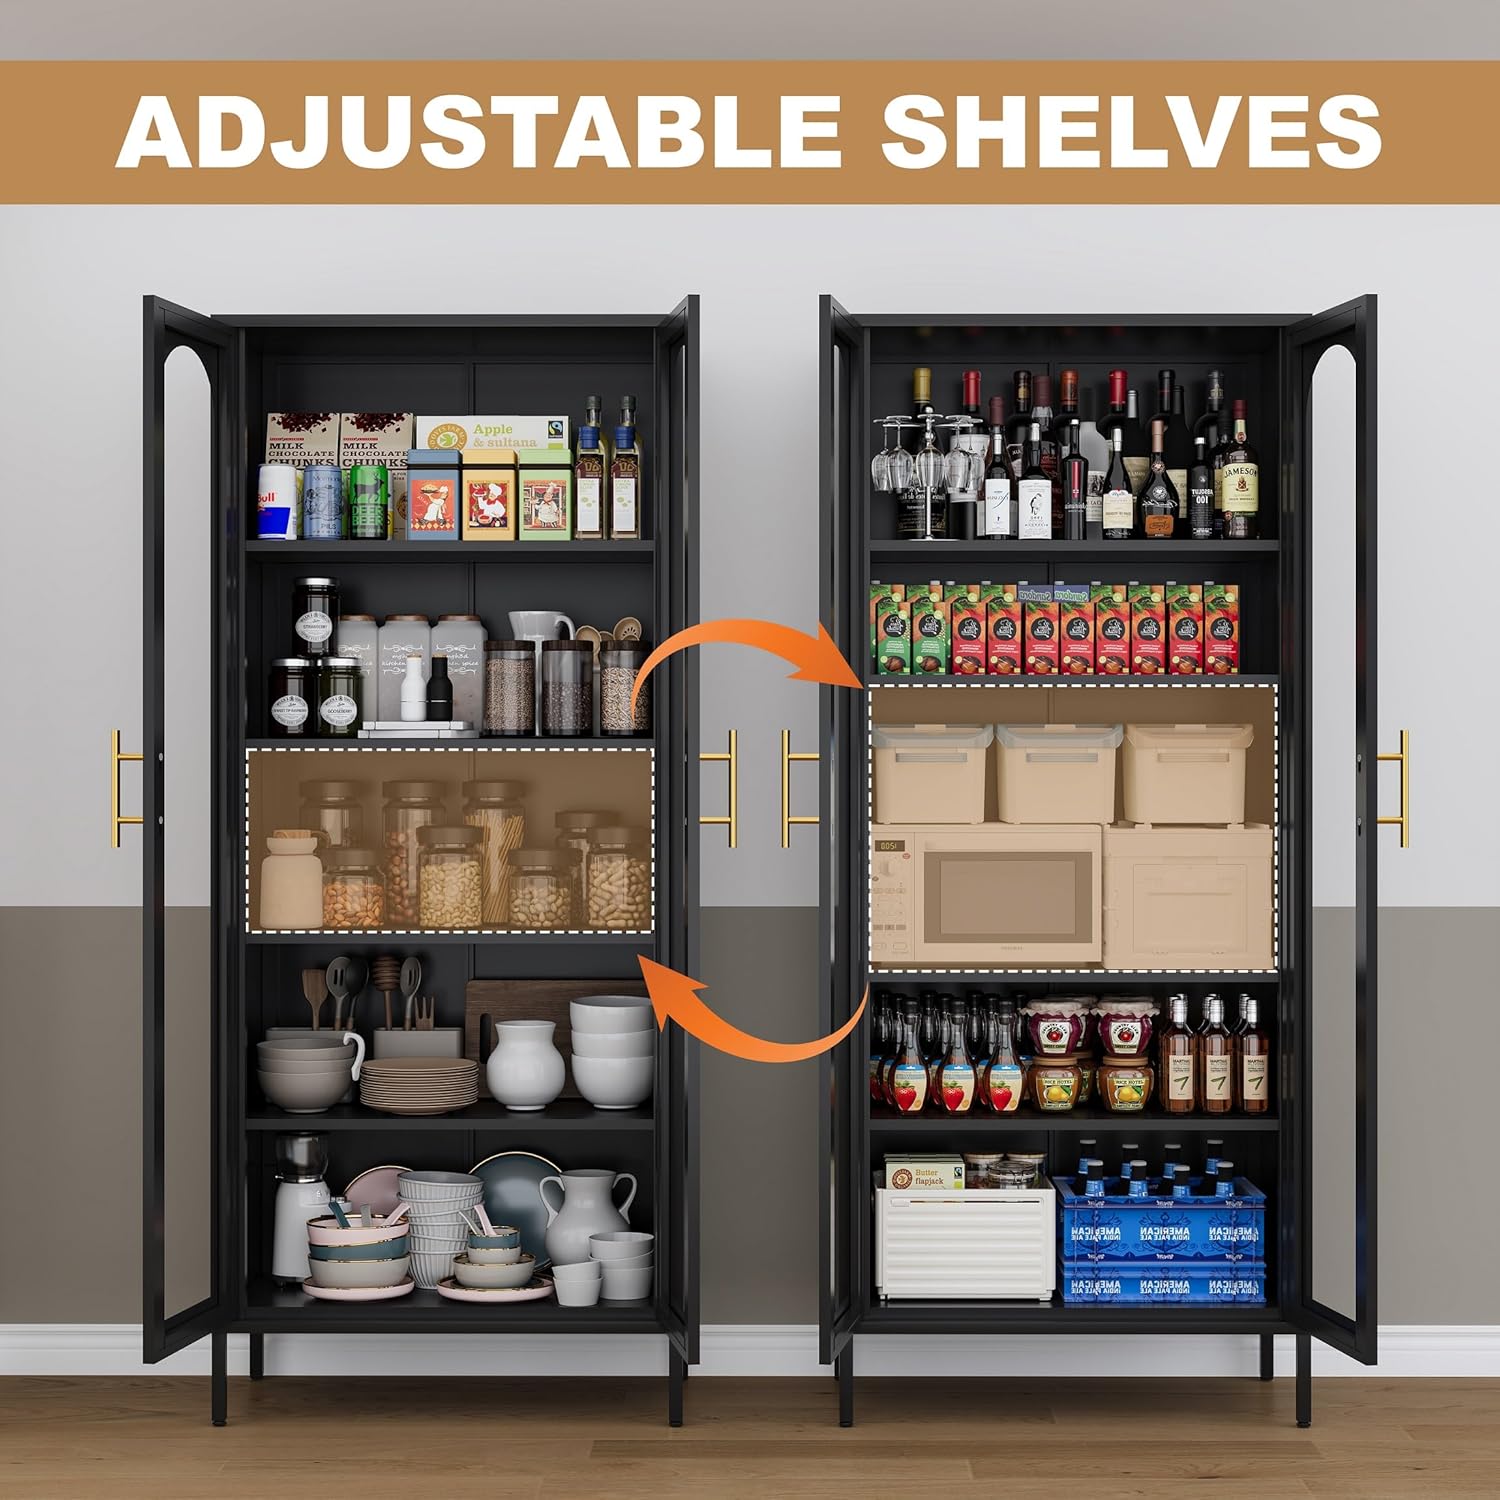
Image: Illustration demonstrating the adjustability of the shelves to accommodate items of varying heights.

Image: Diagram showing how to adjust the shelves by moving the support pins to different height settings.
Door Operation
The cabinet doors are equipped with magnetic pads for secure closure. Gently push the doors to close them, and the magnets will hold them in place. To open, pull the brass handles.
6. Maintenance and Care
- Cleaning: Wipe metal surfaces with a soft, damp cloth. For glass doors, use a standard glass cleaner and a lint-free cloth. Avoid abrasive cleaners or harsh chemicals that may damage the finish or glass.
- Regular Checks: Periodically check all screws and connections to ensure they remain tight. Re-tighten if necessary.
- Stability: Ensure the adjustable feet are properly set to keep the cabinet level and stable.
- Glass Integrity: Inspect the glass for any cracks or damage. If damage occurs, contact customer support for replacement options.

Image: Detail of the 3C certified tempered glass, highlighting its solid and clear properties compared to fragile and dim alternatives.
7. Troubleshooting
- Cabinet Wobbles: Ensure the cabinet is on a level surface. Adjust the individual feet until the cabinet is stable and does not wobble. Verify all assembly screws are tightened.
- Doors Do Not Close Flush: Check that the cabinet frame is square and level. Ensure hinges are properly installed and tightened. Minor adjustments to hinge screws may be necessary.
- Difficulty Assembling: Review the assembly instructions carefully. Ensure all parts are correctly oriented. If issues persist, contact customer support.
- Missing or Damaged Parts: Do not proceed with assembly if parts are missing or damaged. Contact customer support immediately for assistance.
8. Specifications
| Brand | VASAAOSD |
| Model Name | Kitchen Storage Cabinets |
| Product Dimensions | 11.8"D x 27.55"W x 71"H |
| Item Weight | 66 Pounds |
| Material | Metal, Glass |
| Number of Shelves | 4 (Adjustable) |
| Weight Limit (per shelf) | 180 Pounds |
| Mounting Type | Floor Mount (with anti-tipping hardware) |
| Assembly Required | Yes |
9. Warranty and Support
For any questions, concerns, or assistance with your VASAAOSD Metal Pantry Storage Cabinet, please contact the manufacturer's customer support. Refer to your purchase documentation for specific warranty details and contact information.