WBOYWK RFK442
Fortin RFK442 2-Way RF Kit User Manual
Model: RFK442 | Brand: WBOYWK
Introduction
This manual provides comprehensive instructions for the installation, operation, and maintenance of the WBOYWK Fortin RFK442 2-Way RF Kit. This kit is designed to enhance your vehicle's remote start and security system with extended range 2-way communication.
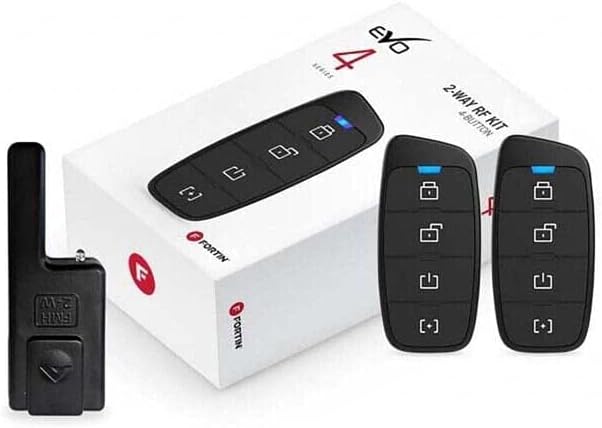
Figure 1: Fortin RFK442 2-Way RF Kit components. The image displays the product packaging, two 4-button LED remotes, and an RF antenna module, highlighting the key elements of the kit.
Safety Information
Please read all safety warnings and instructions carefully before installing or operating this product. Failure to do so may result in damage to the product, vehicle, or personal injury.
- Ensure the vehicle's battery is disconnected before beginning installation to prevent electrical shorts.
- Professional installation is recommended for optimal performance and safety.
- Do not attempt to modify the components of the kit.
- Keep remotes away from extreme temperatures and moisture.
Package Contents
Verify that all items are present in the package before proceeding with installation:
- (2) 4-Button LED Remotes
- (1) RF Antenna Module
- (1) Antenna Cable
- (1) Installation Harness
- (1) User Manual (this document)
Specifications
| Feature | Detail |
|---|---|
| Model Number | RFK442 |
| Brand | WBOYWK |
| Remote Type | 2-Way, 4-Button LED |
| Operating Range | Up to 3000 feet (approx. 914 meters) |
| Compatibility | Fortin EVO-ONE and EVO-ALL modules |
| Item Weight | 3.2 ounces (approx. 90.7 grams) |
| Color | Black |
Setup and Installation
This section outlines the general steps for installing the RFK442 kit. Specific wiring diagrams and programming procedures are dependent on the vehicle and the Fortin EVO module (EVO-ONE or EVO-ALL) being used. Refer to the specific EVO module's installation guide for detailed wiring instructions.
Pre-Installation Checklist:
- Ensure the vehicle's battery is disconnected.
- Have all necessary tools ready (wire strippers, crimpers, multimeter, etc.).
- Identify the location for the RF antenna module, ensuring it has clear line-of-sight to the outside for optimal range.
Installation Steps:
- Mount the RF Antenna Module: Choose a discreet location on the vehicle's windshield or dashboard, ensuring it is not obstructed by metal or tinted windows. Use the provided adhesive to secure it.
- Route the Antenna Cable: Carefully route the antenna cable from the module to the location of your Fortin EVO-ONE or EVO-ALL module, avoiding moving parts or heat sources.
- Connect to EVO Module: Plug the antenna cable into the designated RF port on your Fortin EVO-ONE or EVO-ALL module.
- Program Remotes: Follow the programming instructions provided with your Fortin EVO module to pair the new 2-way remotes with the system. This typically involves a sequence of ignition cycles and button presses.
- Test Functionality: Reconnect the vehicle's battery and test all remote functions (lock, unlock, remote start, trunk release, etc.) to ensure proper operation and 2-way communication feedback.
Operating Instructions
The 4-button LED remotes provide intuitive control over your vehicle's remote start and security features. The LED indicators provide visual feedback on command execution and vehicle status.
Remote Button Functions:
- Lock Button (🔒): Press once to lock vehicle doors. The remote will typically flash to confirm the command.
- Unlock Button (🔓): Press once to unlock vehicle doors. The remote will typically flash to confirm the command.
- Remote Start Button (⏱): Press and hold for approximately 3 seconds to remote start the vehicle. The remote will provide feedback (e.g., a series of flashes or a specific color) to indicate successful start or error.
- Auxiliary/Trunk Button (⏸): This button's function may vary based on your system's configuration. Typically, it controls auxiliary outputs like trunk release or power sliding doors. Consult your EVO module's manual for specific programming.
2-Way Communication Feedback:
The LED on the remote provides visual confirmation of commands sent and received. For example, after a remote start command, the remote's LED might change color or flash a specific pattern to indicate the vehicle has successfully started.
Maintenance
The RFK442 kit requires minimal maintenance to ensure long-term performance.
- Battery Replacement: The remotes are powered by a small coin-cell battery. If the remote's range decreases significantly or the LED indicators become dim, it may be time to replace the battery. Refer to the remote's specific model for battery type and replacement instructions.
- Cleaning: Wipe the remotes and antenna module with a soft, dry cloth. Avoid using harsh chemicals or abrasive cleaners.
- Environmental Protection: Protect the remotes from extreme temperatures, direct sunlight, and moisture. Avoid dropping the remotes.
Troubleshooting
If you experience issues with your RFK442 kit, refer to the following common problems and solutions:
| Problem | Possible Cause | Solution |
|---|---|---|
| Remote not responding | Dead battery in remote; Remote out of range; Remote not programmed; Interference. | Replace remote battery; Move closer to vehicle; Reprogram remote (refer to EVO module manual); Move away from sources of strong RF interference. |
| Reduced operating range | Weak remote battery; Antenna obstruction or poor placement; Environmental interference. | Replace remote battery; Ensure antenna is mounted correctly and not obstructed; Test in a different location. |
| No 2-way feedback | Remote out of range; Antenna connection issue; EVO module communication error. | Move closer to vehicle; Check antenna cable connection to EVO module; Consult EVO module troubleshooting guide. |
| Vehicle does not remote start | Vehicle conditions not met (e.g., hood open, door ajar, check engine light); EVO module issue. | Ensure all vehicle conditions are met; Refer to your EVO module's troubleshooting section. |
For more complex issues, it is recommended to contact professional technical support or refer to the detailed troubleshooting guide for your specific Fortin EVO module.
Warranty Information
This product is covered by a limited warranty provided by the manufacturer, WBOYWK. The warranty typically covers defects in materials and workmanship under normal use for a specified period from the date of purchase. Please retain your proof of purchase for warranty claims.
For detailed warranty terms and conditions, including duration and exclusions, please refer to the warranty card included with your product or visit the manufacturer's official website. Unauthorized modifications or improper installation may void the warranty.
Customer Support
If you require further assistance or have questions not covered in this manual, please contact WBOYWK customer support. When contacting support, please have your product model number (RFK442) and purchase information ready.
Online Resources: For additional resources, FAQs, and updated information, please visit the official WBOYWK website. (Specific URL not provided in product data).
Professional Installation: For complex installation or troubleshooting, it is highly recommended to seek assistance from a certified automotive electronics technician.
Ask a question about this manual
Ask about setup, troubleshooting, compatibility, parts, safety, or missing instructions. Manuals+ will review the question and use this page’s manual context to help answer it.