1. Introduction
This manual provides essential instructions for the safe and efficient operation, maintenance, and troubleshooting of your BAi MirrorM22 Commercial Embroidery Machine. Please read this manual thoroughly before operating the machine and retain it for future reference.
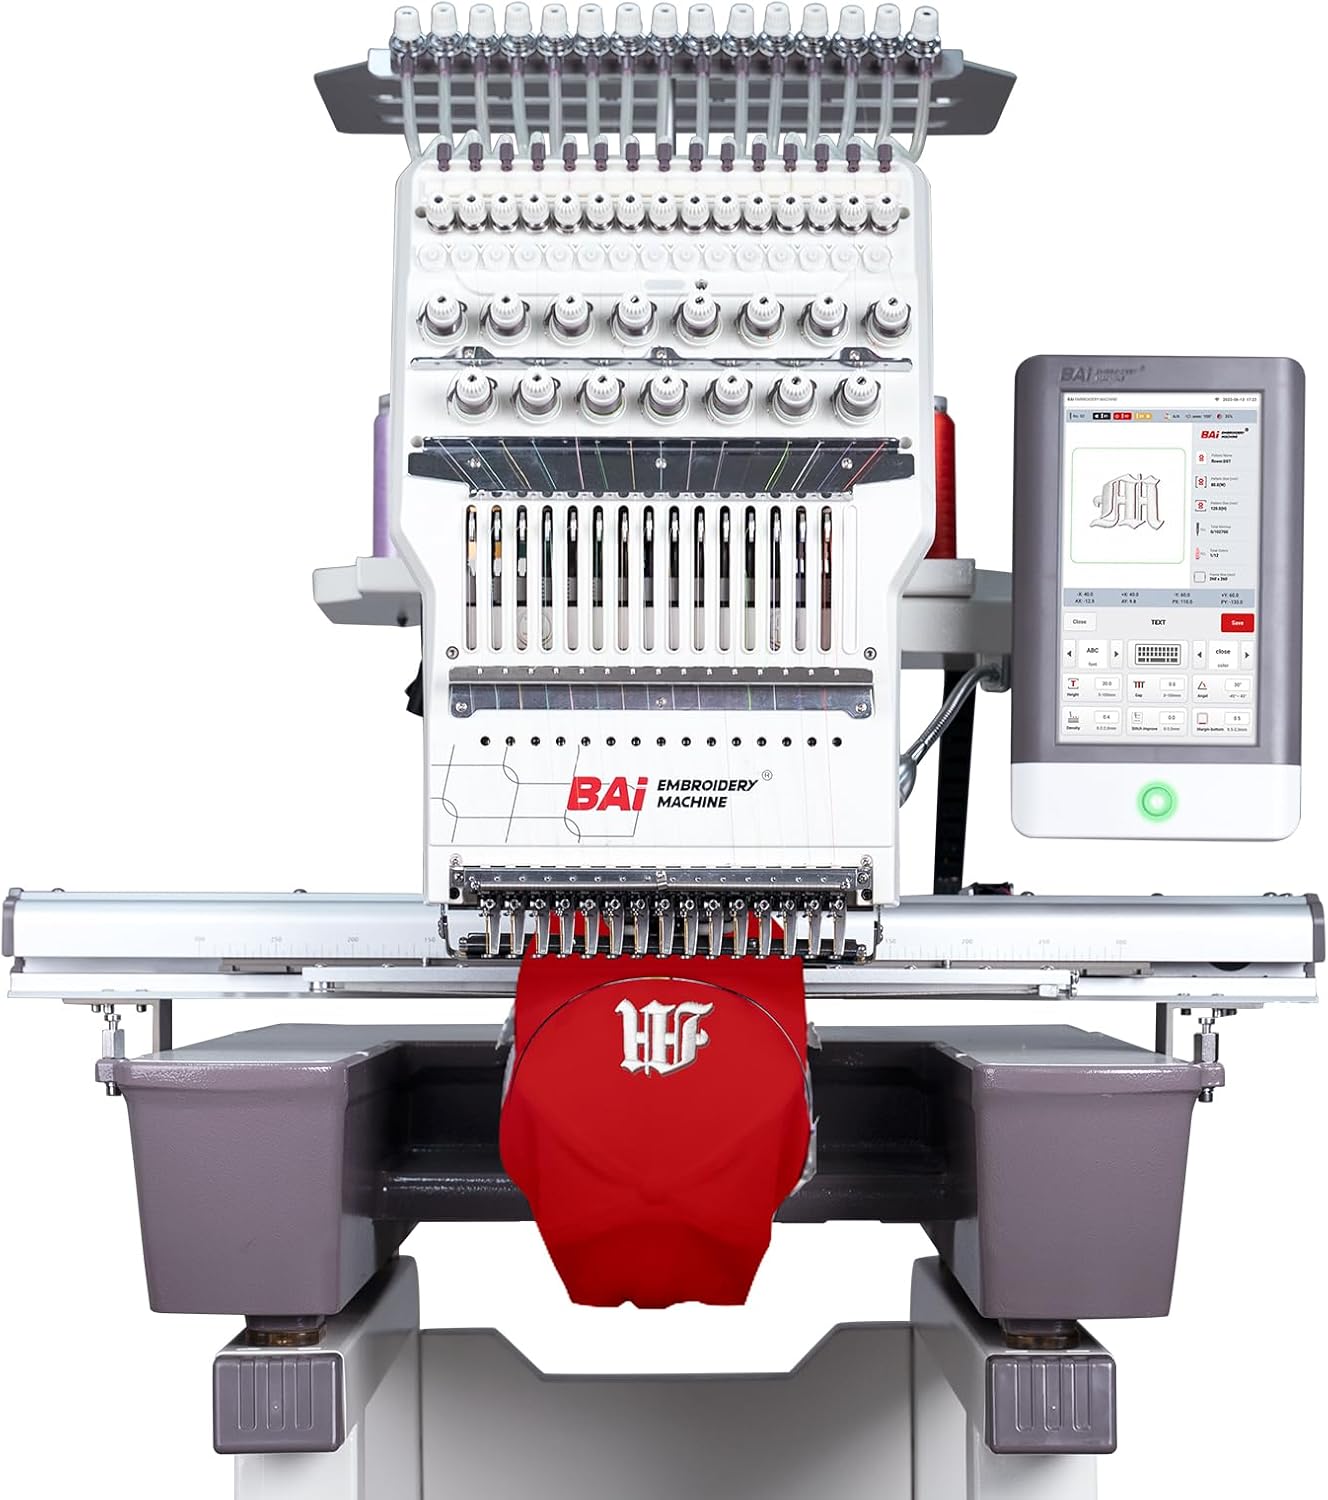
Figure 1: BAi MirrorM22 Commercial Embroidery Machine. This image displays the full embroidery machine with its 15-needle head and integrated touch screen control panel. A red cap is positioned in the embroidery area.
The BAi MirrorM22 is a commercial-grade embroidery machine designed for versatile applications, including hat, cap, apparel, and flat embroidery. It features a 15-needle system, a 10-inch LCD touch screen, and an expansive embroidery area of 15.7 x 23.6 inches.
2. Setup
2.1 Unboxing and Assembly
Carefully unbox the machine and its components. The machine stand requires simple assembly. Refer to the included assembly guide for detailed instructions. Ensure all packaging materials are removed before proceeding.

Figure 2: Machine Stand. This image shows the newly designed stand for the embroidery machine, highlighting its simple assembly and potential for larger storage space.
2.2 Initial Power-Up and System Configuration
Connect the machine to a suitable power source. The Institch i5 Computer System will guide you through the initial setup. This system includes smart 3D hat embroidery capabilities, stride jump functions, and batch production features for patch patterns.

Figure 3: Institch 5.0 Control System. This image displays the 10-inch LCD touch screen control panel, showing the user interface for pattern selection and machine operation.
2.3 Threading and Tension Adjustment
Follow the quick threading guide provided with the machine. Proper threading and tension adjustment are crucial for optimal embroidery quality. Refer to the detailed instructions in the supplementary training materials for precise adjustments.

Figure 4: Threading Guide. This close-up image shows the upper threading path of the embroidery machine, indicating the numbered guides for correct thread placement.
3. Operating Instructions
3.1 Preparing for Embroidery
Select the appropriate hoop for your project. The Mirror M22 includes cap hoops, t-shirt hoops, and flat embroidery devices. Secure your fabric or item within the hoop, ensuring it is taut and properly aligned.

Figure 5: Included Hoops and Accessories. This image displays a variety of hoops and accessories that come with the machine, including cap stations, cap hoops, cap drivers, frames, clips, and various sizes of standard hoops.
3.2 Design Loading and Positioning
Load your embroidery design onto the machine via the Institch i5 Computer System. Utilize the laser positioning device for precise placement of your design on the fabric. This feature helps ensure accurate embroidery position.

Figure 6: Laser Positioning Device. This image shows the laser positioning device projecting a red crosshair onto the fabric within a hoop, indicating the precise starting point for embroidery.
3.3 Starting the Embroidery Process
Once the design is loaded and positioned, and the threads are correctly set, initiate the embroidery process through the touch screen interface. The machine's 15 titanium gold needles are designed for durability and precision, suitable for various materials, including high-hardness structural hats.

Figure 7: DBXK5 Titanium Gold Needles. A close-up view of the machine's needle bar, showcasing the 15 titanium gold needles designed for robust embroidery tasks.
3.4 Utilizing the Wide Arm System
The machine features a wide arm system that accommodates larger items such as bags and suitcases, expanding the range of embroidery possibilities.
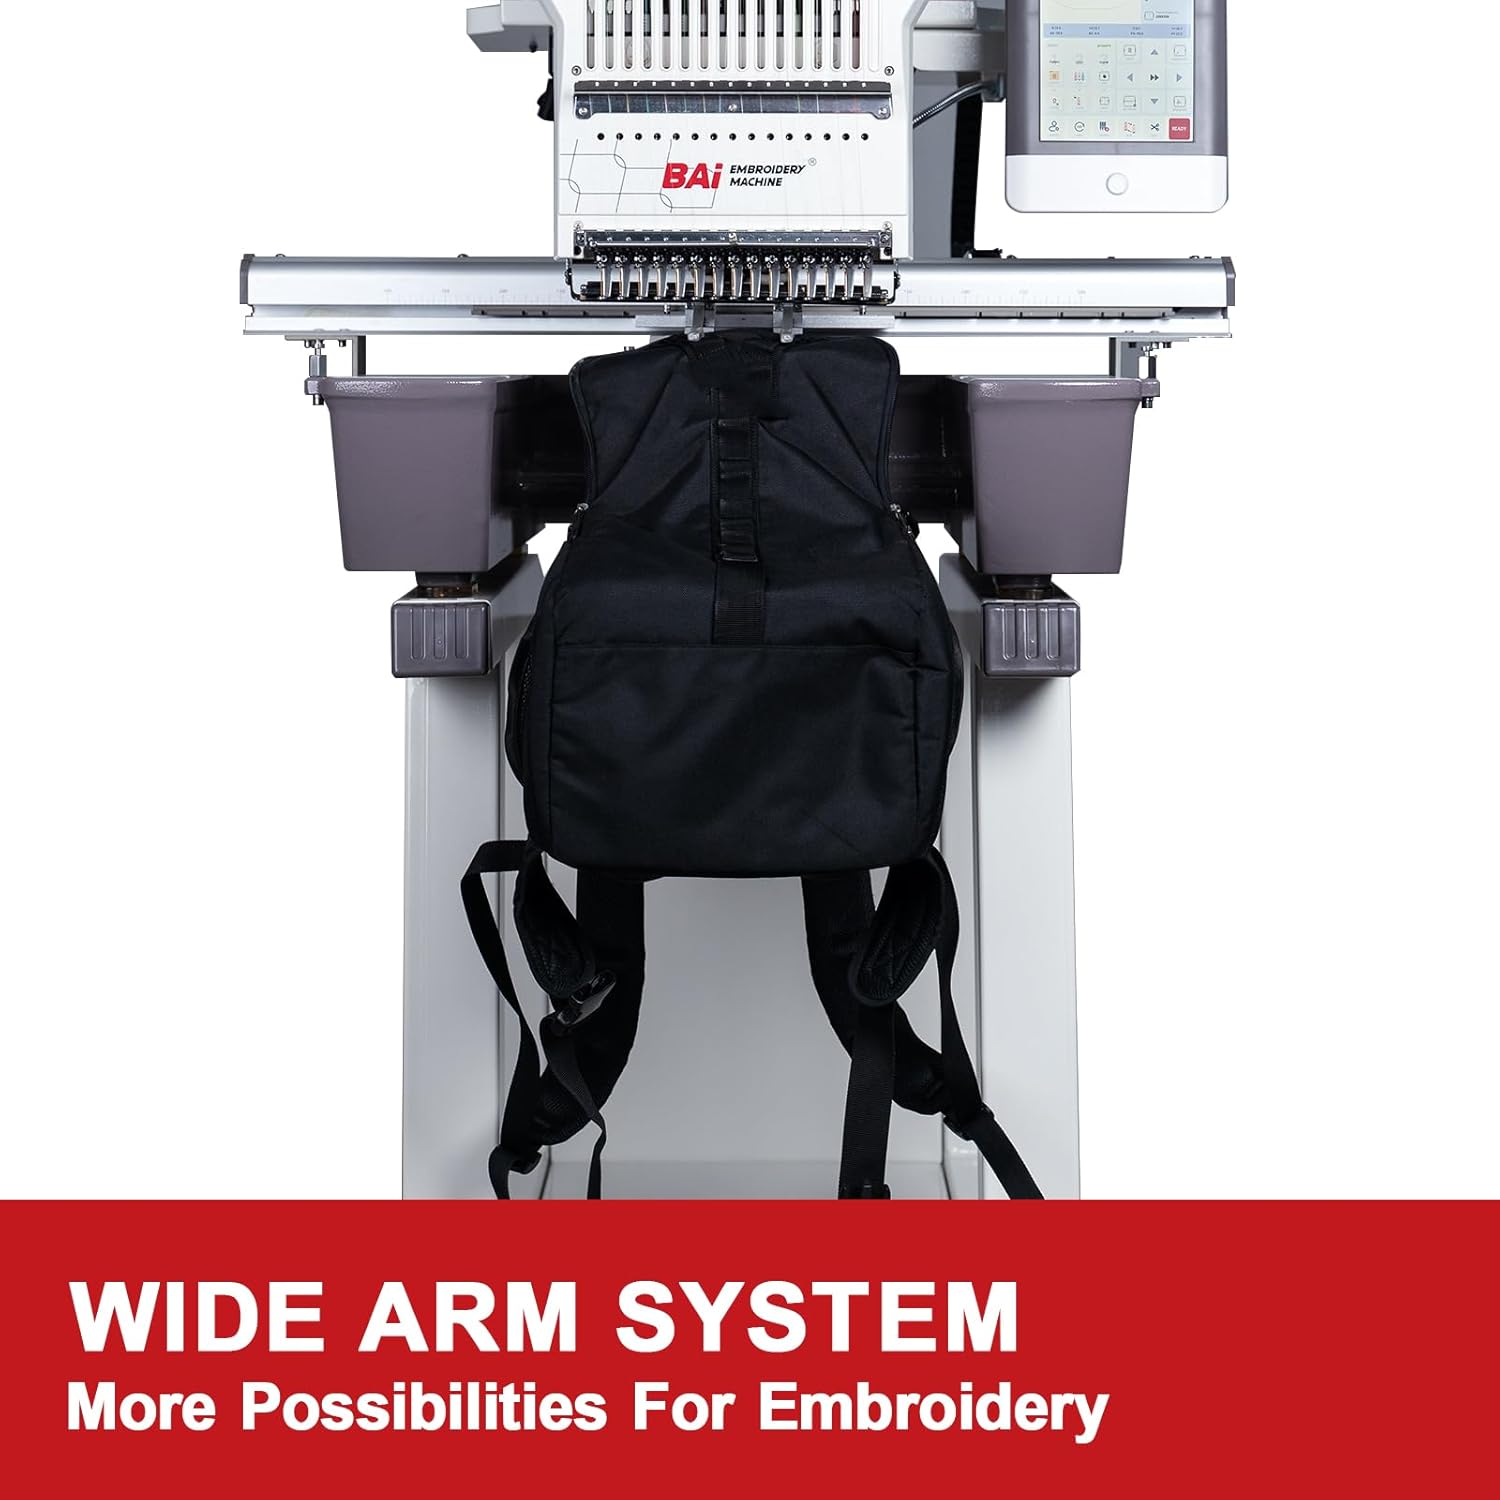
Figure 8: Wide Arm System. This image illustrates the machine's wide arm system with a backpack mounted for embroidery, demonstrating its capability for larger and bulkier items.
4. Maintenance
4.1 Regular Cleaning
Regularly clean the machine, especially the needle area, thread paths, and the dust-proof visual rotary hook. Use a soft brush or compressed air to remove lint and dust. The visual rotary hook allows for convenient inspection during operation.

Figure 9: Dust-proof Visual Rotary Hook. A close-up image of the machine's rotary hook mechanism, designed to be dust-proof and visible for easy monitoring and maintenance.
4.2 Lubrication
Refer to the maintenance schedule in the supplementary guide for lubrication points and recommended lubricants. Proper lubrication ensures smooth operation and extends the machine's lifespan.
4.3 Needle Replacement
Replace needles regularly or when they show signs of wear or damage. Always use the correct type and size of needles for your embroidery projects.
5. Troubleshooting
This section addresses common issues you might encounter during operation. For more complex problems, refer to the comprehensive troubleshooting guide or contact customer support.
5.1 Common Issues and Solutions
- Thread Breakage: Check thread path for obstructions, ensure proper tension, replace old or damaged needles, and verify thread quality.
- Poor Stitch Quality: Adjust thread tension, check needle type and size for the fabric, ensure proper hooping, and clean the bobbin area.
- Machine Not Starting: Verify power connection, check emergency stop button, and ensure all safety covers are closed.
5.2 Support Resources
BAi provides free training and technical support. This includes step-by-step guidance on unboxing, assembling, threading, and tension adjustment. You can also join the 'BAI Embroidery Machine Family' user group on social media for tips and tricks, and access video tutorials on the 'BAIEmbroideryMachineTV' channel.

Figure 10: Free Training Resources. This image shows a person viewing online training videos on a laptop, illustrating the availability of learning resources for machine operation.
6. Specifications
| Feature | Detail |
|---|---|
| Brand | BAi |
| Model Number | Mirror M22 |
| Product Dimensions | 40.55 x 44.49 x 35.04 inches (103cm x 113cm x 89cm) |
| Item Weight | 615 pounds (279 kg) |
| Needle Count | 15 Titanium Gold Needles |
| Control System | Institch i5 Computer System |
| Display | 10 Inches LCD Touch Screen |
| Embroidery Area | 15.7 x 23.6 Inches (40cm x 60cm) |
| Is Electric | Yes |
| Color | White |
7. Support and Warranty
7.1 Customer Support
BAi is committed to providing comprehensive customer support. If you encounter any issues or require assistance, please contact our support team. We offer guidance through various channels, including direct support and community forums.
7.2 Online Resources
- Social Media Group: Join the 'BAI Embroidery Machine Family' on social media to connect with other users, share tips, and find solutions.
- Video Tutorials: Access a variety of helpful video tutorials by searching and following the 'BAIEmbroideryMachineTV' channel.

Figure 11: Social Media and Video Support. This image shows screenshots of a social media group and a video channel, indicating available platforms for community and video-based support.
7.3 Warranty Information
For detailed warranty information, please refer to the warranty card included with your product or contact BAi customer service directly. Keep your purchase receipt as proof of purchase.