1. Introduction
This manual provides detailed instructions for the installation, operation, and maintenance of the Noregon Systems JPRO Diagnostic Software and Adapter Kit, model 232150-NS. This kit is designed for comprehensive diagnostic and troubleshooting of commercial vehicles, offering advanced capabilities for various makes, models, and components.
2. What's in the Box
Verify that all components listed below are present in your kit:
- JPRO Diagnostic Software (Annual Subscription)
- DLA+ 3.0 Adapter with USB Cable
- 9-pin heavy-duty cable (backward compatible with existing 9-pin connectors)
- OBD-II Type-B cable for Mack & Volvo
- OBD-II Type-B cable for Sprinter/Hino/Isuzu
- Adapter Carrying Case
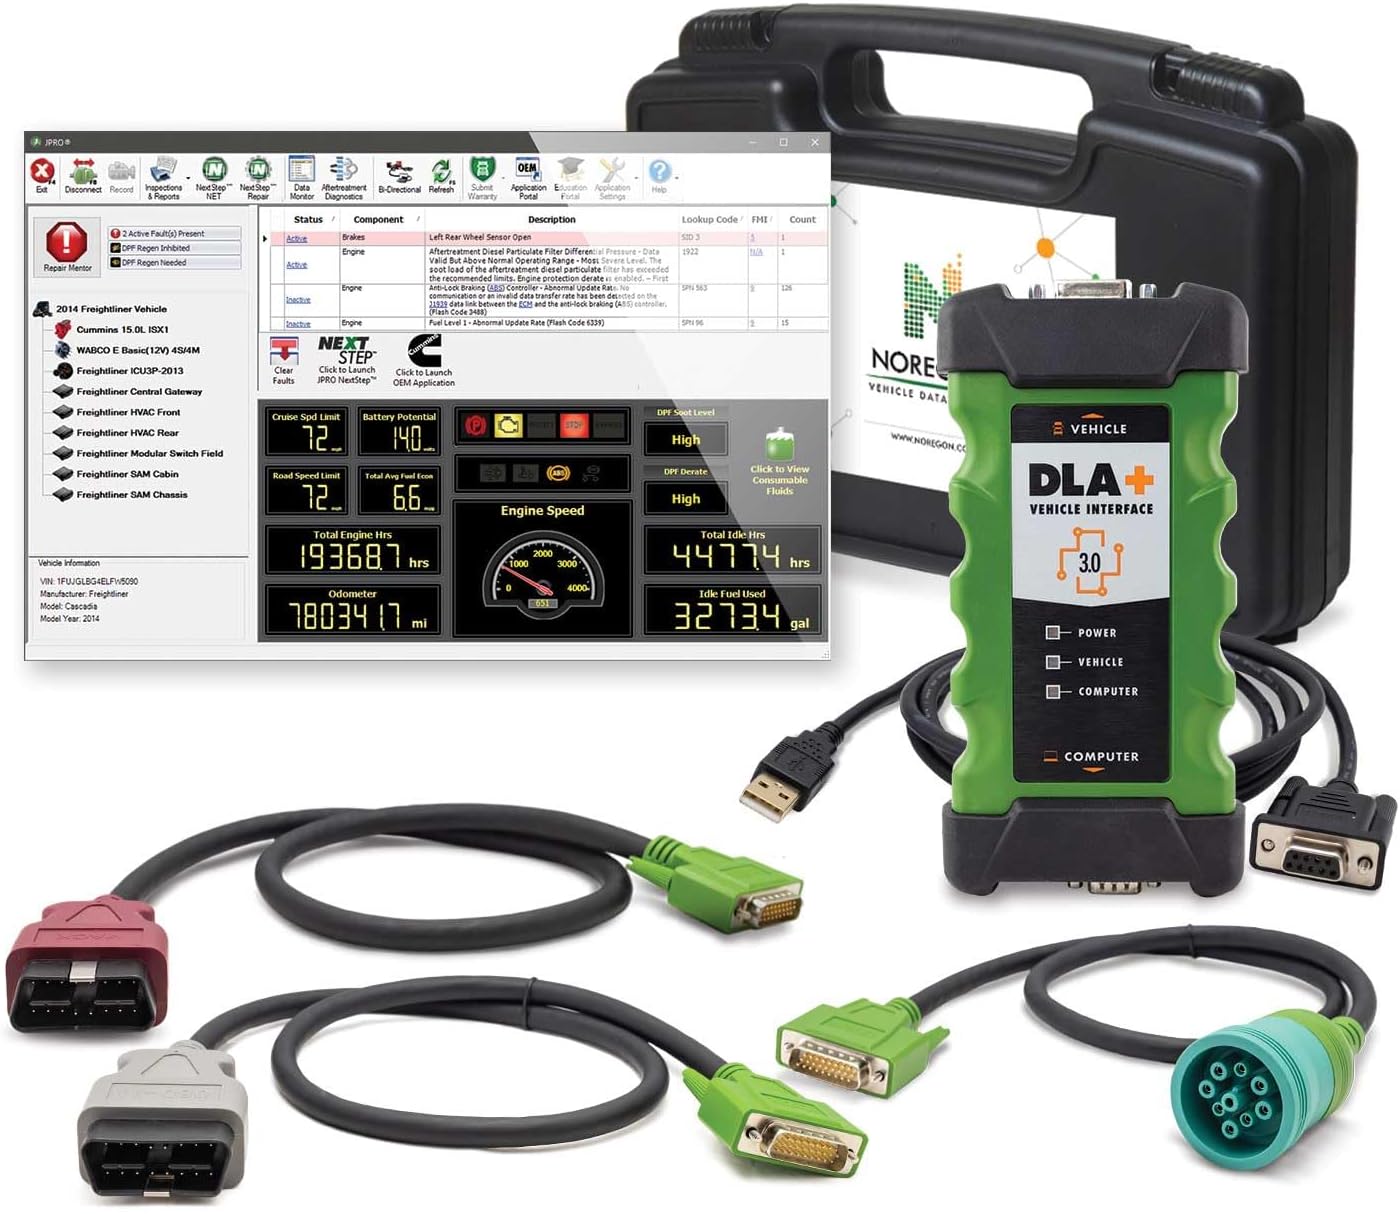
Image 1: Overview of the JPRO Diagnostic Software and Adapter Kit, including the DLA+ 3.0 adapter, various cables, and the software interface.
3. Setup Instructions
3.1. Software Installation
- Insert the JPRO Diagnostic Software installation media or download the software from the official Noregon Systems website.
- Follow the on-screen prompts to complete the installation. Ensure your computer meets the minimum system requirements.
- Activate your annual software subscription using the provided license key.
3.2. Adapter Connection
- Connect the DLA+ 3.0 Adapter to your computer using the provided USB cable.
- Allow your operating system to install any necessary drivers for the DLA+ 3.0 Adapter.
- Select the appropriate vehicle diagnostic cable based on the vehicle's diagnostic port (e.g., 9-pin heavy-duty, OBD-II Type-B).
- Connect the selected cable to the DLA+ 3.0 Adapter.
- Connect the other end of the diagnostic cable to the vehicle's diagnostic port.

Image 2: The DLA+ 3.0 Vehicle Interface Adapter, showing its connection ports and indicator lights.

Image 3: Various diagnostic cables included with the kit, such as the 9-pin heavy-duty cable and OBD-II Type-B cables for different vehicle types.
4. Operating Instructions
4.1. Initiating Diagnostics
- Ensure the DLA+ 3.0 Adapter is connected to both your computer and the vehicle.
- Launch the JPRO Diagnostic Software on your computer.
- The software will automatically detect the connected vehicle and begin reading data. This process typically takes approximately one minute.
4.2. Key Features and Functions
- Rapid Connections: JPRO connects to and reads the entire vehicle's pertinent details quickly, minimizing wait times.
- Comprehensive Coverage: The software simultaneously diagnoses all components across various makes and models of commercial trucks, including popular off-highway equipment.
- Fault Guidance: Utilize the Fault Guidance feature to streamline troubleshooting. This includes access to full-color wiring diagrams, component locators, and specific troubleshooting tips.
- Bi-directional Controls: Perform industry-leading bi-directional tests such as DPF regens, cylinder cutouts, and wiggle tests to isolate components and diagnose issues effectively.
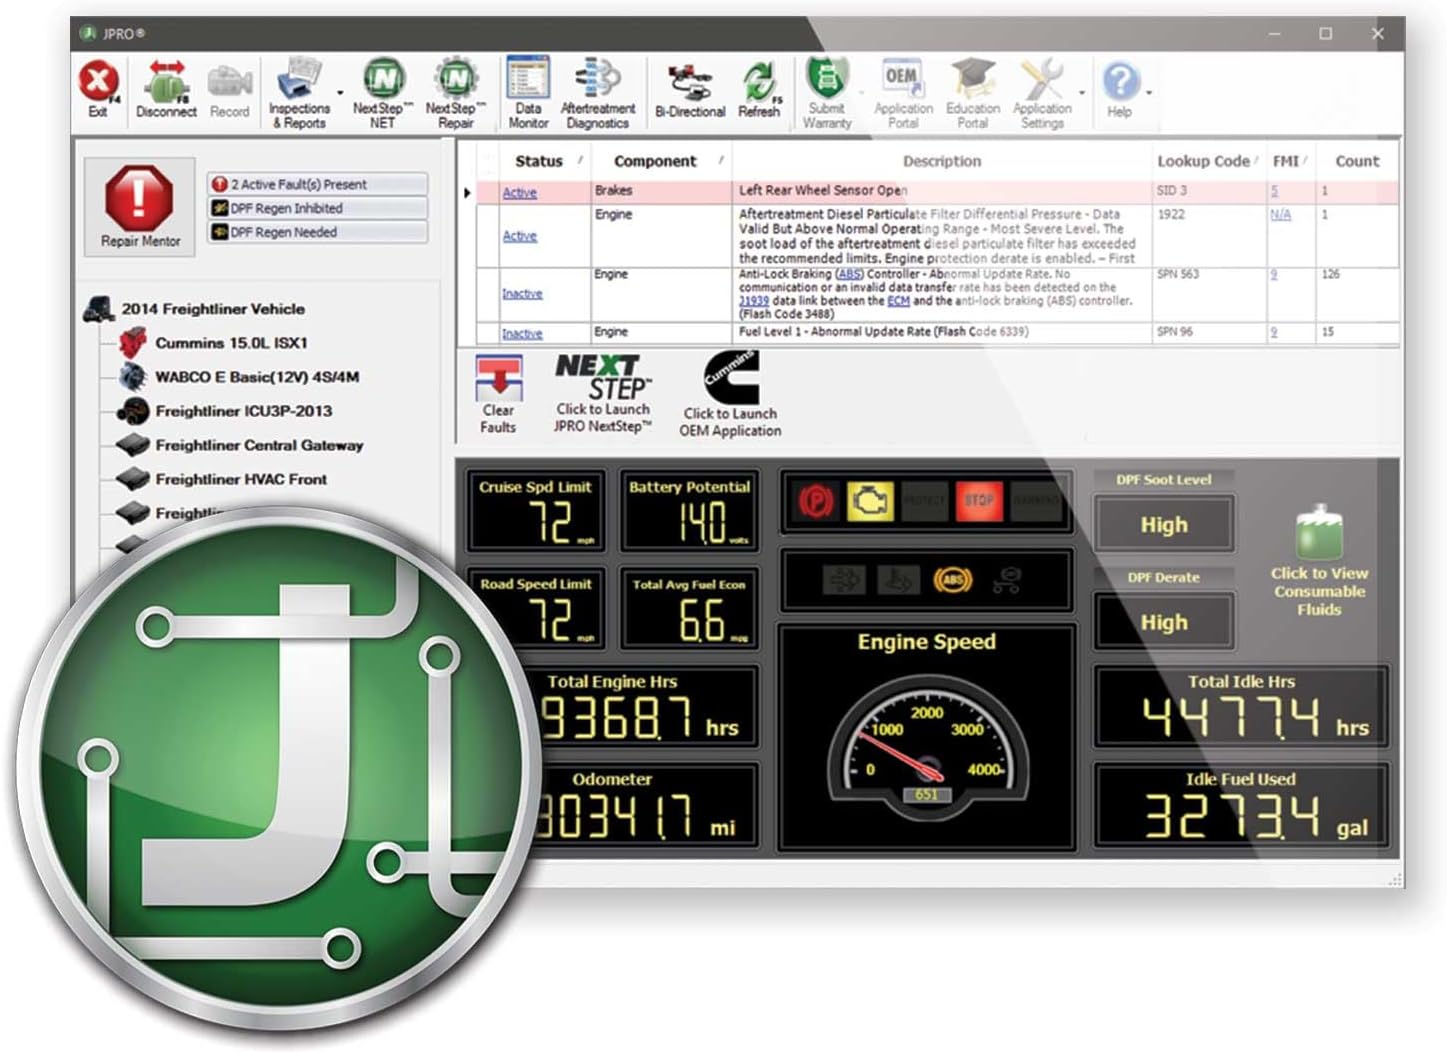
Image 4: The JPRO software interface showing active and inactive faults, vehicle parameters, and diagnostic options.

Image 5: A detailed view of the JPRO software interface, highlighting different diagnostic screens and data displays.

Image 6: Close-up of the 'Fault Guidance' icon within the JPRO software, indicating access to detailed troubleshooting information.
5. Maintenance
5.1. Software Updates
Regularly check for and install software updates to ensure optimal performance, access to the latest vehicle coverage, and new features. JPRO software updates are typically released periodically and are part of your annual subscription.
5.2. Adapter Care
- Store the DLA+ 3.0 Adapter and cables in the provided carrying case when not in use to protect them from damage.
- Keep the adapter and cables clean and free from dirt, oil, and moisture.
- Inspect cables regularly for any signs of wear or damage. Replace damaged cables immediately to prevent connectivity issues.
6. Troubleshooting
If you encounter issues, consider the following troubleshooting steps:
- Connection Issues: Ensure all cables are securely connected to the adapter, computer, and vehicle. Verify that the DLA+ 3.0 Adapter's indicator lights are functioning correctly.
- Software Not Launching: Confirm that your computer meets the minimum system requirements and that the software installation was successful. Try restarting your computer.
- Vehicle Not Detected: Check the vehicle's ignition status. Ensure the correct diagnostic cable is used for the specific vehicle type.
- Diagnostic Errors: Refer to the JPRO software's built-in Fault Guidance for detailed information on specific fault codes and recommended repair procedures.
For persistent issues, consult the Noregon Systems support resources or contact their technical support team.
7. Specifications
| Feature | Detail |
|---|---|
| Model | JPRO Diagnostic Software with Adapter Kit |
| Item Model Number | 232150-NS |
| Brand | Noregon Systems |
| Item Weight | 7 pounds |
| Package Dimensions | 17 x 13 x 5 inches |
| Power Source | Corded Electric (via vehicle/USB) |
| UPC | 680569326317 |
8. Support and Warranty
For technical assistance, software support, or inquiries regarding your annual subscription, please contact Noregon Systems directly. Information on warranty coverage for the DLA+ 3.0 Adapter and cables can be obtained from Noregon Systems or your authorized reseller at the time of purchase.
Visit the official Noregon Systems website for the latest support resources, FAQs, and contact information: www.noregon.com