1. Introduction
Thank you for choosing the TUXING PCP Air Compressor. This manual provides essential information for the safe and efficient operation, maintenance, and troubleshooting of your compressor. Please read this manual thoroughly before using the product to ensure proper function and to prevent damage or injury.
The TUXING PCP Air Compressor (Model TXET062-2) is designed for inflating PCP air rifles, paintball tanks, and mini diving tanks. It features an auto-shutoff function, a built-in power adapter for both 110V AC and 12V DC car battery power, and a water/oil separation system for convenience.
2. Safety Information
Always observe the following safety precautions to reduce the risk of injury or damage:
- Do not operate the compressor in wet or damp conditions.
- Ensure proper ventilation during operation to prevent overheating.
- Always wear appropriate eye protection when operating the compressor.
- Keep children and pets away from the compressor during operation.
- Do not exceed the maximum pressure rating of the compressor or the device being inflated.
- Disconnect power before performing any maintenance or cleaning.
- Regularly check all connections for leaks and ensure they are secure.
- The compressor generates heat during operation. Avoid touching hot surfaces.
3. Package Contents
Verify that all items are present in the package:
- TUXING PCP Air Compressor (TXET062-2)
- AC Power Cord (for 110V household outlet)
- DC Power Cable (for 12V car battery)
- 8mm Quick Disconnect Hose with Oil Water Filter
- Replacement Filter Cotton
- Spare O-rings and Seals
- User Manual

Figure 3.1: TUXING PCP Air Compressor with all included accessories and dimensions.
4. Product Overview
Familiarize yourself with the components of your TUXING PCP Air Compressor:

Figure 4.1: Detailed component diagram of the TUXING PCP Air Compressor.
- Adjustable Pressure Gauge: Displays current pressure and allows setting the auto-stop pressure.
- Temperature Display: Shows the internal operating temperature.
- Motor Switch: Powers the compressor motor on/off.
- Cooling Fan Switch: Controls the built-in cooling fan.
- Release Valve: Used to release pressure from the system.
- Burst Disc: A safety feature designed to rupture if pressure exceeds safe limits.
- Air Outlet (8mm male connector): Connection point for the inflation hose.
- 110V/220V Built-in Transformer: Allows direct connection to household AC power.
- 12V DC Power Connector: For connecting to a 12V car battery.
- Overload Fuse: Protects the unit from electrical overloads.
- Built-in Fan Cooling: Internal fan for efficient heat dissipation.
- Handle: For easy portability.
5. Setup
Before first use, ensure the compressor is placed on a stable, flat surface in a well-ventilated area.
5.1 Power Connection
The compressor can be powered by either a 110V AC household outlet or a 12V DC car battery.
- For AC Power (Household): Connect the provided AC power cord to the compressor's AC input and then to a standard 110V wall outlet.

Figure 5.1: Connecting the compressor to a 110V AC household outlet.
- For DC Power (Car Battery): Connect the red clamp of the DC power cable to the positive (+) terminal of your 12V car battery and the black clamp to the negative (-) terminal. Then, connect the other end of the DC power cable to the compressor's 12V DC power connector.
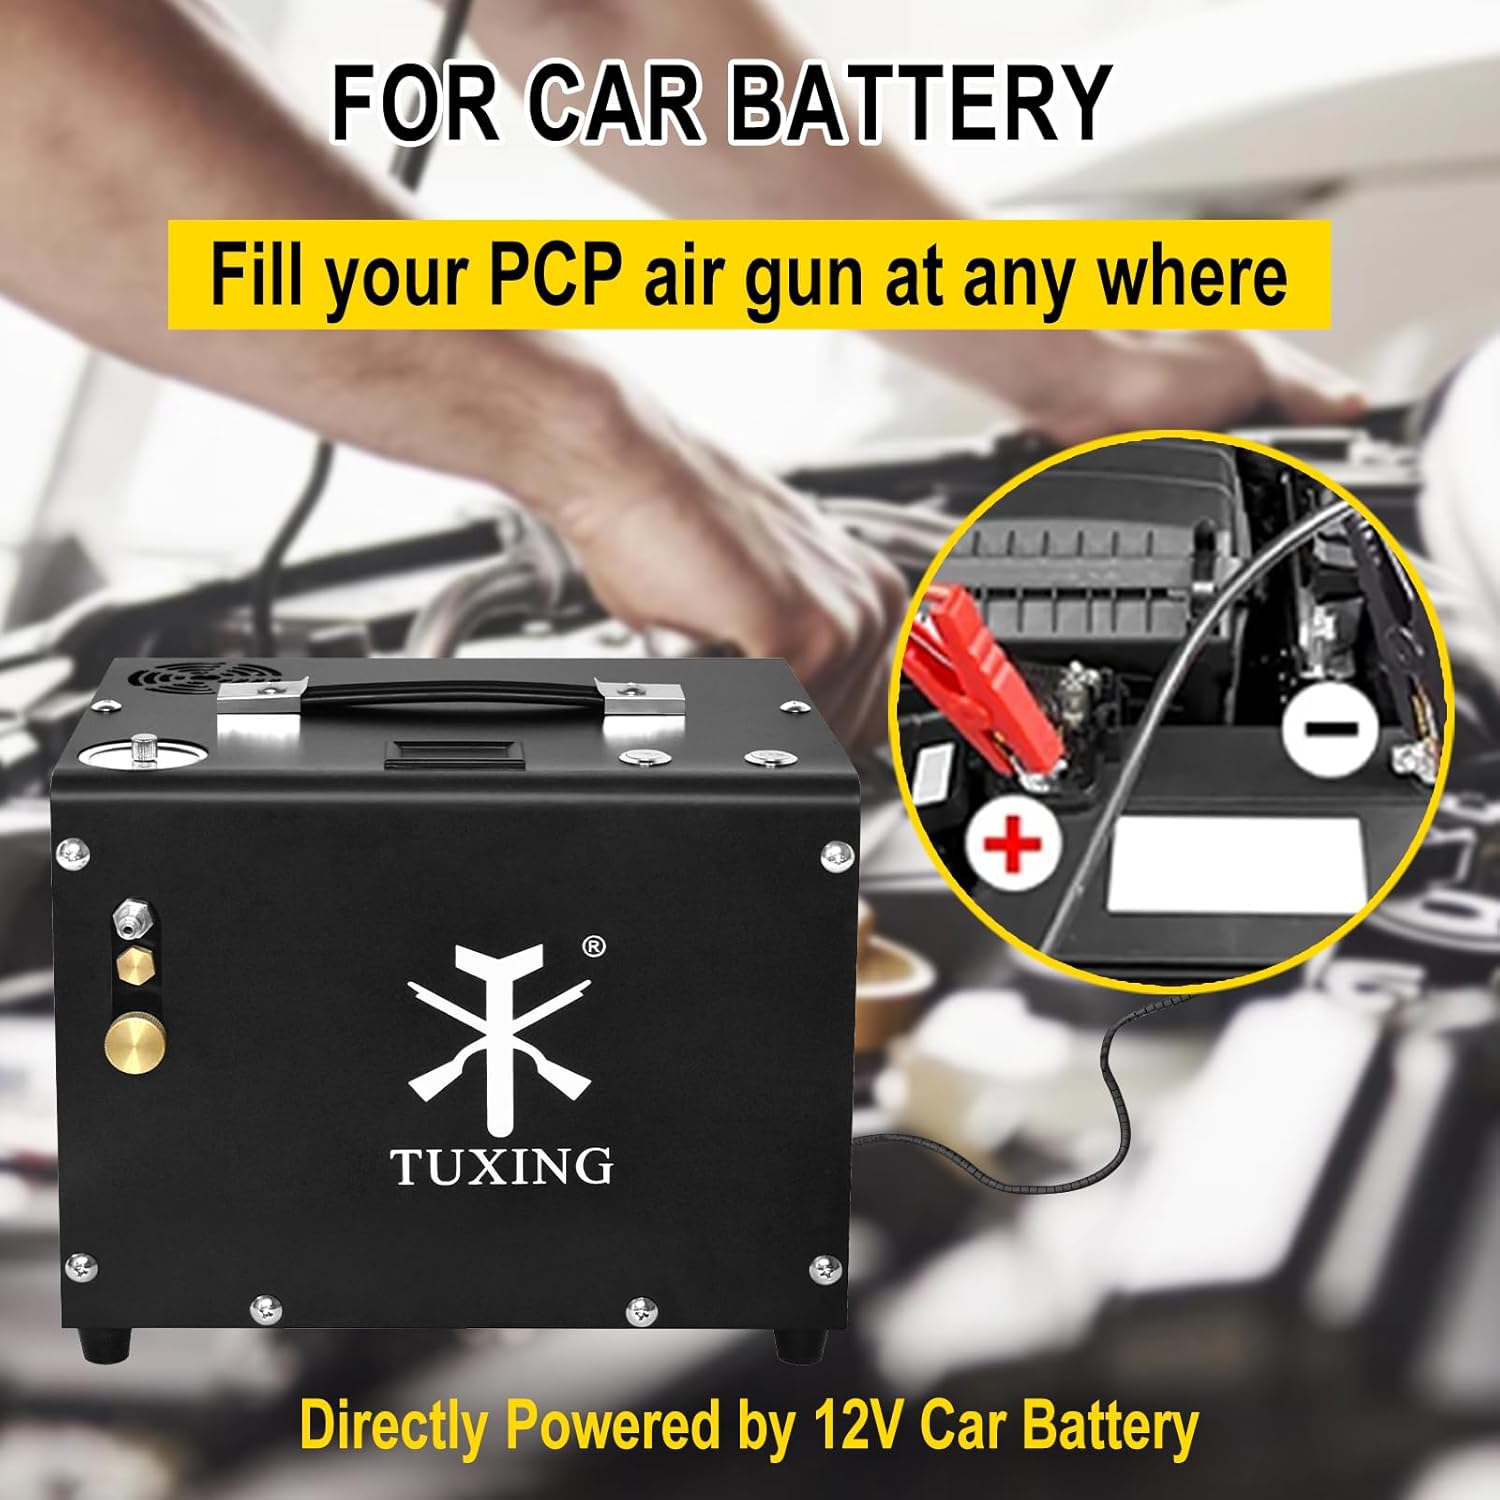
Figure 5.2: Connecting the compressor to a 12V car battery for portable use.
5.2 Connecting the Inflation Hose
Attach the 8mm quick disconnect hose to the air outlet of the compressor. Ensure it is securely fastened to prevent air leaks during operation. The hose includes an integrated oil water filter to ensure clean, dry air output.
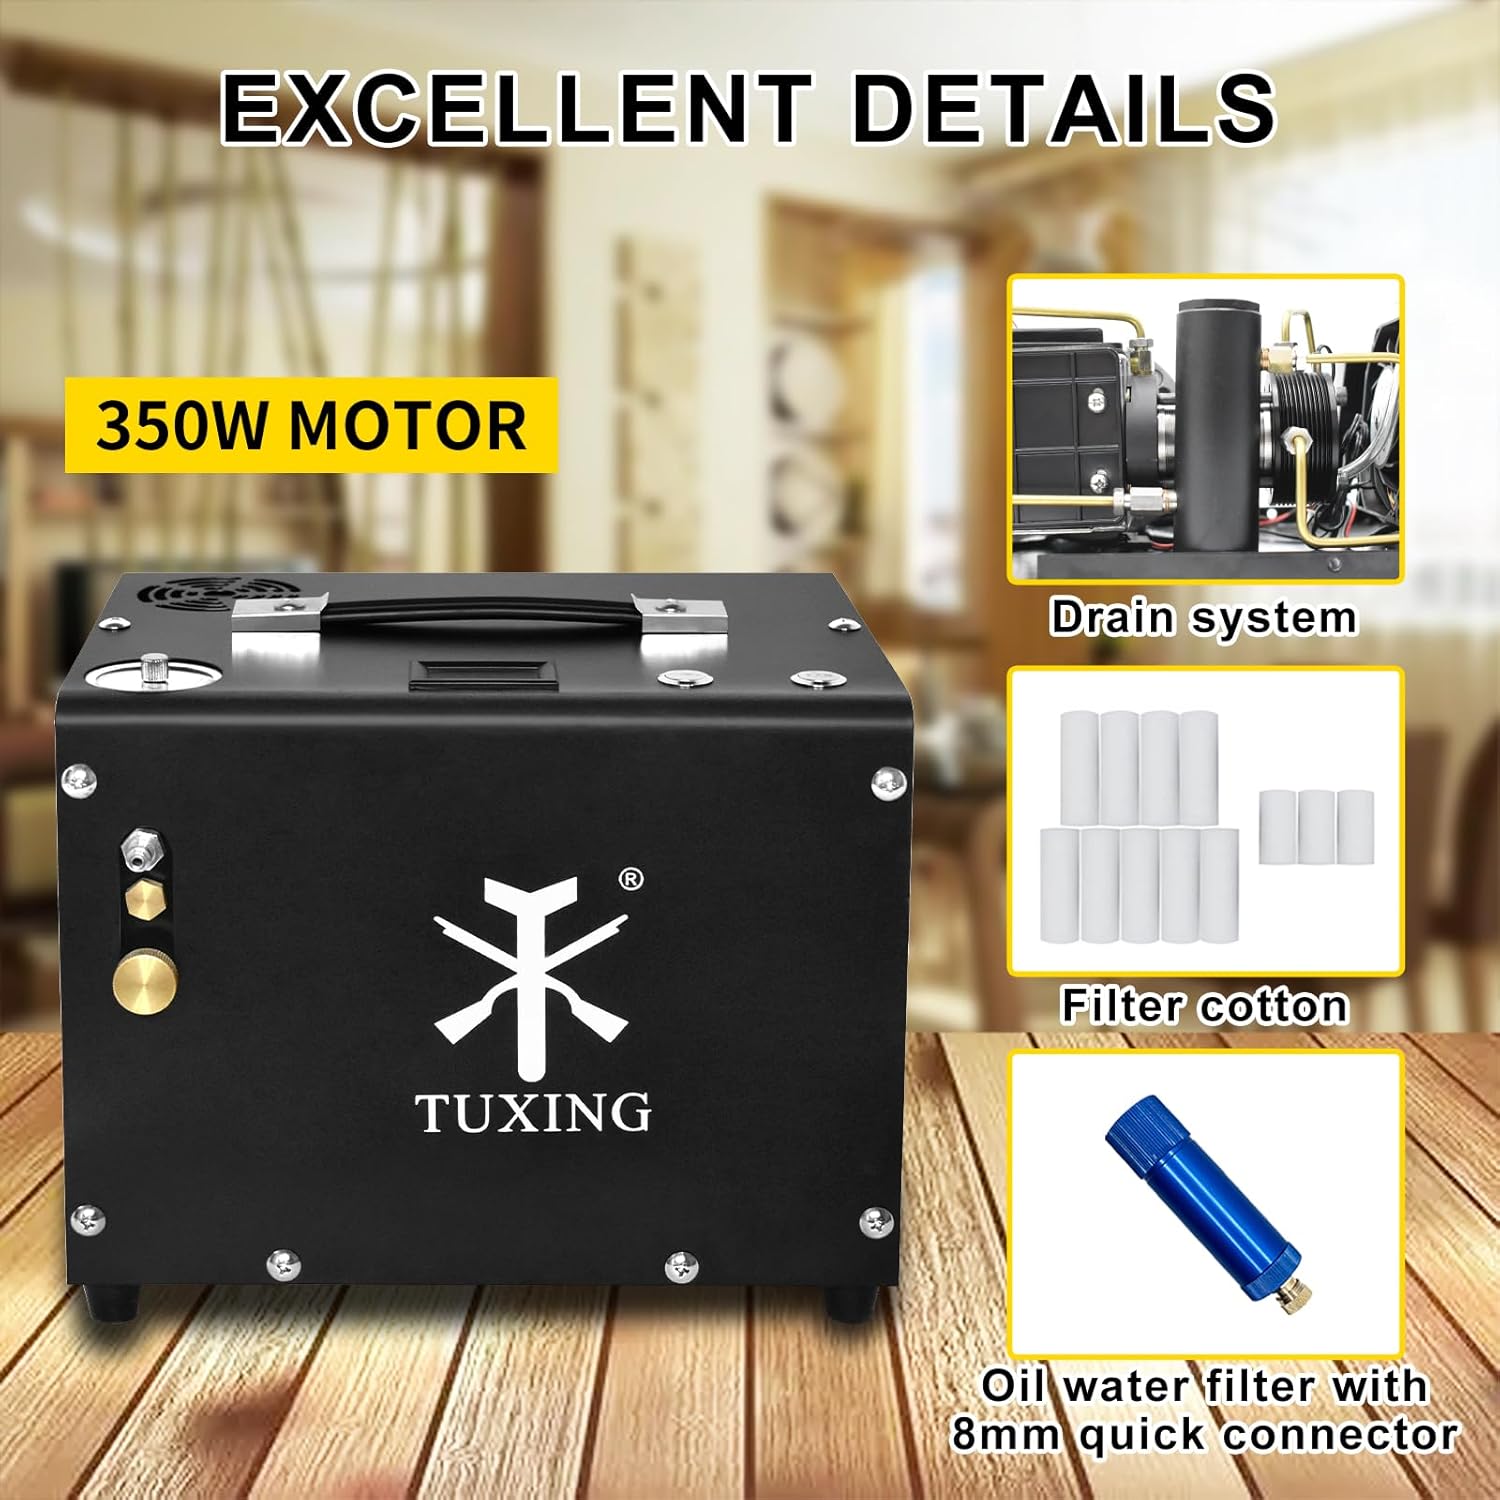
Figure 5.3: The compressor features a built-in drain system and an oil water filter for clean air.
6. Operating Instructions
Follow these steps for safe and effective operation:
- Connect to Device: Connect the 8mm quick disconnect end of the inflation hose to the PCP air rifle, paintball tank, or mini diving tank you wish to inflate.
- Set Desired Pressure: Rotate the knob on the pressure gauge to set your desired shut-off pressure. The compressor will automatically stop once this pressure is reached.
- Turn on Cooling Fan: Before starting the compressor, always turn on the cooling fan using its dedicated switch. This is crucial for heat dissipation.
- Start Compressor: Flip the motor switch to the 'ON' position to begin inflation. Monitor the pressure gauge and the temperature display during operation.
- Monitor Temperature: The temperature display shows the internal temperature. If the temperature approaches 70°C (158°F), turn off the compressor and allow it to cool down before resuming operation.
- Automatic Shut-off: The compressor will automatically stop once the preset pressure is achieved.
- Release Pressure: After inflation, turn off the compressor and slowly open the release valve to vent any remaining pressure in the hose before disconnecting.
- Disconnect: Disconnect the inflation hose from your device and then from the compressor.

Figure 6.1: The auto-stop feature allows you to set the desired pressure, and the temperature display helps monitor operation.
The portable design allows for various applications:

Figure 6.2: The compressor's portable design makes it suitable for inflating PCP air rifles, paintball air guns, and mini diving tanks.
7. Maintenance
Regular maintenance ensures the longevity and optimal performance of your compressor.
- Drain System: Periodically drain any accumulated moisture from the built-in drain system. This helps maintain air quality and prevents internal corrosion.
- Filter Cotton Replacement: The oil water filter contains filter cotton that needs to be replaced regularly. Refer to the included spare parts for replacements. The frequency depends on usage and air quality.
- Cleaning: Keep the exterior of the compressor clean and free of dust and debris. Use a dry cloth for cleaning. Do not use harsh chemicals or abrasive cleaners.
- Cooling Fan: Ensure the cooling fan and air vents are not obstructed to allow for proper airflow and heat dissipation.
8. Troubleshooting
If you encounter issues with your TUXING PCP Air Compressor, refer to the following common problems and solutions:
| Problem | Possible Cause | Solution |
|---|---|---|
| Compressor does not start | No power supply; Overload fuse tripped; Motor switch off. | Check power connection; Reset overload fuse; Ensure motor switch is ON. |
| Compressor overheats quickly | Cooling fan off or obstructed; Prolonged operation; High ambient temperature. | Ensure cooling fan is ON and vents are clear; Allow compressor to cool down; Operate in a cooler environment. |
| Pressure not building up | Air leaks in connections; Hose not properly connected; Release valve open. | Check all connections for tightness; Ensure hose is securely attached; Close the release valve. |
| Compressor stops unexpectedly | Auto-shutoff pressure reached; Overheating; Low voltage. | Check preset pressure; Allow unit to cool; Ensure stable power supply. |
If the problem persists after attempting these solutions, please contact TUXING customer support.
9. Specifications
| Feature | Specification |
|---|---|
| Model Number | TXET062-2 |
| Maximum Pressure | 300 Bars / 4500 Psi / 30 Mpa |
| Power Source | Corded Electric (110V AC) / 12V DC Car Battery |
| Wattage / Maximum Power | 300 Watts |
| Voltage | 110 Volts (AC) |
| Item Weight | 9.5 kg (20.9 lbs) |
| Product Dimensions | 33 x 27 x 34 cm (13 x 10.6 x 13.4 inches) |
| Noise Level | 85 Sones |
| Hose Length | 0.5 Meters |
| Special Features | Portable, Auto-shutoff, Built-in Water Filter, Built-in Fan Cooling |
| Material | Iron |
10. Warranty and Support
10.1 Warranty Information
The main part of this TUXING PCP Air Compressor comes with a 1-year warranty from the date of purchase. This warranty covers manufacturing defects under normal use. It does not cover damage caused by misuse, accidents, unauthorized modifications, or improper maintenance.
10.2 Customer Support
For technical assistance, warranty claims, or any questions regarding your TUXING PCP Air Compressor, please contact the seller or manufacturer directly. Refer to your purchase documentation for contact details.