
1. Introduction
Thank you for choosing the WORKPRO 300W 125mm Random Orbital Sander. This electric sander is designed for various sanding tasks, including grinding, paint removal, surface preparation, and roughing. To ensure safe and efficient operation, please read this instruction manual thoroughly before use and keep it for future reference.

Image 1.1: The WORKPRO 300W 125mm Random Orbital Sander, shown with a selection of sanding discs.
2. Safety Instructions
Always follow basic safety precautions when using electric power tools to reduce the risk of fire, electric shock, and personal injury. Keep your work area clean and well-lit. Do not operate power tools in explosive atmospheres, such as in the presence of flammable liquids, gases, or dust. Keep children and bystanders away while operating a power tool.
- Wear appropriate personal protective equipment, including safety glasses, dust masks, and hearing protection.
- Ensure the power cord is in good condition and avoid using the tool in wet conditions.
- Do not force the tool; let the tool do the work at the appropriate speed setting.
- Always disconnect the power plug from the power source before making any adjustments, changing accessories, or storing the tool.
- Maintain a firm grip on the tool during operation. Wearing anti-vibration gloves is recommended due to the eccentric motion of random orbital sanders.
- Ensure the workpiece is dry before sanding to prevent sawdust from clogging the dust collection system.
3. Package Contents
Verify that all items are present upon unpacking:
- WORKPRO Random Orbital Sander Unit
- Dust Collection Box
- Sanding Papers (20 sheets, φ125mm):
- 4 x #60 grit
- 4 x #80 grit
- 4 x #120 grit
- 4 x #180 grit
- 4 x #240 grit
- Instruction Manual (Japanese)
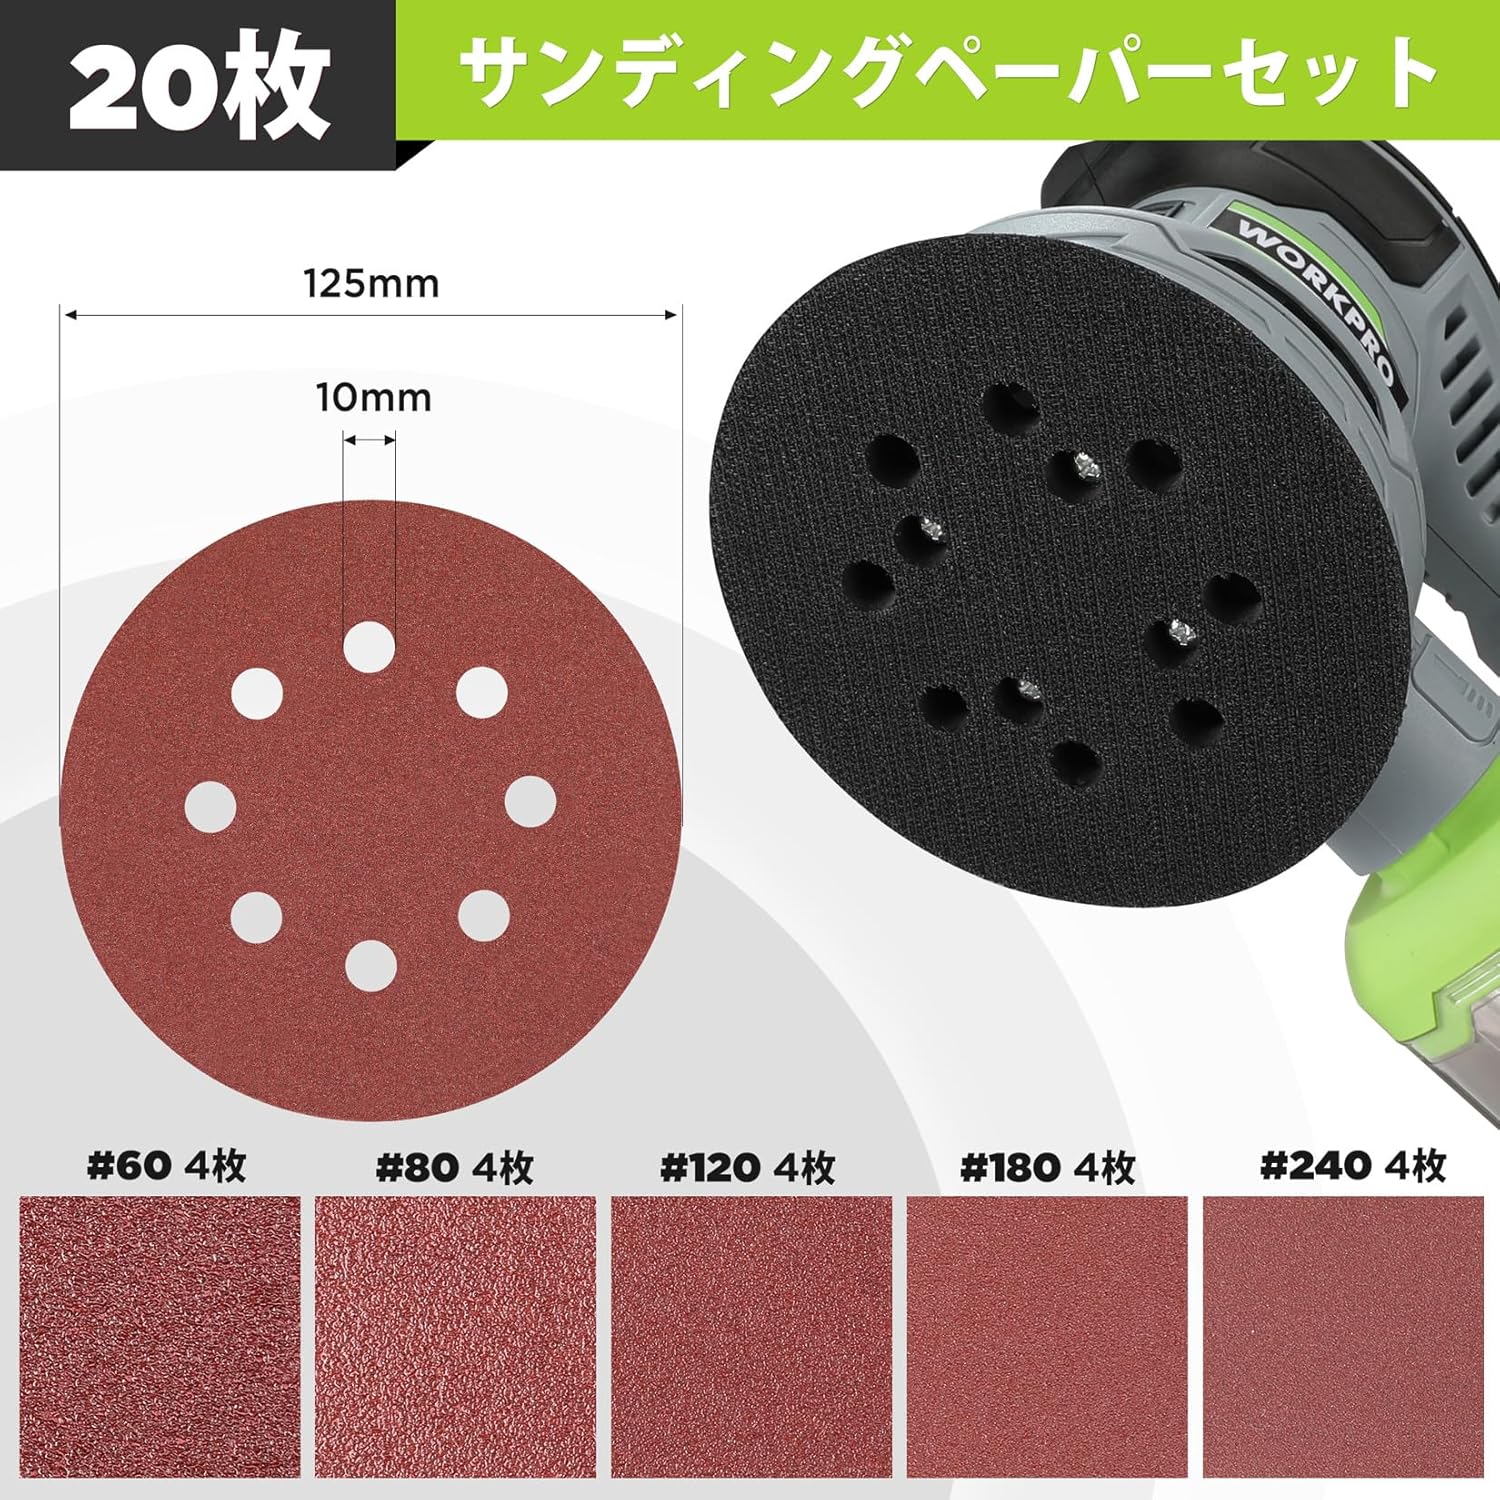
Image 3.1: The 20 included sanding papers, ranging from #60 to #240 grit.
4. Product Overview
Familiarize yourself with the main components of your random orbital sander:
- ON/OFF Switch: Controls power to the unit.
- Speed Control Dial: Adjusts the sanding speed from 1 to 6.
- Microfilter Dust Box: Collects sawdust during operation.
- Exhaust Port: Allows air to exit the tool.
- Sanding Pad: The circular base where sandpaper is attached.

Image 4.1: Labeled diagram showing the ON/OFF switch, speed control, microfilter, dust box, and exhaust port.

Image 4.2: Illustration of the sander's ventilation system, designed to prevent overheating.
5. Setup
5.1 Attaching Sandpaper
- Ensure the sander is unplugged from the power source.
- Select the appropriate grit sandpaper for your task.
- Align the holes on the sandpaper with the holes on the sanding pad.
- Press the sandpaper firmly onto the hook-and-loop pad until it is securely attached.

Image 5.1: Attaching sandpaper to the sanding pad using the hook-and-loop system.
5.2 Attaching the Dust Collection Box
- Ensure the sander is unplugged.
- Align the dust collection box with the exhaust port on the sander.
- Push the dust box firmly onto the port until it clicks into place.

Image 5.2: The dust collection box being attached to the sander's exhaust port.
6. Operation
6.1 Power On/Off
- Plug the sander into a suitable power outlet.
- To turn ON, slide the switch to the left (position 'I'). This allows for continuous operation.
- To turn OFF, slide the switch to the right (position '0').

Image 6.1: The ON/OFF switch for controlling the sander's power.
6.2 Speed Adjustment
The sander features a 6-stage speed adjustment dial, allowing you to select a sanding speed between 7000 RPM and 13000 RPM.
- Rotate the speed control dial to select the desired speed setting (1-6).
- Higher settings (e.g., 6) provide faster rotation and are suitable for rougher sanding.
- Lower settings (e.g., 1) provide slower rotation for finer finishing.

Image 6.2: The speed control dial, indicating settings from 1 to 6.
6.3 Sanding Technique
When operating the random orbital sander, apply appropriate pressure. Excessive pressure can slow down the rotation of the sanding pad and cause premature wear of internal components. The random orbital motion means the pad oscillates while rotating, which helps prevent swirl marks. Move the sander in gentle, overlapping circular motions across the workpiece.

Image 6.3: A user demonstrating proper sanding technique on a wooden surface.
7. Maintenance
7.1 Emptying the Dust Collection Box
The removable dust collection box efficiently captures sawdust, minimizing airborne particles and simplifying cleanup. For optimal performance, empty the dust box regularly.
- Ensure the sander is unplugged.
- Carefully detach the dust collection box from the sander.
- Empty the collected sawdust into a waste bin.
- Reattach the dust box securely before next use.

Image 7.1: A hand emptying sawdust from the transparent dust collection box into a container.
7.2 Cleaning
Regular cleaning helps prolong the life of your tool.
- Wipe down the exterior of the sander with a clean, damp cloth. Do not use harsh chemicals or abrasive cleaners.
- Periodically inspect the ventilation openings for dust buildup and clear them to ensure proper airflow and prevent overheating.
- Check the sanding pad for wear or damage. Replace if necessary.
8. Troubleshooting
Reduced Rotation or Stoppage Under Pressure
If the sanding pad's rotation weakens or stops when pressure is applied, it indicates excessive downward force. Random orbital sanders rely on eccentric motion for effective sanding. Applying too much pressure can hinder this motion and cause internal components to wear prematurely.
- Solution: Apply only moderate, appropriate pressure. Allow the tool's weight and speed to do the work. Move the sander gently over the surface.
- Recommendation: For optimal results and tool longevity, avoid pressing down too hard.
9. Specifications
| Feature | Specification |
|---|---|
| Brand | WORKPRO |
| Model | Random Orbital Sander |
| Power | 300W |
| Voltage | 100V (AC) |
| Max. No-Load Speed | 13000 RPM |
| Speed Adjustment | 6-stage (7000-13000 RPM) |
| Sanding Pad Diameter | 125mm |
| Dust Collection | Integrated Dust Box |
| Power Cord Length | 2m |
| Product Dimensions | 21.5 x 13 x 16.5 cm |
| Product Weight | 1.66 kg |
| UPC | 820909689256 |

Image 9.1: The sander highlighting its 2-meter power cord and approximate dimensions (14cm height, 12.5cm width, 23.5cm length).
10. Warranty and Support
This WORKPRO Random Orbital Sander comes with a 24-month warranty from the date of purchase. Please retain your proof of purchase for warranty claims.
For customer support, technical assistance, or warranty inquiries, please contact WORKPRO customer service through the retailer where the product was purchased or visit the official WORKPRO website.

