1. Introduction
This manual provides instructions for the installation, operation, and maintenance of your Generico 100-tooth motor belt, designed for various Necchi and Millepoint sewing machine models. Please read this manual carefully before attempting any installation or maintenance to ensure safe and correct usage.
2. Safety Information
- Always disconnect the sewing machine from the power supply before attempting any installation, maintenance, or repair.
- Wear appropriate personal protective equipment, such as gloves, if necessary.
- Ensure all tools are clean and in good condition to prevent damage to the machine or injury.
- Keep small parts away from children.
- If you are unsure about any step, consult a qualified technician.
3. Product Overview
The Generico 100-tooth motor belt is a replacement part for the motor drive system of compatible Necchi and Millepoint sewing machines. It ensures the smooth and efficient transfer of power from the motor to the machine's internal mechanisms.
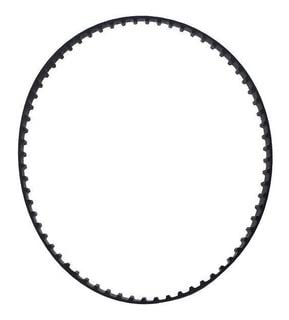
Image 1: Generico 100-tooth motor belt. This image shows the black rubber belt with visible teeth designed for motor power transmission in sewing machines.
3.1. Compatible Models
This motor belt is compatible with the following Necchi and Millepoint sewing machine models:
- Necchi: 203, 205, 207, 233, 242, 243, 244, 246, 247, 249, 260, 270, 274, 275, 282, 284, 296HD, 515, 516, 516 MK2, 517, 518, 518 MK2, 519, 520, 521, 527, 529, 540, 541, 544, 545, 556, 558, 559, 2003, 2005, 2007
- Millepoint: 233, 242, 243, 244, 246, 247, 249, 282, 284, 520 (machine with 18-point motor underneath), 521, 527, 529, 540, 541, 544, 545, 556
- Also compatible with FEMAC 520.
4. Setup (Installation)
The following steps outline a general procedure for replacing the motor belt. Specific machine designs may vary, so always refer to your sewing machine's original service manual if available.
- Disconnect Power: Ensure the sewing machine is unplugged from the electrical outlet.
- Access Motor Area: Depending on your machine model, you may need to remove a cover or tilt the machine to access the motor and belt area. Refer to your machine's manual for specific access instructions.
- Remove Old Belt: Carefully remove the old motor belt. This may involve loosening a motor mount screw to relieve tension, or simply rolling the belt off the pulleys. Inspect the old belt for wear patterns, which can indicate other issues.
- Clean Pulleys: Clean any dust, lint, or debris from the motor pulley and the machine's drive pulley. A clean surface ensures proper grip and extends belt life.
- Install New Belt: Place the new 100-tooth motor belt onto the smaller motor pulley first, then carefully stretch and roll it onto the larger drive pulley. Ensure the teeth of the belt align correctly with the grooves on both pulleys.
- Adjust Tension (if applicable): If your machine has an adjustable motor mount, adjust the motor position to achieve proper belt tension. The belt should be taut but not overly tight; a slight amount of play (about 1/4 inch or 6mm) when pressed in the middle is usually ideal. Over-tightening can strain the motor and bearings.
- Secure Components: Tighten any loosened screws or fasteners. Replace any covers removed earlier.
- Test: Plug in the machine and perform a brief test run at a slow speed to ensure the belt operates smoothly and quietly.
5. Operation Check
After installing the new motor belt, perform the following checks:
- Visual Inspection: Observe the belt as the machine runs. It should rotate smoothly without wobbling or slipping.
- Sound Check: Listen for any unusual noises, such as squealing, grinding, or thumping, which could indicate improper installation or tension.
- Functionality Test: Operate the sewing machine through its various speed settings and functions (e.g., needle up/down, reverse) to ensure consistent power delivery.
- Heat Check: After a few minutes of operation, carefully feel the motor and belt area (with the machine unplugged) for excessive heat, which could indicate friction or over-tightening.
6. Maintenance
Proper maintenance extends the life of your motor belt and sewing machine:
- Regular Inspection: Periodically inspect the belt for signs of wear, cracking, fraying, or stretching. Replace the belt if any damage is observed.
- Keep Clean: Keep the belt and pulleys free from dust, lint, oil, and grease. These can cause the belt to slip or degrade prematurely.
- Avoid Overloading: Do not force the sewing machine to sew through excessively thick materials or at speeds beyond its design, as this can put undue strain on the motor belt.
- Proper Storage: If the machine is stored for extended periods, ensure it is in a clean, dry environment away from extreme temperatures.
7. Troubleshooting
| Problem | Possible Cause | Solution |
|---|---|---|
| Belt slips or machine loses power | Belt too loose, worn out belt, oil/grease on belt/pulleys | Adjust belt tension, replace belt, clean belt and pulleys |
| Squealing noise from belt area | Belt too tight, belt slipping, worn belt | Adjust belt tension, clean belt/pulleys, replace belt |
| Machine runs sluggishly or inconsistently | Belt too loose, internal machine issue | Adjust belt tension, inspect other machine components (e.g., motor, gears) |
| Belt breaks prematurely | Over-tightening, defect, excessive strain, misaligned pulleys | Ensure proper tension, check pulley alignment, avoid overloading machine |
If troubleshooting steps do not resolve the issue, it is recommended to consult a professional sewing machine technician.
8. Specifications
- Product Type: Motor Belt
- Number of Teeth: 100
- Brand: Generico
- Manufacturer: SingerCT
- ASIN: B0BZT38BJF
- Compatibility: Necchi and Millepoint sewing machines (various models)
9. Warranty Information
Specific warranty information for this Generico product is not available in the provided product details. Please refer to the seller or manufacturer's website for any applicable warranty terms and conditions.
10. Customer Support
Customer support contact details are not available in the provided product information. For assistance, please contact the seller directly through the platform where the purchase was made.