
ALUSSO LIGHTING YDS-1
ALUSSO LIGHTING YDS-1 LED Flood Light with Motion Sensor and Remote Control User Manual
Model: YDS-1
1. Introduction
Thank you for choosing the ALUSSO LIGHTING YDS-1 LED Flood Light. This product is designed to provide efficient and versatile outdoor lighting with advanced features for enhanced security and convenience. Please read this manual thoroughly before installation and operation to ensure proper use and longevity of your device.
2. Safety Information
To reduce the risk of death, personal injury, or property damage from fire, electric shock, falling parts, cuts/abrasions, and other hazards, please read all warnings and instructions included with and on the fixture box and all fixture labels.
- Always turn off the power supply at the circuit breaker before installation or maintenance.
- Ensure proper grounding to avoid potential electric shock.
- Do not install near flammable materials or in explosive atmospheres.
- Consult a qualified electrician if you are unsure about the installation process.
- Keep the remote control out of reach of children.
3. Package Contents
Verify that all components are present and undamaged upon opening the package:
- 1 x ALUSSO LIGHTING YDS-1 LED Flood Light
- 1 x Remote Control
- 1 x Bag of Accessories (mounting hardware)
- 1 x User Manual
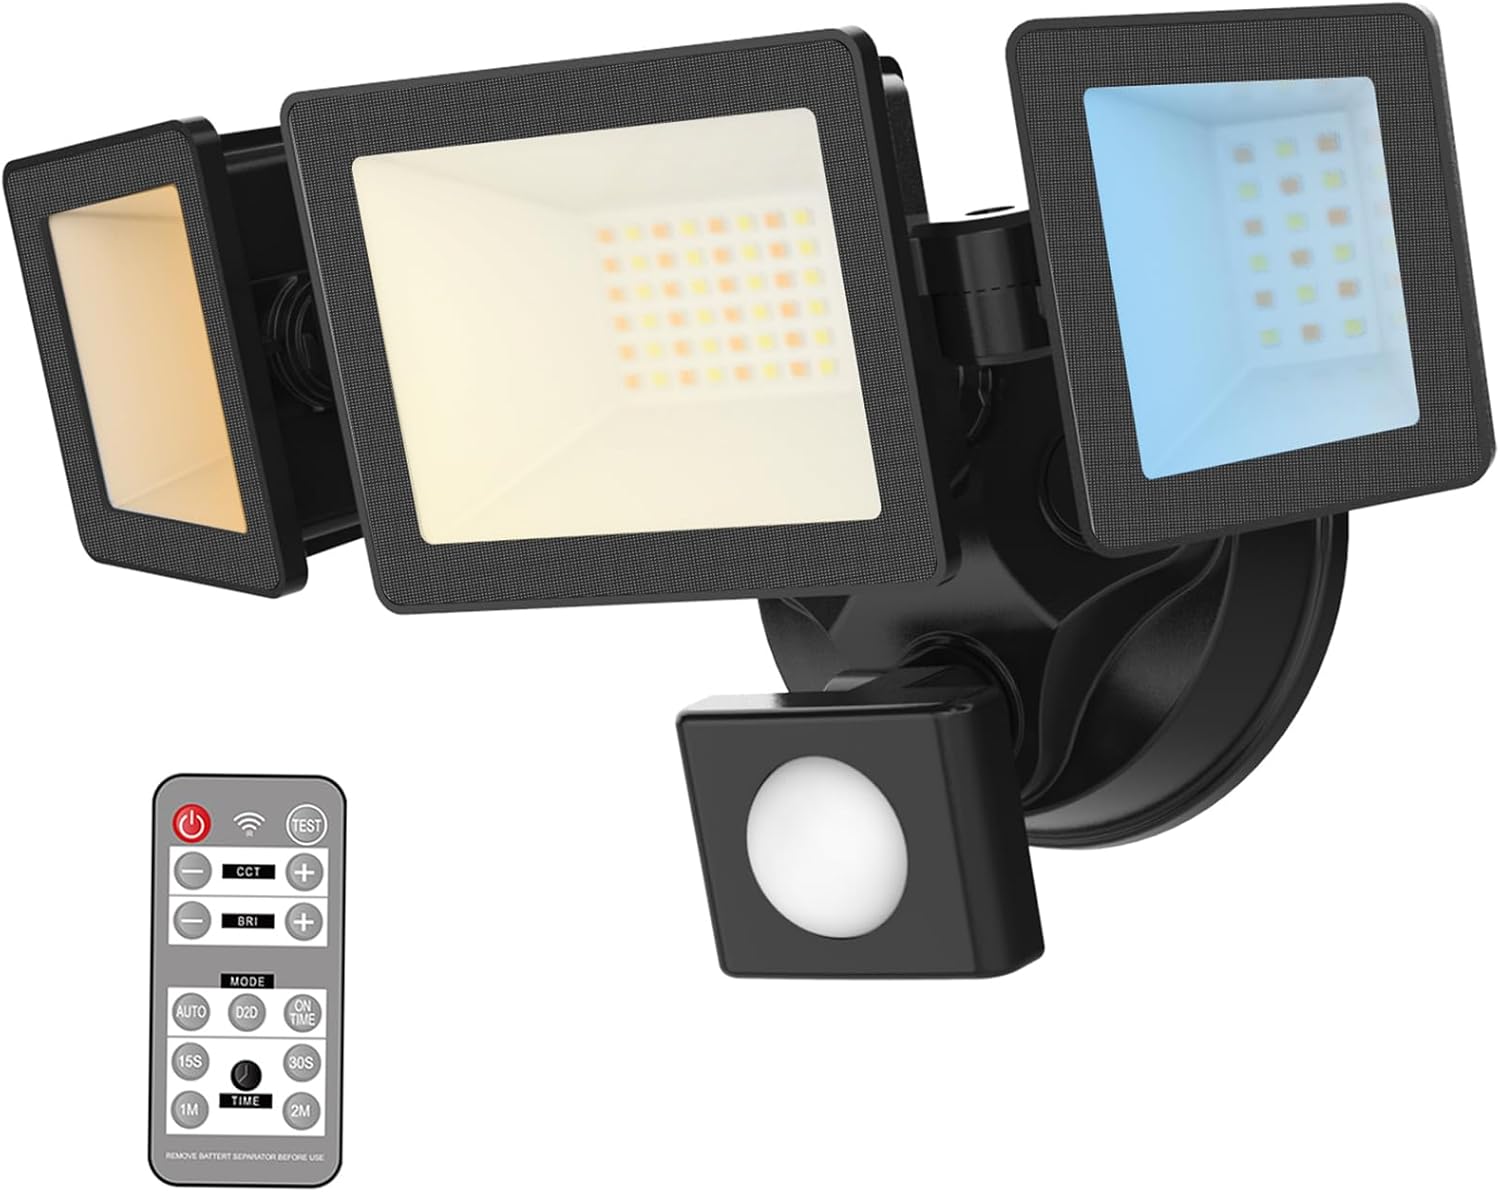
Image: The ALUSSO LIGHTING YDS-1 LED Flood Light with its three adjustable heads, motion sensor, and included remote control.
4. Specifications
| Feature | Specification |
|---|---|
| Model | YDS-1 |
| Wattage | 40W |
| Lumens | 3200LM |
| Color Temperature | 3000K-6000K (Adjustable) |
| IP Rating | IP65 Waterproof |
| Beam Angle | 270° |
| Voltage | 120V 60Hz |
| Material | Aluminum, Plastic |
| Control Method | Remote Control |
| Special Features | Adjustable Color Temperature, Dimmable, Energy Efficient, Motion Sensor, Waterproof |
5. Installation and Setup
5.1 Pre-Installation Checklist
- Ensure power is OFF at the circuit breaker.
- Gather necessary tools: screwdriver, wire strippers, ladder (if installing at height).
- Select a suitable mounting location (e.g., garage, yard, porch) that provides adequate coverage and is within reach of power.
5.2 Mounting the Fixture
- Turn off the main power supply at the circuit breaker.
- Attach the mounting bracket to the desired surface using the provided screws and anchors. Ensure the bracket is securely fastened.
- Connect the electrical wires (Live, Neutral, Ground) from your power supply to the corresponding wires on the flood light using the provided wire connectors. Ensure all connections are secure.
- Align the flood light fixture with the mounting bracket and secure it in place.
- Adjust the three LED heads and the motion sensor to your desired angles. The heads are designed to rotate freely but maintain position once set.

Image: A diagram illustrating the installation steps, including mounting the bracket, wiring connections, and adjusting the light heads and sensor.

Image: An illustration showing the dimensions of the flood light and the adjustable range of its three heads and motion sensor.
Video: An overview of the ALUSSO LIGHTING 40W 3200LM Security Light with Motion Sensor and Remote, demonstrating its features and components.
6. Operating Instructions
The ALUSSO LIGHTING YDS-1 is operated using the included remote control. Ensure the battery separator tab is removed from the remote before first use.
6.1 Remote Control Functions
Image: The remote control for the ALUSSO LIGHTING YDS-1, showing buttons for power, CCT (color temperature), BRI (brightness), mode selection (AUTO, D2D, ON TIME), and time settings (15S, 30S, 1M, 2M).
- Power Button (⏻): Turns the light ON/OFF.
- CCT (+/-): Adjusts the color temperature between 3000K (warm white) and 6000K (cool white).
- BRI (+/-): Adjusts the brightness (dimming function).
- MODE Buttons:
- AUTO (Motion Mode): Light turns on when movement is detected at night. Delay time can be selected.
- D2D (Dusk to Dawn Mode): Light automatically turns on after dusk and stays on until dawn.
- ON TIME (Always On Mode): Light remains on continuously. The motion sensor is inactive in this mode.
- TIME Buttons (15S, 30S, 1M, 2M): Sets the duration the light stays on after motion detection in AUTO mode.
- TEST Button: Used for testing the motion sensor and light functionality during setup.
6.2 Adjusting Color Temperature and Brightness
Use the CCT buttons on the remote to cycle through different color temperatures from warm white (3000K) to cool white (6000K). Use the BRI buttons to increase or decrease the light's brightness.

Image: An illustration demonstrating the adjustable color temperature feature of the flood light, ranging from 3000K warm white to 6000K cool white, controlled by the remote.

Image: An illustration showing the stepless dimming capability of the flood light, allowing brightness adjustment from 10% to 100% via the remote control.
6.3 Understanding Operating Modes

Image: A visual representation of the three operating modes: ON TIME (always on), AUTO (motion detection at night), and D2D (dusk to dawn).
- AUTO Mode: Ideal for security, the light activates only when motion is detected in low-light conditions. The duration can be customized.
- D2D Mode: Provides continuous illumination from dusk until dawn, suitable for general area lighting.
- ON TIME Mode: The light stays on constantly, regardless of ambient light or motion. This mode bypasses the motion sensor.
Video: A demonstration of the motion sensor functionality of the ALUSSO LIGHTING LED Flood Light, showing how it activates when motion is detected.
7. Maintenance
- Cleaning: Periodically clean the light fixture and motion sensor lens with a soft, damp cloth. Do not use abrasive cleaners or solvents.
- Inspection: Regularly check for any loose connections or damage to the wiring and housing.
- Bulb Replacement: The LED lights are integrated and not user-replaceable. The fixture is designed for long-term use.
8. Troubleshooting
| Problem | Possible Cause | Solution |
|---|---|---|
| Light does not turn on. | No power, loose wiring, faulty remote battery. | Check circuit breaker. Verify wiring connections. Replace remote battery. |
| Motion sensor not working. | Incorrect mode selected, sensor obstructed, sensitivity too low. | Ensure AUTO mode is selected. Clear obstructions from sensor. Use remote to adjust sensor settings. |
| Light stays on constantly in AUTO mode. | D2D or ON TIME mode selected, continuous motion detected. | Switch to AUTO mode. Check for constant movement in sensor's range. |
| Remote control not responding. | Battery depleted, remote too far from light, IR sensor obstructed. | Replace remote battery. Operate remote within close range (1-2ft). Ensure no obstructions between remote and light's IR sensor. |
9. Warranty and Support
ALUSSO LIGHTING offers a 2-year return and exchange policy for quality issues. If you encounter any problems or have questions regarding your YDS-1 LED Flood Light, please do not hesitate to contact our customer support team. We aim to respond within 24 hours.
For support, please visit the ALUSSO LIGHTING Store on Amazon or refer to the contact information provided in your purchase documentation.
Ask a question about this manual
Ask about setup, troubleshooting, compatibility, parts, safety, or missing instructions. Manuals+ will review the question and use this page’s manual context to help answer it.