Introduction
This manual provides instructions for the proper use and maintenance of your Soleilwear Mini Electric Screwdriver 52-in-1 kit. This precision tool is designed for assembling and disassembling various electronic products and small devices. Please read this manual thoroughly before operation to ensure safe and efficient use.
Safety Information
- Keep the tool away from water and moisture.
- Do not use the screwdriver for tasks beyond its intended precision repair scope.
- Store the tool and bits out of reach of children.
- Ensure the correct bit size is used for each screw to prevent damage to the screw head or bit.
- Avoid excessive force when using the electric mode to prevent stripping screws or damaging components.
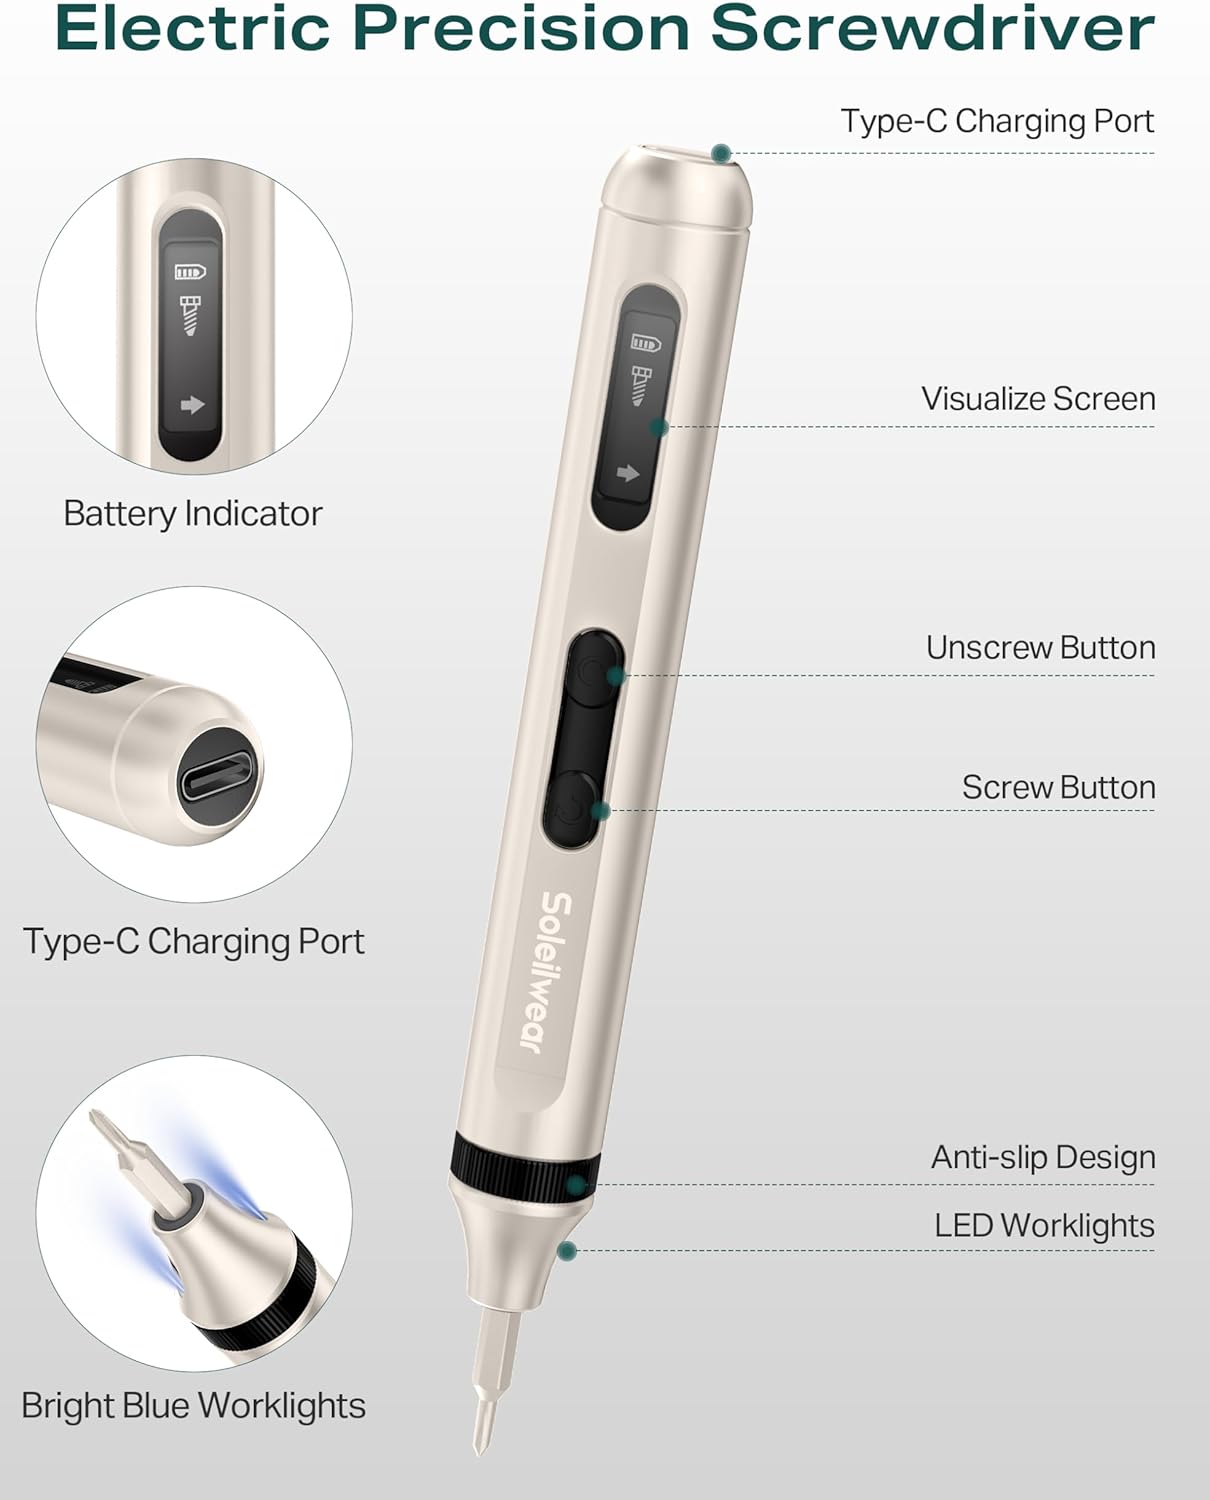
Product Overview and Components
The Soleilwear Mini Electric Screwdriver kit includes the following components:
- 1 Electric Screwdriver Handle
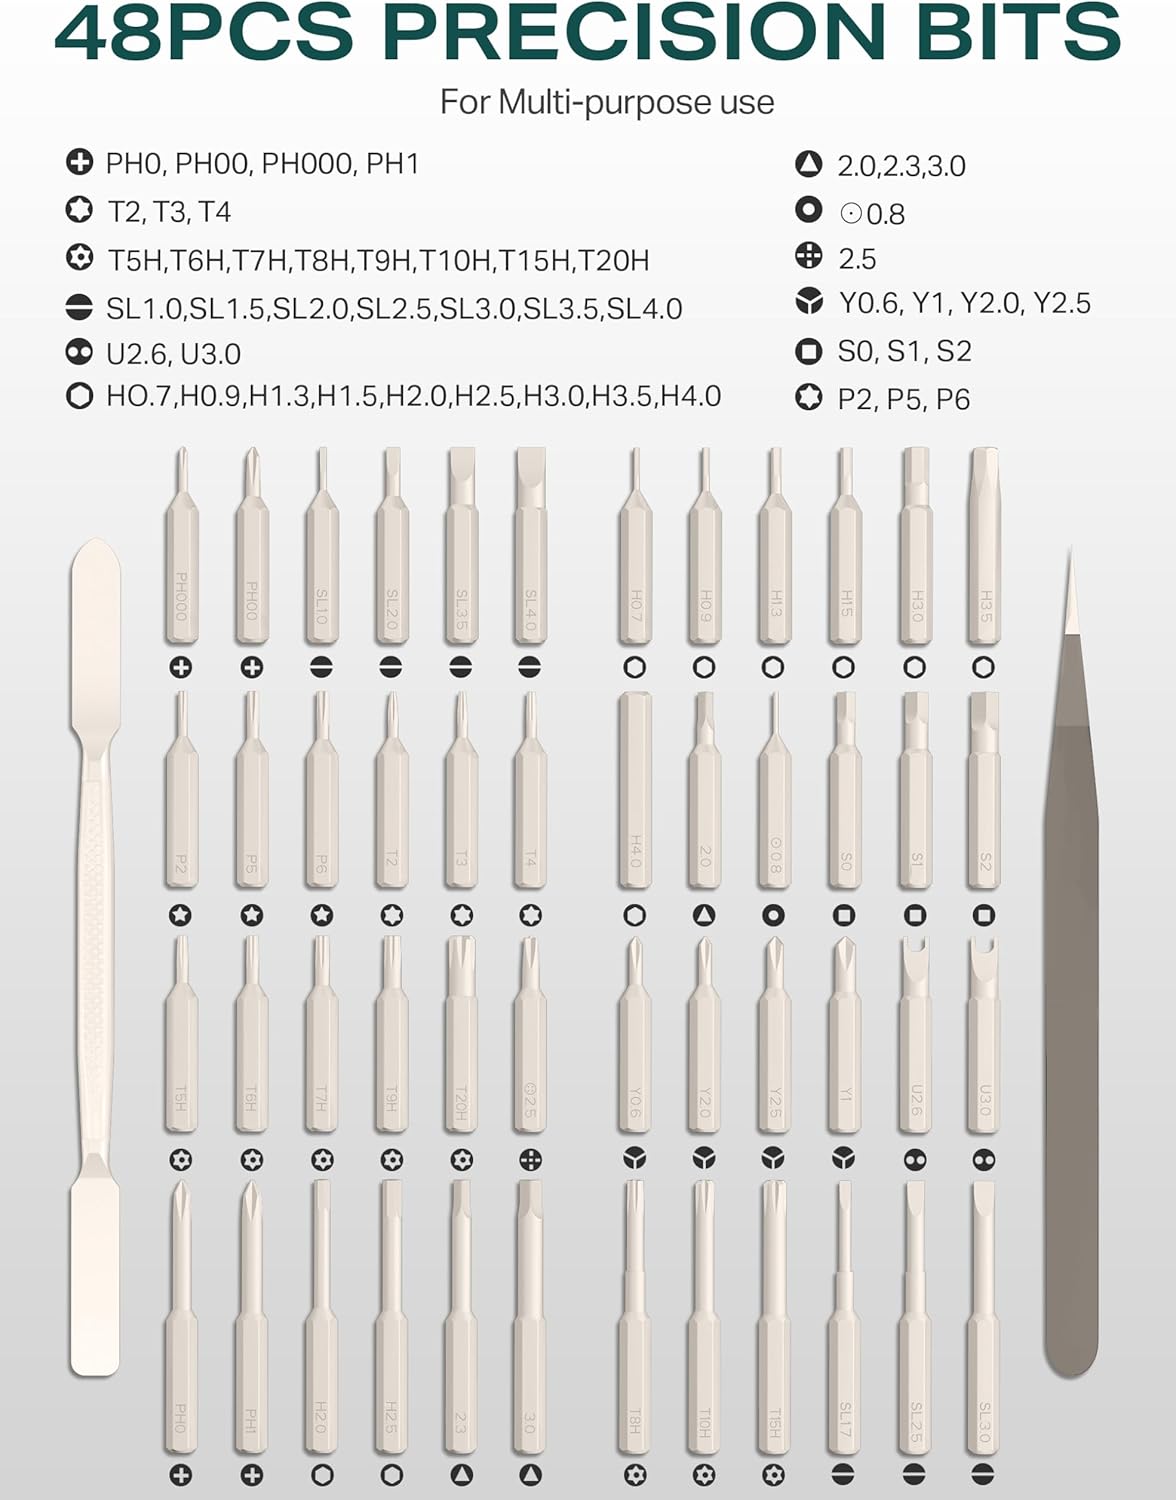
- 48 S2 Steel Precision Bits
- 1 Tweezers
- 1 Pry Tool
- 1 USB Type-C Charging Cable
Setup
Charging the Screwdriver
Before initial use, fully charge the screwdriver. Connect the provided USB Type-C cable to the charging port on the screwdriver and a compatible USB-A power source. A full charge takes approximately 45 minutes. The battery indicator on the visual screen will show the charging status.
- The screwdriver is powered by a 350 mAh rechargeable lithium battery.
- It supports USB-A to USB-C charging only; USB-C PD chargers are not supported.

Installing and Storing Bits
The bit storage case features a push-up design for easy access. All bits and the screwdriver itself are magnetic, ensuring secure placement within the case and preventing bits from falling out.
- To open the case, gently push the top cover.
- Select the desired bit and insert it firmly into the screwdriver's magnetic chuck.
- To enhance the magnetism of a screw or bit, place it in the designated magnetization zone within the case.
- After use, return the bit to its corresponding slot in the magnetic storage case.

Operating Instructions
Electric Mode Operation
The screwdriver offers both electric and manual modes. The electric mode provides efficient and precise fastening.
- Ensure the correct bit is securely installed.
- Position the bit onto the screw head.
- To screw in, press the 'Screw' button (typically indicated by a forward arrow).
- To unscrew, press the 'Unscrew' button (typically indicated by a backward arrow).
- The electric mode operates at 200 r/min with a torque of 0.3 N.m.

Manual Mode Operation
For screws requiring higher torque or for initial loosening/final tightening, the manual mode can be used.
- Simply twist the screwdriver handle manually.
- The manual torque capacity is up to 3.5 N.m.
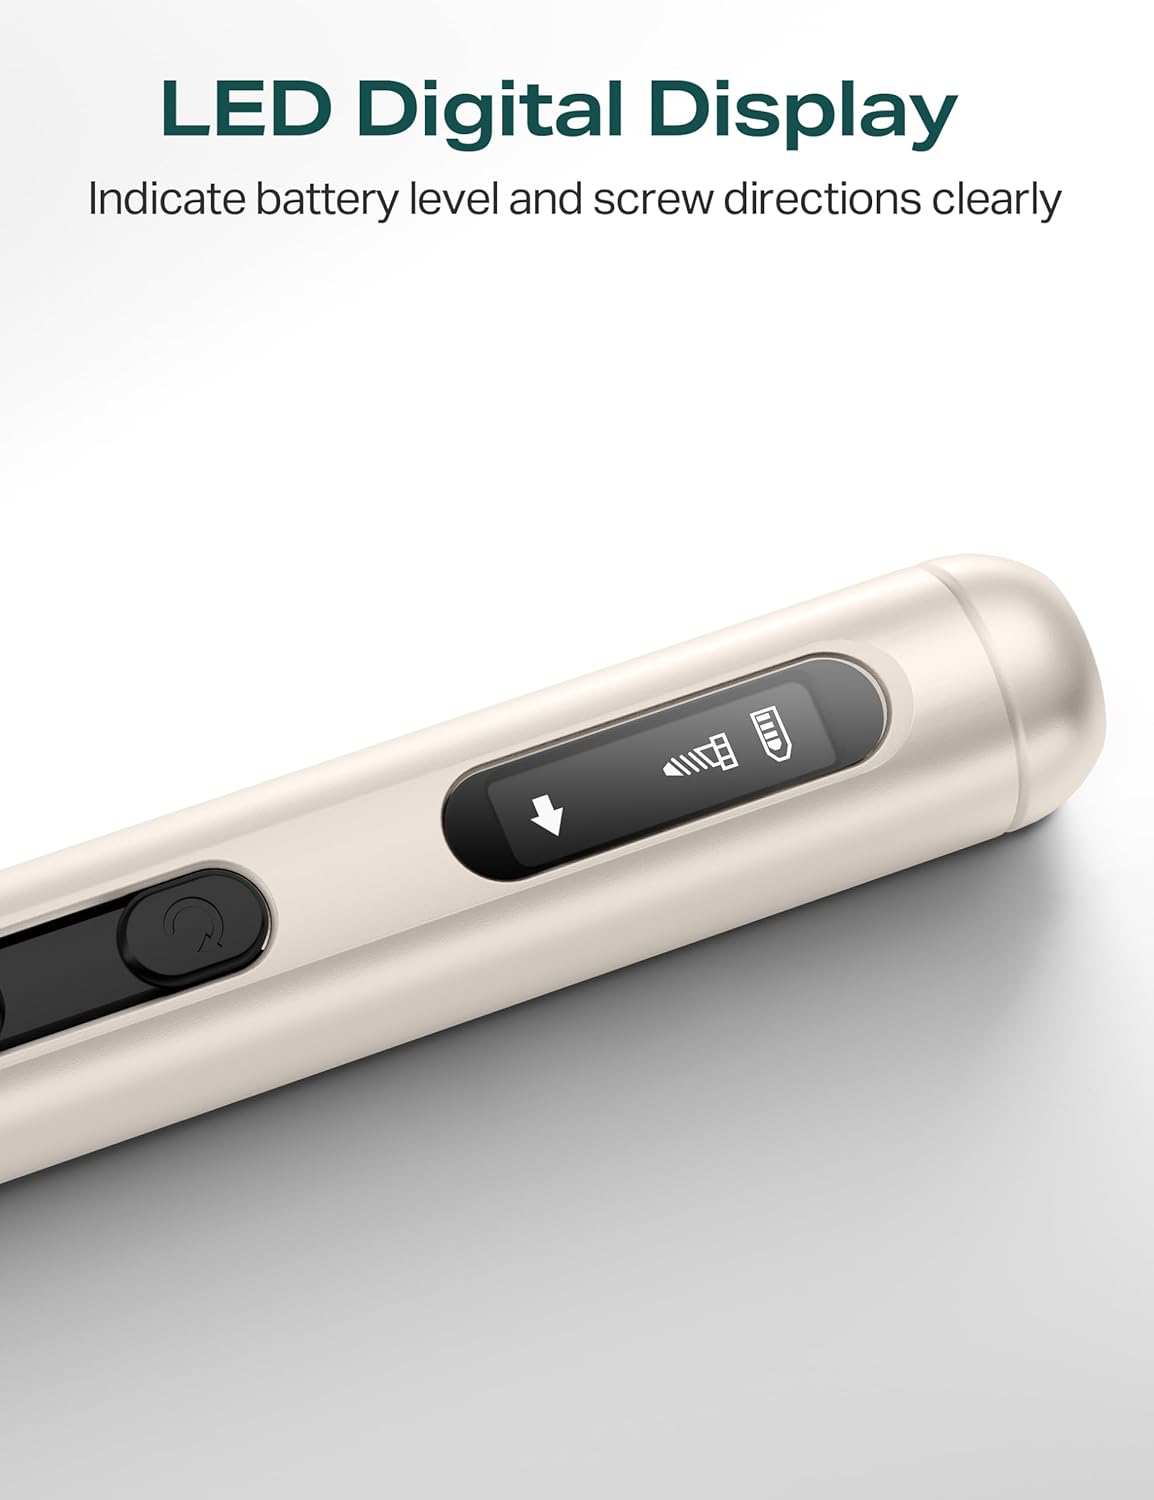
LED Digital Display
The integrated LED digital display provides clear information during operation.
- It indicates the current battery level.
- It shows the screw direction (forward or reverse).
Maintenance
Cleaning
Regular cleaning helps maintain the tool's performance and longevity.
- Wipe the screwdriver handle and bits with a clean, dry cloth after each use.
- Do not use abrasive cleaners or solvents.
Storage
Proper storage protects the tool and its components.
- Always store the screwdriver and bits in their magnetic storage case when not in use.
- Store in a cool, dry place, away from direct sunlight and extreme temperatures.
- Ensure the battery is partially charged (around 50%) before long-term storage to preserve battery health.
Troubleshooting
If you encounter issues with your screwdriver, refer to the following common problems and solutions:
- Screwdriver not turning on or operating: Ensure the battery is fully charged. If the issue persists, contact customer support.
- Low torque in electric mode: For very tight screws, use the manual mode to apply more force (up to 3.5 N.m). Ensure the bit is fully engaged with the screw head.
- Bits slipping or stripping screws: Verify that you are using the correct bit size and type for the screw. Apply gentle, consistent pressure.
- Battery not charging: Check the USB-C cable and power source. Ensure you are using a USB-A to USB-C charger, as USB-C PD chargers are not compatible.
Specifications
| Model Number | JD006 |
|---|---|
| Brand | Soleilwear |
| Battery Type | 1 Lithium-polymer (included) |
| Battery Capacity | 350 mAh |
| Charging Time | Approx. 45 minutes |
| Electric Torque | 0.3 N.m |
| Manual Torque | 3.5 N.m |
| No-Load Speed | 200 r/min |
| Voltage | 5 Volts |
| Dimensions (L x W x H) | 17.2 x 7.19 x 2.21 cm |
| Weight | 430.91 Grams |
| Material | Tool Steel |
| Color | Grey |
| Special Features | Electric, Portable, Magnetic Bit Holder, Anti-Slip Design, LED Worklights, Digital Display |
| Recommended Use | Precision repair of small devices (watches, phones, drones, laptops, etc.). Not suitable for PCs, furniture, or larger appliances. |
Warranty and Support
Specific warranty information is not provided in this manual. For warranty details, technical support, or service inquiries, please refer to the product packaging or contact the retailer where the product was purchased.