1. Introduction
This manual provides detailed instructions for the installation, operation, and maintenance of your TERRAMASTER D6-320 External Hard Drive Enclosure. Please read this manual carefully before using the device to ensure proper functionality and data safety. The D6-320 is a high-performance, 6-bay Direct Attached Storage (DAS) solution designed for expanding storage capacity for various operating systems.
2. Product Overview
The TERRAMASTER D6-320 is engineered for speed, capacity, and reliability, making it an ideal solution for professionals and enthusiasts requiring extensive and fast external storage.
Key Features:
- High-Speed Data Transfer: Utilizes the USB 3.2 Gen2 protocol, offering data transfer speeds up to 10Gbps. Achieve read/write speeds of up to 1,030MB/s with 6 HDDs installed, or 510MB/s with a single SSD.
- Super-large Storage Space: Supports up to six 3.5" or 2.5" SATA HDDs/SSDs, with a maximum capacity of 22TB per drive, totaling up to 132TB (22TB x 6). Note: The D6-320 operates with individual disks and does not support hardware RAID arrays internally.
- Plug and Play, Highly Compatible: Driver-free operation across MAC, Windows, and Linux operating systems. Features a USB Type-C interface and is compatible with USB 3.0, USB 3.1, USB 3.2, Thunderbolt 3, and Thunderbolt 4.
- Hot Swappable: Allows for the replacement of hard disks without powering off the device, enhancing convenience and efficiency for data management.
- Better Heat Dissipation: Equipped with an intelligent temperature-controlled, low-noise fan that automatically adjusts its speed based on hard disk temperature, ensuring optimal operating conditions and longevity.

Figure 1: TERRAMASTER D6-320 showcasing its robust metal body and efficient cooling system.
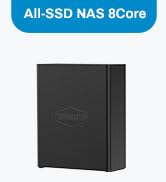
Figure 2: Rear view of the D6-320, emphasizing the USB 3.2 Gen2 10Gbps Type-C interface and dual fans.
3. What's in the Box
Upon unboxing your TERRAMASTER D6-320, you should find the following items:
- TERRAMASTER D6-320 External Hard Drive Enclosure (Diskless)
- Power Adapter and Power Cable
- USB Type-C to Type-C Cable
- Screws for 2.5" SSD/HDD installation
- Quick Installation Guide
- Warranty Card
- Drive Bay Labels
4. Setup
4.1. Installing Hard Drives
- Gently press the release lever on each drive bay to open it.
- Slide your 3.5" SATA HDD directly into the bay until it clicks into place. For 2.5" SATA SSDs/HDDs, secure them to the drive tray using the provided screws before sliding the tray into the bay.
- Close the drive bay lever to secure the drive.

Figure 3: Tool-free hard drive installation into the D6-320 bays.
4.2. Connecting to Your Computer
- Connect the power adapter to the D6-320 and plug it into a power outlet.
- Use the provided USB Type-C to Type-C cable to connect the D6-320 to your computer's USB-C port.
- Power on the D6-320 using the power button on the front panel. Your computer should automatically detect the drives.

Figure 4: D6-320 connected to a computer, illustrating its plug-and-play compatibility.
5. Operation
5.1. Data Transfer
The D6-320 leverages USB 3.2 Gen2 for high-speed data transfer. Ensure your computer's USB-C port supports USB 3.2 Gen2 or Thunderbolt for optimal performance. Data transfer speeds will vary based on the type and number of drives installed, as well as your computer's capabilities.

Figure 5: High-speed data transfer capabilities of the D6-320.
5.2. Hot Swapping Drives
The D6-320 supports hot swapping. This means you can replace or add hard drives without needing to power down the enclosure or your computer. Simply open the bay, remove/insert the drive, and close the bay. The system will recognize the change automatically.

Figure 6: Hot swappable drive bays for convenient data management.
5.3. Intelligent Disk Sleep
To conserve power and extend drive lifespan, the D6-320 features an intelligent disk sleep function. Drives will automatically enter a low-power sleep mode when inactive, hibernating alongside your computer's operating system.

Figure 7: Intelligent Disk Sleep feature for power efficiency.
6. Maintenance
6.1. Heat Dissipation
The D6-320 is designed with an intelligent temperature-controlled fan system. The fans automatically adjust their speed based on the internal temperature of the hard disks, ensuring efficient heat dissipation and maintaining optimal operating temperatures for your drives. Regularly ensure that the fan vents on the rear of the enclosure are not obstructed to allow for proper airflow.

Figure 8: Intelligent fan system for effective heat dissipation.
7. Troubleshooting
If you encounter any issues with your TERRAMASTER D6-320, please consider the following common solutions:
- Device Not Detected: Ensure all cables (power and USB) are securely connected. Try a different USB port or cable. Verify the power button is pressed.
- Drive Not Recognized: Check if the hard drive is properly seated in its bay. Ensure the drive is formatted and partitioned correctly for your operating system.
- Slow Transfer Speeds: Confirm your computer's USB-C port supports USB 3.2 Gen2 or Thunderbolt. Ensure you are using the provided high-speed USB-C cable. Performance can also be affected by the type and health of the installed drives.
- Overheating: Ensure the fan vents are clear of obstructions. Operate the device in a well-ventilated area.
For further assistance, please refer to the support section of the TERRAMASTER official website or contact customer support.
8. Specifications
| Feature | Detail |
|---|---|
| Model Number | D6-320 |
| Item Weight | 4.1 Kilograms (9.02 pounds) |
| Product Dimensions | 9 x 5 x 9 inches (8.58"L x 5.12"W x 8.9"H) |
| Compatible Devices | Windows, Mac, Linux |
| Hard Disk Form Factor | 3.5 Inches, 2.5 Inches (SATA HDD/SSD) |
| Max Number of Supported Devices | 6 (individual disks) |
| Data Transfer Rate | 10 Gigabits Per Second (USB 3.2 Gen 2) |
| Connectivity Technology | SATA, Thunderbolt, USB |
| Hardware Interface | USB 3.2 Gen 2 |
| Material | Metal |
9. Warranty and Support
TERRAMASTER products come with a standard warranty. Users who register their product on the official TERRAMASTER website (www.terra-master.com) can enjoy a value-added extension of their warranty for six months.
Support Resources:
- Official Website: www.terra-master.com
- Support Page: start.terra-master.com
- Email Support: support@terra-master.com, sales@terra-master.com
- Facebook: @terramasterofficial
- Skype: terramaster-support
10. Official Product Video
Video 1: Official overview of the TERRAMASTER D6-320 USB 3.2 10Gbps 6-Bay USB Storage. This video provides a visual guide to the product's features and design.