1. Introduction and Overview
This manual provides instructions for the installation, operation, and maintenance of your Bewinner M5 Electric Bicycle LCD Display Meter. This universal display is designed for electric bicycles and scooters, compatible with 24V, 36V, 48V, and 60V systems.
The M5 display serves as a central control panel, providing essential information such as speed, battery level, and trip distance. Its robust and waterproof design ensures reliable performance in various weather conditions.

Image 1.1: The Bewinner M5 LCD Display Meter, illustrating its clear interface with speed, battery, and trip information.

Image 1.2: The M5 display integrated onto an electric bicycle, highlighting its practical application.
2. Setup and Installation
Before installation, ensure your electric bicycle or scooter uses a controller compatible with Communication Protocol No. 2. Incompatibility with this protocol will prevent the display from functioning correctly.
2.1 Package Contents
- 1 x Bewinner M5 Electric Bicycle LCD Display Meter
- 1 x Instruction Manual (this document)
2.2 Mounting the Display
The M5 display features a handlebar mounting bracket. It supports mounting openings of 31.8 mm or 22.2 mm, making it suitable for various handlebar sizes. Choose the appropriate mounting position on your handlebar for optimal visibility and access to control buttons.
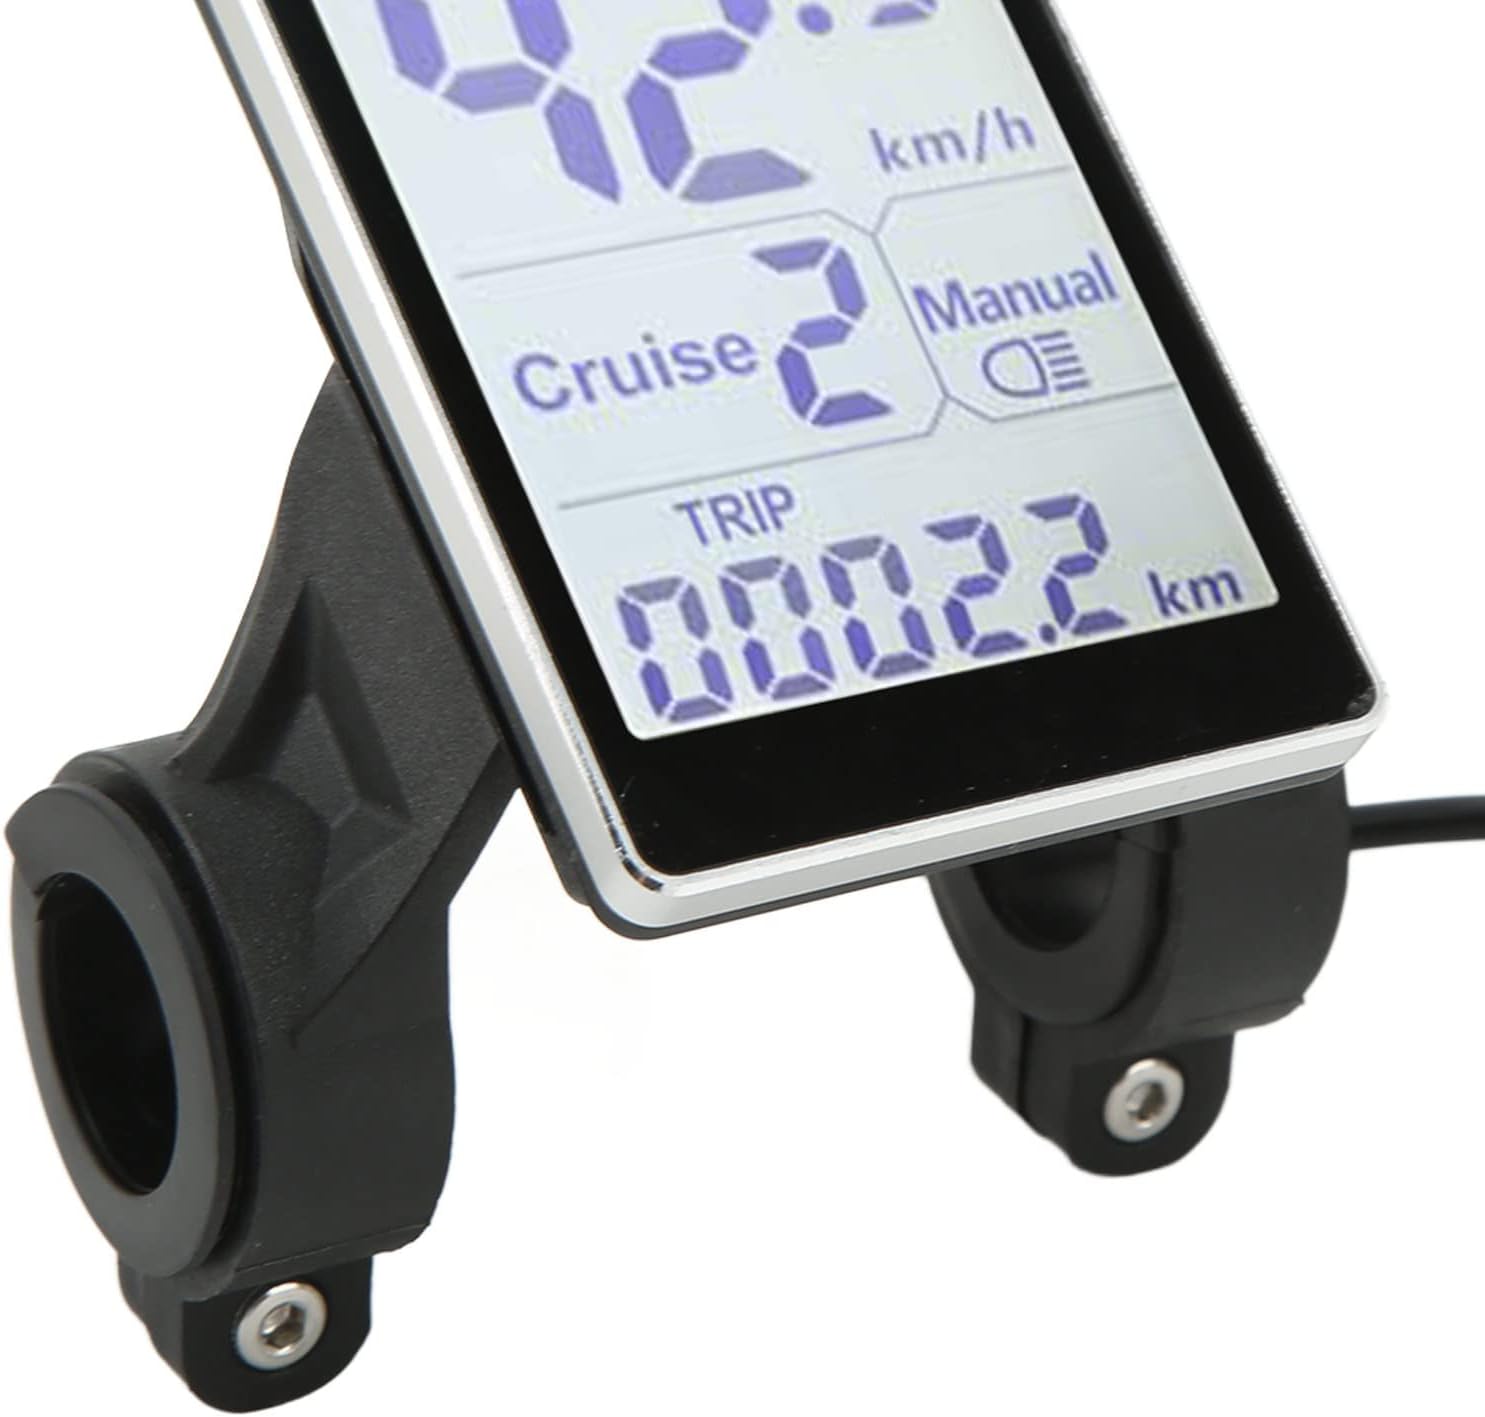
Image 2.1: Detail of the display's mounting bracket, designed for secure attachment to handlebars.
2.3 Electrical Connection
Connect the display's cable to your electric bicycle's controller. Ensure the connection is secure and the green connector is properly seated. The display is designed for 24V, 36V, 48V, and 60V systems, with a default labeling of 36V.
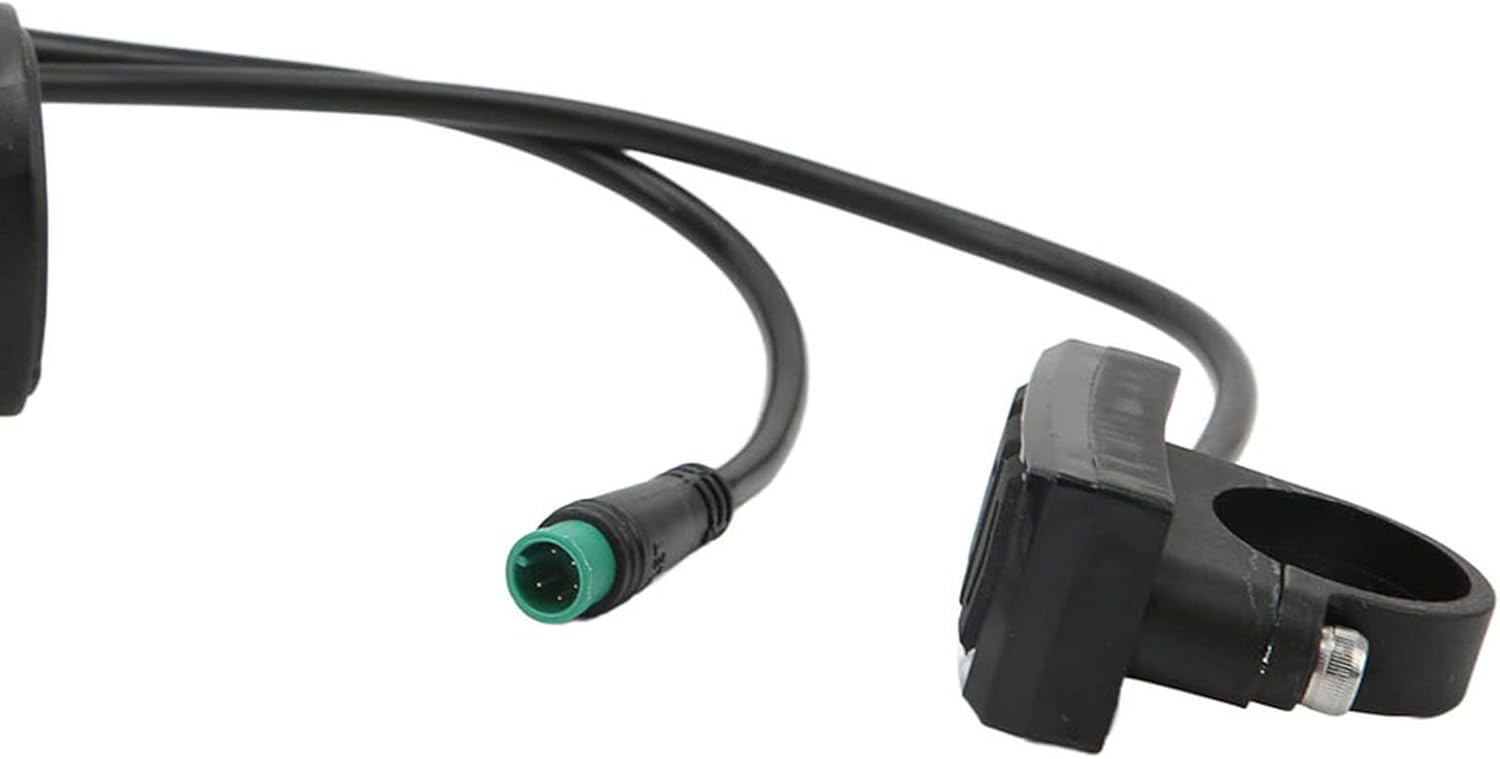
Image 2.2: The electrical connector and integrated control buttons, crucial for connecting and operating the display.

Image 2.3: Rear view of the display, illustrating the cable entry points and voltage compatibility label.
3. Operating Instructions
The M5 display features intuitive button controls for various functions. While specific button functions may vary slightly based on your e-bike's controller, the general operations are as follows:
3.1 Power On/Off
Press and hold the power button (typically the middle button on the control pad) to turn the display on or off. The screen will illuminate and show current data upon activation.
3.2 Display Information
Once powered on, the display will show:
- Speed: Current riding speed (km/h).
- Energy Bar: Visual representation of battery charge level.
- Cruise: Indicates cruise control status (if available and active).
- Manual/Light Icon: Indicates headlight status (on/off).
- TRIP: Current trip distance.
3.3 Mode Selection and Settings
Use the up and down buttons on the control pad to navigate through different display modes or adjust settings. Common adjustable settings may include:
- Assistance level (PAS).
- Unit conversion (e.g., km/h to mph, if supported).
- Headlight control.
Refer to your e-bike's main controller manual for detailed instructions on specific settings and advanced functions.
4. Maintenance
The Bewinner M5 LCD Display Meter is designed for durability and low maintenance.
4.1 Cleaning
The display features a waterproof design, allowing it to be used in rainy conditions without fear of damage. To clean the display, wipe it with a soft, damp cloth. Avoid using abrasive cleaners or solvents that could damage the screen or casing.
4.2 Storage
When not in use for extended periods, store your electric bicycle or scooter in a dry, cool place. Ensure the display is clean and free from moisture.
4.3 Cable and Interface Inspection
Periodically inspect the cables and interfaces for any signs of wear, damage, or loose connections. The wires and interfaces are designed to be durable, contributing to a low failure rate over long-term use.
5. Troubleshooting
If you encounter issues with your Bewinner M5 LCD Display Meter, refer to the following common troubleshooting steps:
5.1 Display Not Powering On
- Check Battery: Ensure your e-bike's battery is charged and properly connected.
- Check Connections: Verify that all cables, especially the main power cable to the display, are securely connected.
- Controller Compatibility: The display requires a controller that uses Communication Protocol No. 2. If your controller uses a different protocol, the display will not be compatible and will not function.
5.2 Incorrect Readings or Malfunctions
- Loose Connections: Inspect all electrical connections for looseness or corrosion.
- Sensor Issues: If speed or distance readings are incorrect, check the speed sensor on your e-bike wheel for proper alignment and damage.
- Environmental Factors: Extreme temperatures or strong electromagnetic interference can sometimes affect electronic displays.
5.3 Display Damage
If the display is physically damaged or shows persistent errors after troubleshooting, it may require replacement. Contact Bewinner customer support or your retailer for assistance.
6. Specifications
| Feature | Detail |
|---|---|
| Product Type | Electric Bicycle LCD Display Meter |
| Material | ABS |
| Voltage Compatibility | 24V, 36V, 48V, 60V (Universal, default labeled 36V) |
| Communication Protocol | Protocol No. 2 (Requires compatible controller) |
| Mounting Opening | 31.8 mm, 22.2 mm (Optional) |
| Display Type | LCD |
| Interface Input | Buttons |
| Waterproof Design | Yes |
| Dimensions (Package) | 13 x 10 x 8 cm |
| Weight (Package) | 190 g |
| Model Number | Bewinneruo02rnez15 |
7. Warranty and Support
For warranty information and customer support, please refer to the documentation provided at the time of purchase or contact Bewinner directly through their official channels. Warranty terms typically cover manufacturing defects for a specified period.
If you require technical assistance or have questions not covered in this manual, please reach out to the seller or manufacturer for further guidance.


