1. Introduction
This manual provides detailed instructions for assembling the XBERSTAR DIY 3S 7P 18650 Li-ion Battery Case Kit. This kit allows you to construct a 3-series, 7-parallel (3S7P) 18650 lithium-ion battery pack, suitable for various applications requiring a 12V power source. Please read all instructions carefully before beginning assembly to ensure safe and correct operation.
2. Product Components
The XBERSTAR DIY Battery Kit includes the following components:
- 12V Box (Empty): One green plastic enclosure for the assembled battery pack.
- 3x7 18650 Bracket Holder: Two pieces of 18650 battery holders, designed to accommodate 21 individual 18650 cells in a 3S7P configuration.
- Welding Nickel Strips: Four strips of nickel for connecting the 18650 cells.
- 3S 40A Balance BMS: One Battery Management System board for 3-series lithium-ion batteries, rated for up to 40A, providing balancing and protection functions.
- Battery Insulators: Red adhesive rings for insulating the positive terminals of 18650 cells (as shown in Figure 2.2).
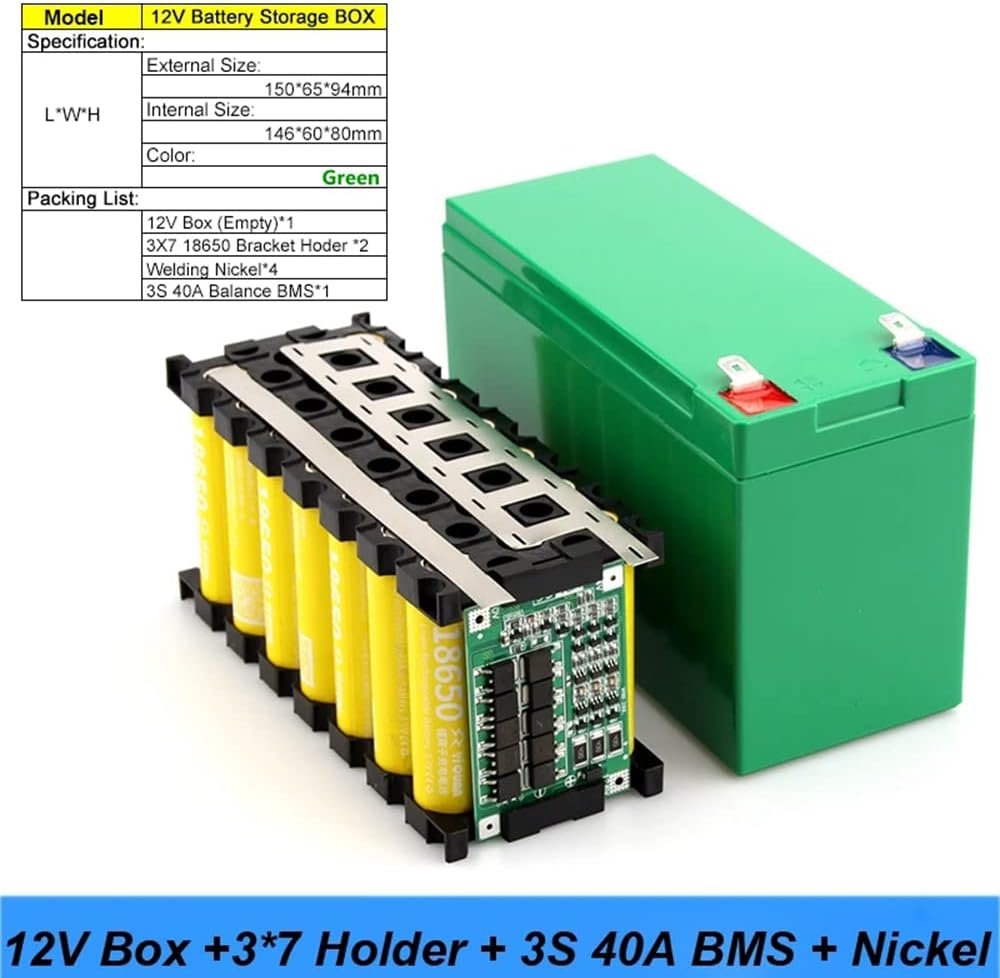
Figure 2.1: All components included in the XBERSTAR DIY Battery Kit. This image displays the green empty battery box, two 3x7 18650 cell holders, four nickel welding strips, and the 3S 40A Balance BMS board.

Figure 2.2: Red adhesive rings, typically used as insulators for the positive terminals of 18650 battery cells to prevent short circuits.
3. Setup and Assembly Instructions
Important Safety Note: Assembling a lithium-ion battery pack requires careful attention to polarity and connections. Incorrect assembly can lead to short circuits, overheating, fire, or explosion. This process requires a spot welder. If you are not experienced with battery pack assembly and spot welding, seek professional assistance.
- Prepare 18650 Cells: Ensure you have 21 high-quality 18650 lithium-ion cells. It is recommended to use cells of the same brand, model, and state of charge for optimal performance and safety. Apply the red adhesive insulator rings (if included) to the positive terminals of each 18650 cell.
- Insert Cells into Holders: Carefully insert the 21 18650 cells into the two 3x7 bracket holders. Pay close attention to the polarity markings on the holders and cells to ensure correct orientation (positive to positive, negative to negative). The holders are designed to create a 3S7P configuration.
- Spot Welding Nickel Strips: Use a spot welder to connect the cells using the provided nickel strips. Follow the 3S7P wiring diagram for series and parallel connections. Ensure strong, consistent welds.

Figure 3.1: Illustration of welding positions for connecting 18650 cells with nickel strips and the BMS. Ensure welding points are precise and do not short-circuit other components.
- Connect BMS Board: Solder the 3S 40A Balance BMS board to the battery pack according to its specific wiring diagram. This typically involves connecting the B- (negative battery terminal), B1, B2, and B+ (positive battery terminal) balance wires, as well as the P- (load/charge negative) and P+ (load/charge positive) terminals. Refer to the BMS manufacturer's specific wiring instructions for accurate connections.
- Test Battery Pack: Before enclosing, carefully test the voltage of the assembled battery pack and individual cell groups to ensure correct assembly and functionality of the BMS. The total voltage for a 3S pack should be approximately 12.6V when fully charged.
- Enclose in Case: Once the battery pack is assembled, tested, and verified, carefully place it into the green 12V battery box. Ensure all wires are properly routed and secured to prevent pinching or damage. Close the case securely.
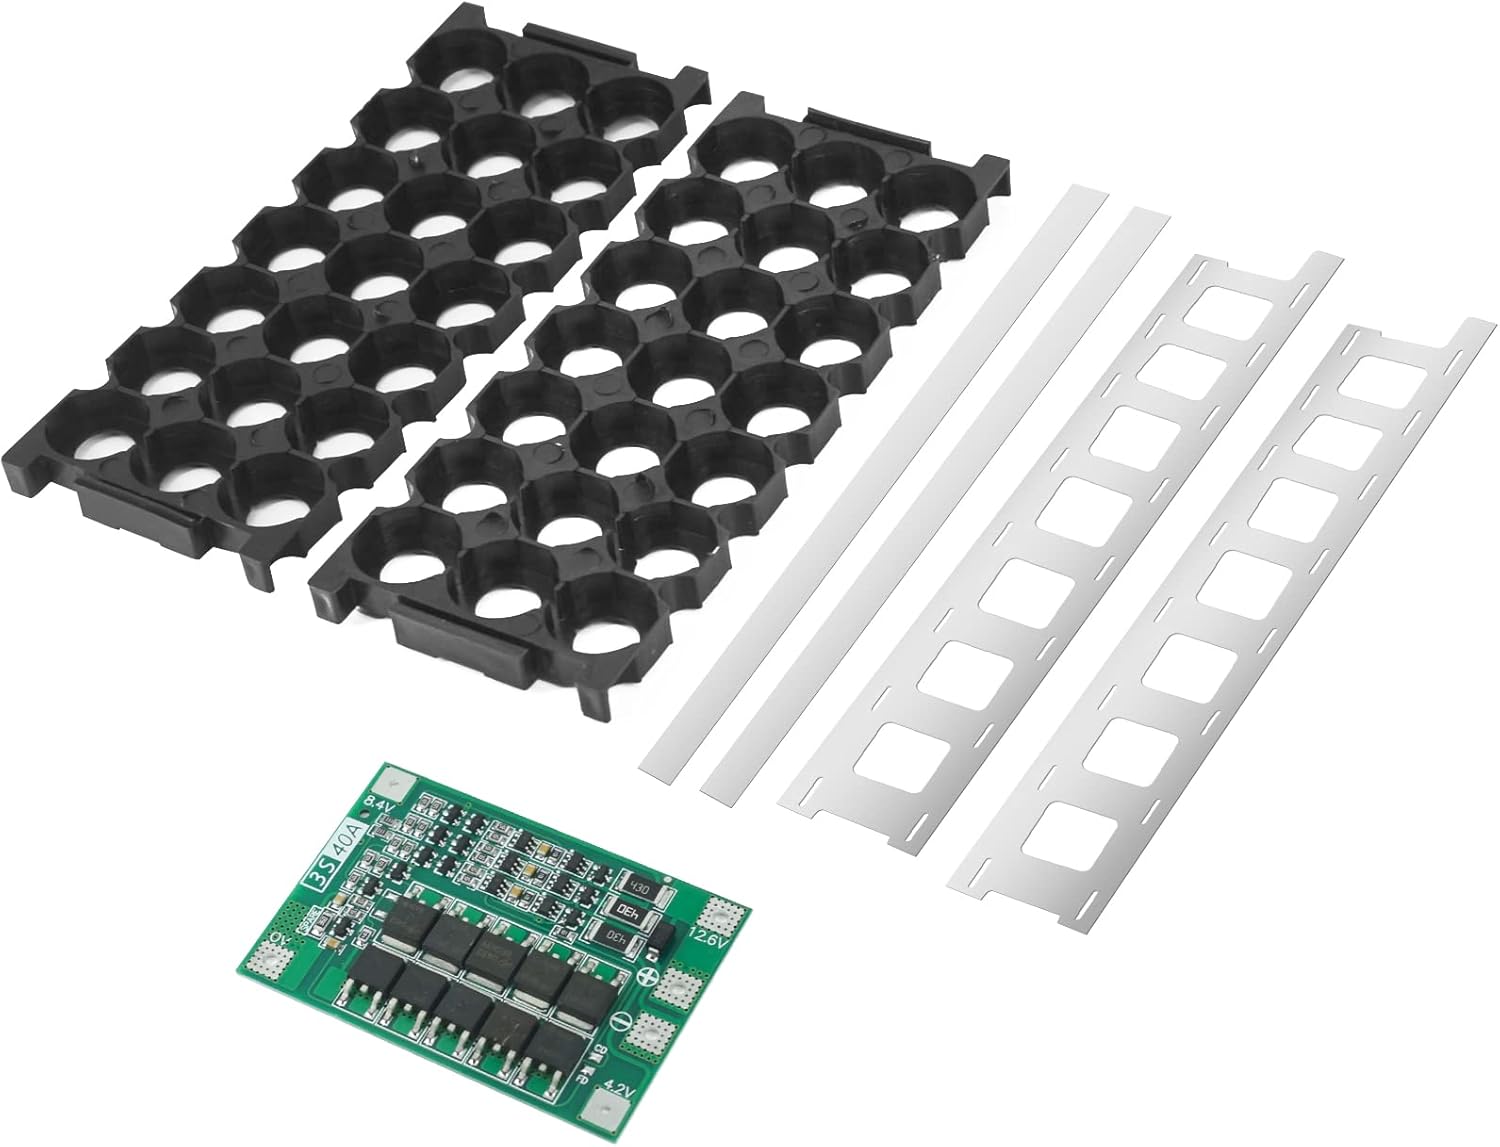
Figure 3.2: The fully assembled 3S7P 18650 battery pack, including the BMS, housed within the green 12V battery storage box.
4. Operating Instructions
Once assembled, the 3S7P 18650 battery pack functions as a 12V power source. Connect your load or charging device to the designated output terminals of the battery case. The integrated BMS will manage charging, discharging, and balancing of the cells, providing protection against overcharge, over-discharge, overcurrent, and short circuits.
- Charging: Use a compatible 3S (12.6V) lithium-ion battery charger. Ensure the charger's current rating is appropriate for your battery pack's capacity and the BMS's maximum charging current.
- Discharging: Connect your device to the output terminals. Do not exceed the 40A continuous discharge current rating of the BMS.
- Storage: For long-term storage, charge the battery pack to approximately 50-60% of its capacity (around 3.7V-3.8V per cell, or 11.1V-11.4V for the pack) and store in a cool, dry place away from direct sunlight.
5. Maintenance
Proper maintenance ensures the longevity and safety of your battery pack:
- Regularly inspect the battery case for any signs of damage, swelling, or leakage.
- Avoid exposing the battery pack to extreme temperatures, direct sunlight, or moisture.
- Do not attempt to open the sealed battery case once assembled, unless for repair by a qualified technician.
- Always use a charger specifically designed for 3S lithium-ion batteries.
6. Troubleshooting
If you encounter issues with your assembled battery pack, consider the following:
- No Output Voltage: Check all connections, especially to the BMS. Ensure the BMS has not triggered a protection mode (e.g., due to over-discharge or short circuit). A brief connection to a charger might reset some BMS protection states.
- Battery Not Charging: Verify the charger is functioning correctly and is compatible with 3S Li-ion batteries. Check BMS connections.
- Overheating: Immediately disconnect the battery pack from any load or charger. Overheating can indicate a short circuit, damaged cells, or an overloaded BMS. Do not use the pack if it is overheating.
- Reduced Capacity/Run Time: This could indicate aging cells or an imbalance between cells. The BMS should help with balancing, but severely mismatched cells may require replacement.
For complex issues, it is recommended to consult with an experienced electronics technician.
7. Specifications
| Model | B0BZD8HRC7 |
| Brand | XBERSTAR |
| Battery Configuration | 3 Series, 7 Parallel (3S7P) |
| Compatible Cells | 18650 Lithium-Ion (21 pieces required) |
| BMS Type | 3S 40A Balance BMS |
| Battery Cell Composition | Lithium Ion |
| Reusability | Rechargeable |
| External Case Dimensions (L*W*H) | 150mm * 65mm * 94mm (Approximate) |
| Internal Case Dimensions (L*W*H) | 146mm * 60mm * 80mm (Approximate) |
8. Safety Information
Working with lithium-ion batteries carries inherent risks. Adhere to the following safety guidelines:
- Always wear appropriate personal protective equipment (PPE), including safety glasses and gloves, during assembly.
- Work in a well-ventilated area, away from flammable materials.
- Never short-circuit battery terminals or individual cells.
- Do not puncture, crush, or disassemble individual 18650 cells.
- Dispose of damaged or spent batteries according to local regulations.
- Keep out of reach of children and pets.
- If a battery cell shows signs of swelling, leakage, or extreme heat, immediately place it in a fire-safe container and dispose of it properly.
9. Warranty and Support
Information regarding specific warranty terms or direct customer support for this XBERSTAR DIY Battery Kit is not provided in the product details. For any inquiries or support, please refer to the seller or manufacturer's contact information available at the point of purchase.