Introduction
This manual provides detailed instructions for the assembly, installation, operation, and maintenance of your SmartStandard 40x84 inch Glass Barn Door with 7FT Sliding Hardware Kit and Handle. Please read all instructions carefully before beginning installation to ensure safe and correct usage. Keep this manual for future reference.
The SmartStandard barn door features a modern design with frosted glass panels on one side and smooth glass on the other, offering both light and privacy. The door panels are constructed from primed MDF with a waterproof PVC coating for durability and ease of cleaning. The included hardware kit ensures smooth and quiet sliding operation.
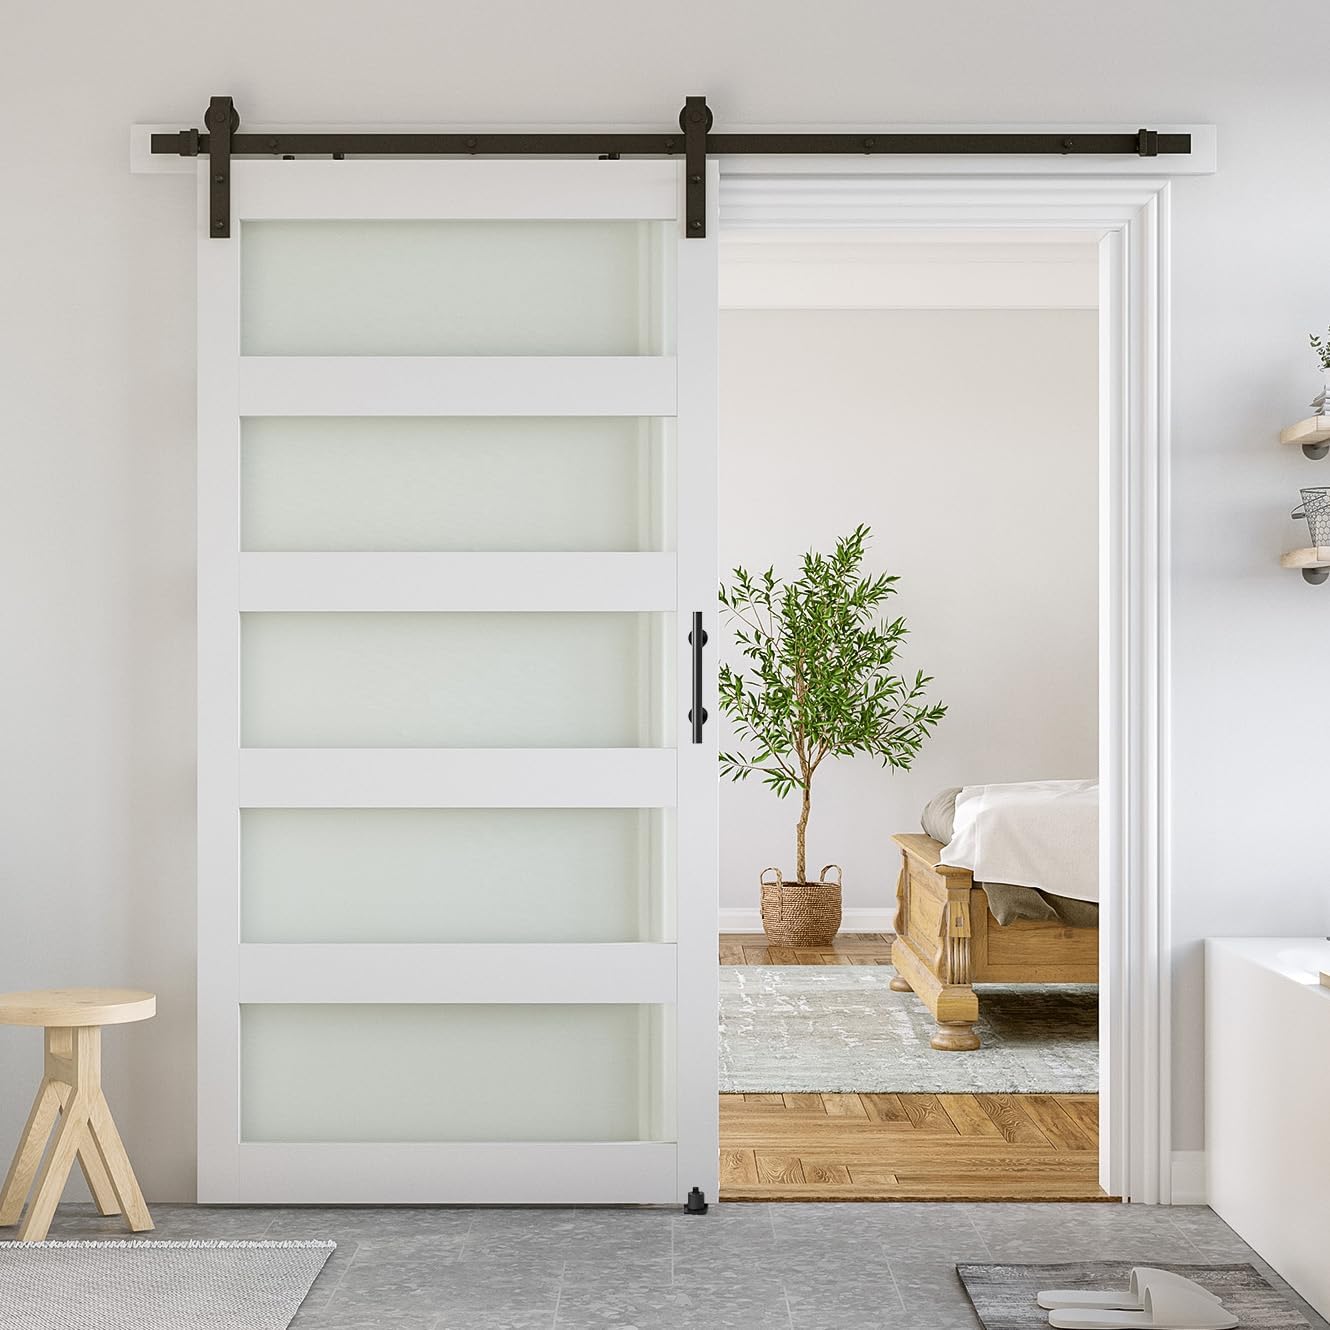
Image: The SmartStandard 40x84 inch Glass Barn Door with its black sliding hardware kit, installed in a modern interior, providing a stylish and functional room divider.
Setup and Installation
Important: Installation typically requires two people due to the weight of the door and glass panels. Ensure you have all necessary tools and components before starting.
Package Contents
Verify that all components listed below are present in your package:
- 1 x 40"(W) x 84"(H) Door (Thickness 1 3/8") - Assembly Required
- 1 x 7FT Sliding Track Kit
- 1 x Floor Guide
- 1 x Double-sided Handle
- Installation Tools
- Detailed Instructions

Image: A visual representation of the complete package contents, including the unassembled door components, the sliding track, rollers, handle, floor guide, and various fasteners and tools.
Pre-Installation Considerations
- Wall Type: Ensure your wall can support the weight of the door and hardware. A solid wood header board (backer board) is recommended for drywall installations to provide adequate support.
- Clearance: A minimum of 6 inches of clearance is needed above the top of the door for track installation.
- Measurements: Carefully measure your opening and wall space. The track length for this model is 7 feet.

Image: An illustration detailing critical measurements for installation, such as the 6-inch clearance required above the door and the fixed distance from the wall to the door, ensuring proper fit and function.
Assembly Steps
The door is designed for easy assembly with pre-drilled holes for hangers and the handle. Follow these general steps:
- Assemble the Door: Connect the door slats and insert the glass panels. The door bottom has a pre-made groove for the floor guide.
- Install the Track: Secure the 7FT sliding track to the wall, ensuring it is level and at the correct height.
- Install the Hangers: Attach the rollers/hangers to the top of the assembled door using the pre-drilled holes.
- Attach to the Track: Carefully lift the door and place the rollers onto the track.
- Install Floor Guides: Position and secure the floor guide(s) to prevent the door from swinging.
- Install the Handle: Attach the double-sided handle to the door using the pre-drilled holes.
- Final Adjustments: Ensure smooth operation and adjust stoppers as needed.

Image: A step-by-step visual guide illustrating the assembly and installation process, from door construction to mounting the track and attaching the handle.
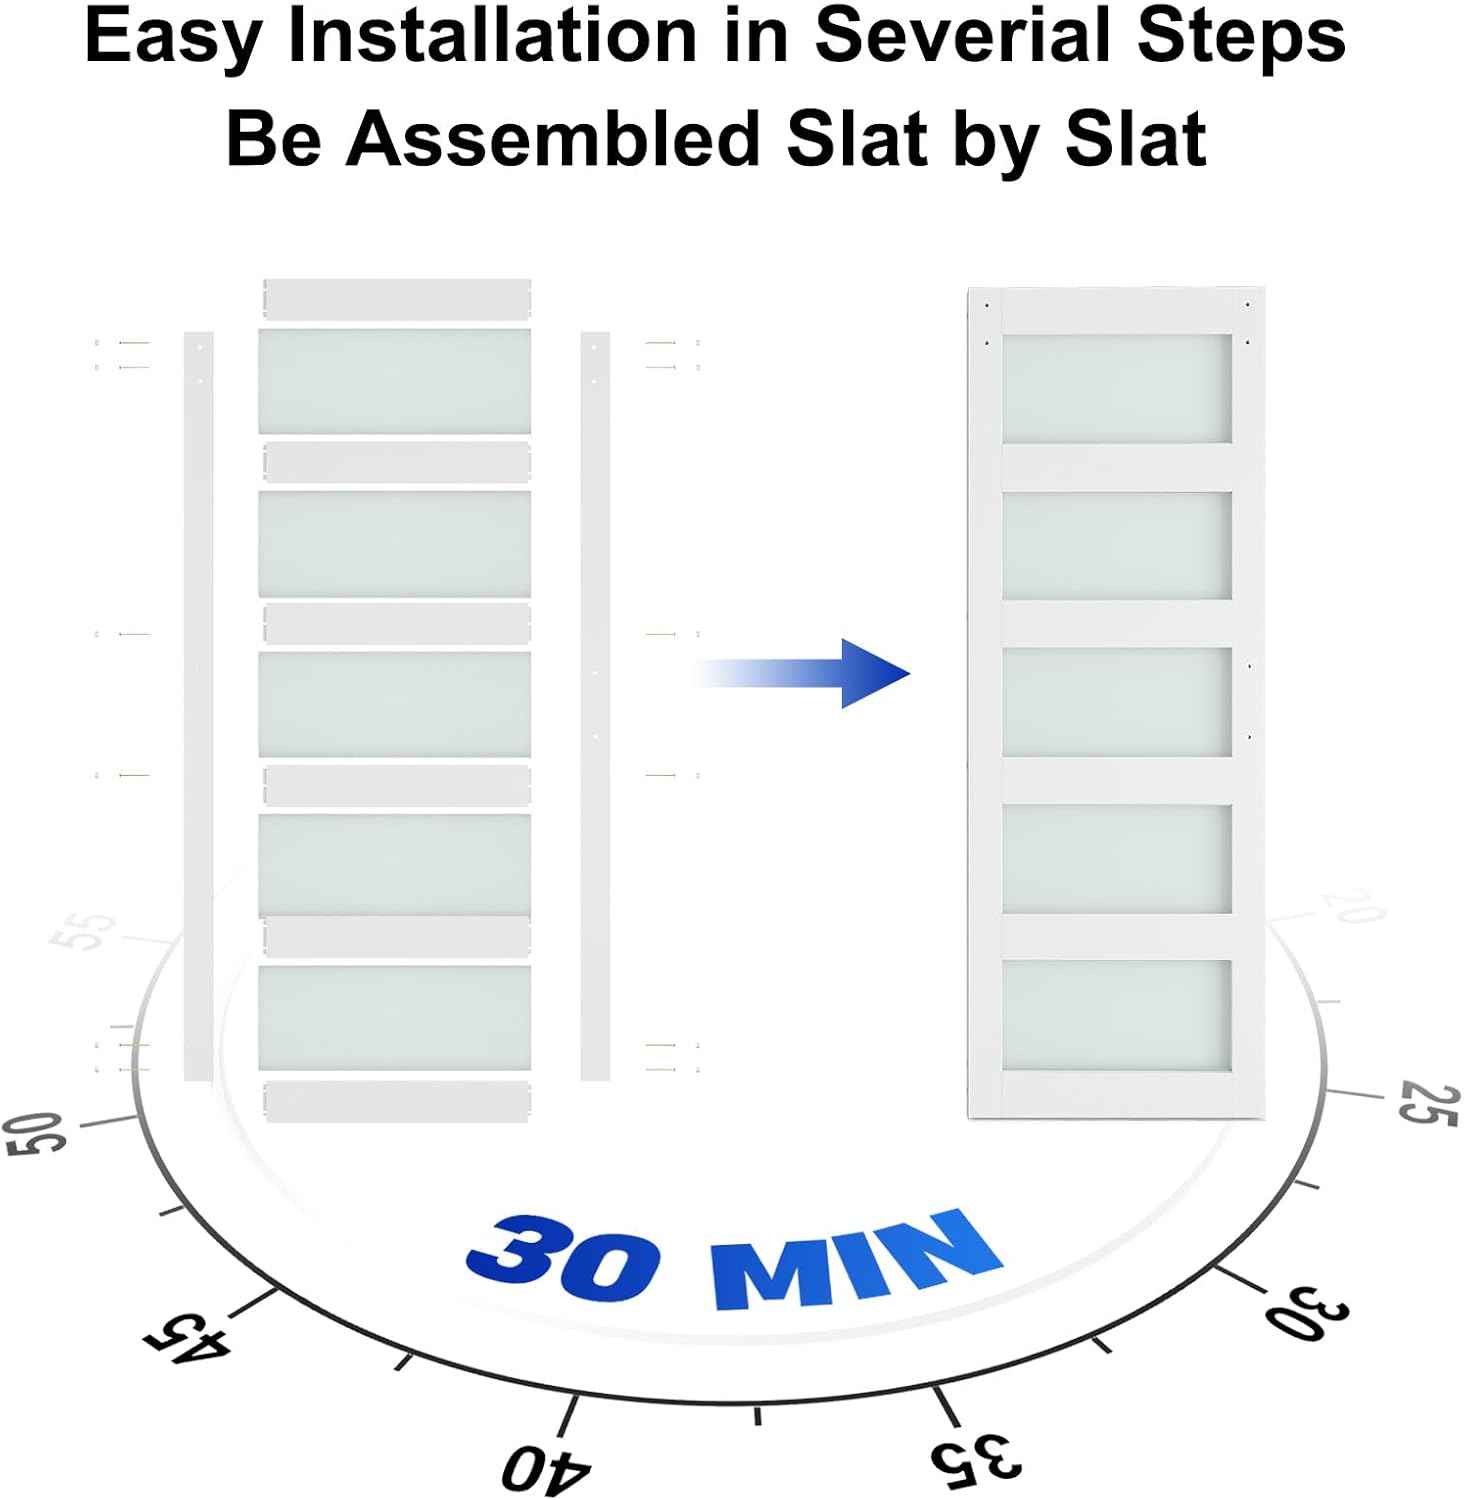
Image: A graphic demonstrating the ease of door assembly, showing individual slats and glass panels transforming into a complete door, highlighting the time-saving design.
Hardware Details
The sliding hardware kit includes:
- Rubber Cushioned Stoppers: Designed to stop your door at the desired point and prevent it from rolling off the track.
- Superior Quality Bearings: Tested for durability and smooth operation.
- Premium Nylon Wheels: Ensure super smooth and quiet sliding.

Image: Detailed view of the black sliding hardware components, including the robust rollers with premium nylon wheels and superior quality bearings, and the rubber cushioned stoppers for safe operation.
Operation
To operate the barn door, simply grasp the handle and slide the door along the track. The premium nylon wheels and superior quality bearings ensure a smooth and quiet gliding motion. The floor guide keeps the door stable and prevents it from swinging out of alignment.
The frosted glass panels provide privacy while allowing light to pass through, making it suitable for various rooms such as bedrooms, living rooms, bathrooms, kitchens, closets, and pantries.

Image: An illustration demonstrating the versatility of the barn door, showing its application in different areas of a home, including bedrooms, living rooms, and kitchens.

Image: A graphic emphasizing the quality of the hardware, showcasing its sturdy construction, safe design with polished edges, and smooth sliding capability due to an upgraded floor guide.
Maintenance
Regular maintenance ensures the longevity and optimal performance of your barn door.
- Cleaning the Door: The waterproof PVC coating makes the door easy to clean. Use a soft, damp cloth with mild soap and water to wipe down the door panels and glass. Avoid abrasive cleaners or harsh chemicals that could damage the finish or glass.
- Cleaning the Track: Periodically wipe the sliding track with a dry cloth to remove dust and debris that could impede smooth operation.
- Hardware Inspection: Regularly check all screws and fasteners on the hangers, track, and handle to ensure they are tight. Tighten any loose components as needed.
- Glass Care: The tempered frosted glass is designed for privacy and durability. Clean with standard glass cleaner and a soft cloth.

Image: A graphic illustrating the high-quality features of the barn door, such as its resistance to warping, sturdy construction, ease of cleaning, environmental friendliness, tempered frosted glass for privacy, and scratch-resistant surface.
Troubleshooting
| Problem | Possible Cause | Solution |
|---|---|---|
| Door does not slide smoothly | Debris on track, loose rollers, misaligned track. | Clean the track. Check and tighten roller bolts. Ensure track is level and securely mounted. |
| Door swings away from wall | Floor guide not installed or improperly adjusted. | Install or adjust the floor guide to properly engage the door's bottom groove. |
| Door stoppers are loose or cracked | Set screws not tightened sufficiently, overtightening. | Ensure set screws are tightened firmly but do not overtighten. If cracked, contact customer support for replacement parts. |
| Door is difficult to move | Track not level, rollers binding, excessive friction. | Verify the track is perfectly level. Inspect rollers for any obstructions or damage. |
Specifications
| Feature | Detail |
|---|---|
| Brand | SMARTSTANDARD |
| Model Number | BDM-40G-KIT-WT |
| Color | White |
| Material | Wood (Primed MDF) |
| Style | Modern |
| Assembly Required | Yes |
| Item Weight | 102 pounds |
| Product Dimensions | 1.38 x 40 x 84 inches (Door) |
| Track Length | 7 feet |
| Included Components | Barn Door Slats, Glass Panels, Sliding Hardware Kit, Floor Guide, Handle, Installation Tools, Detailed Instructions |
Warranty Information
For specific warranty details regarding your SmartStandard barn door and hardware kit, please refer to the documentation included with your purchase or contact SmartStandard customer support directly. General return policies typically allow for returns within 30 days of purchase.
Customer Support
If you encounter any issues during installation or operation, or if you have questions about your product, please contact SmartStandard customer support. They offer 24-hour standby support to assist you.
For further assistance, please visit the official SmartStandard store or contact their customer service department through the retailer where the product was purchased.