1. Introduction
This manual provides detailed instructions for the setup, operation, and maintenance of your Bisofice Biometric Fingerprint Time Attendance Machine. Please read this manual thoroughly before using the device to ensure proper functionality and to maximize its lifespan. This device is designed for efficient and accurate employee time tracking in various environments.

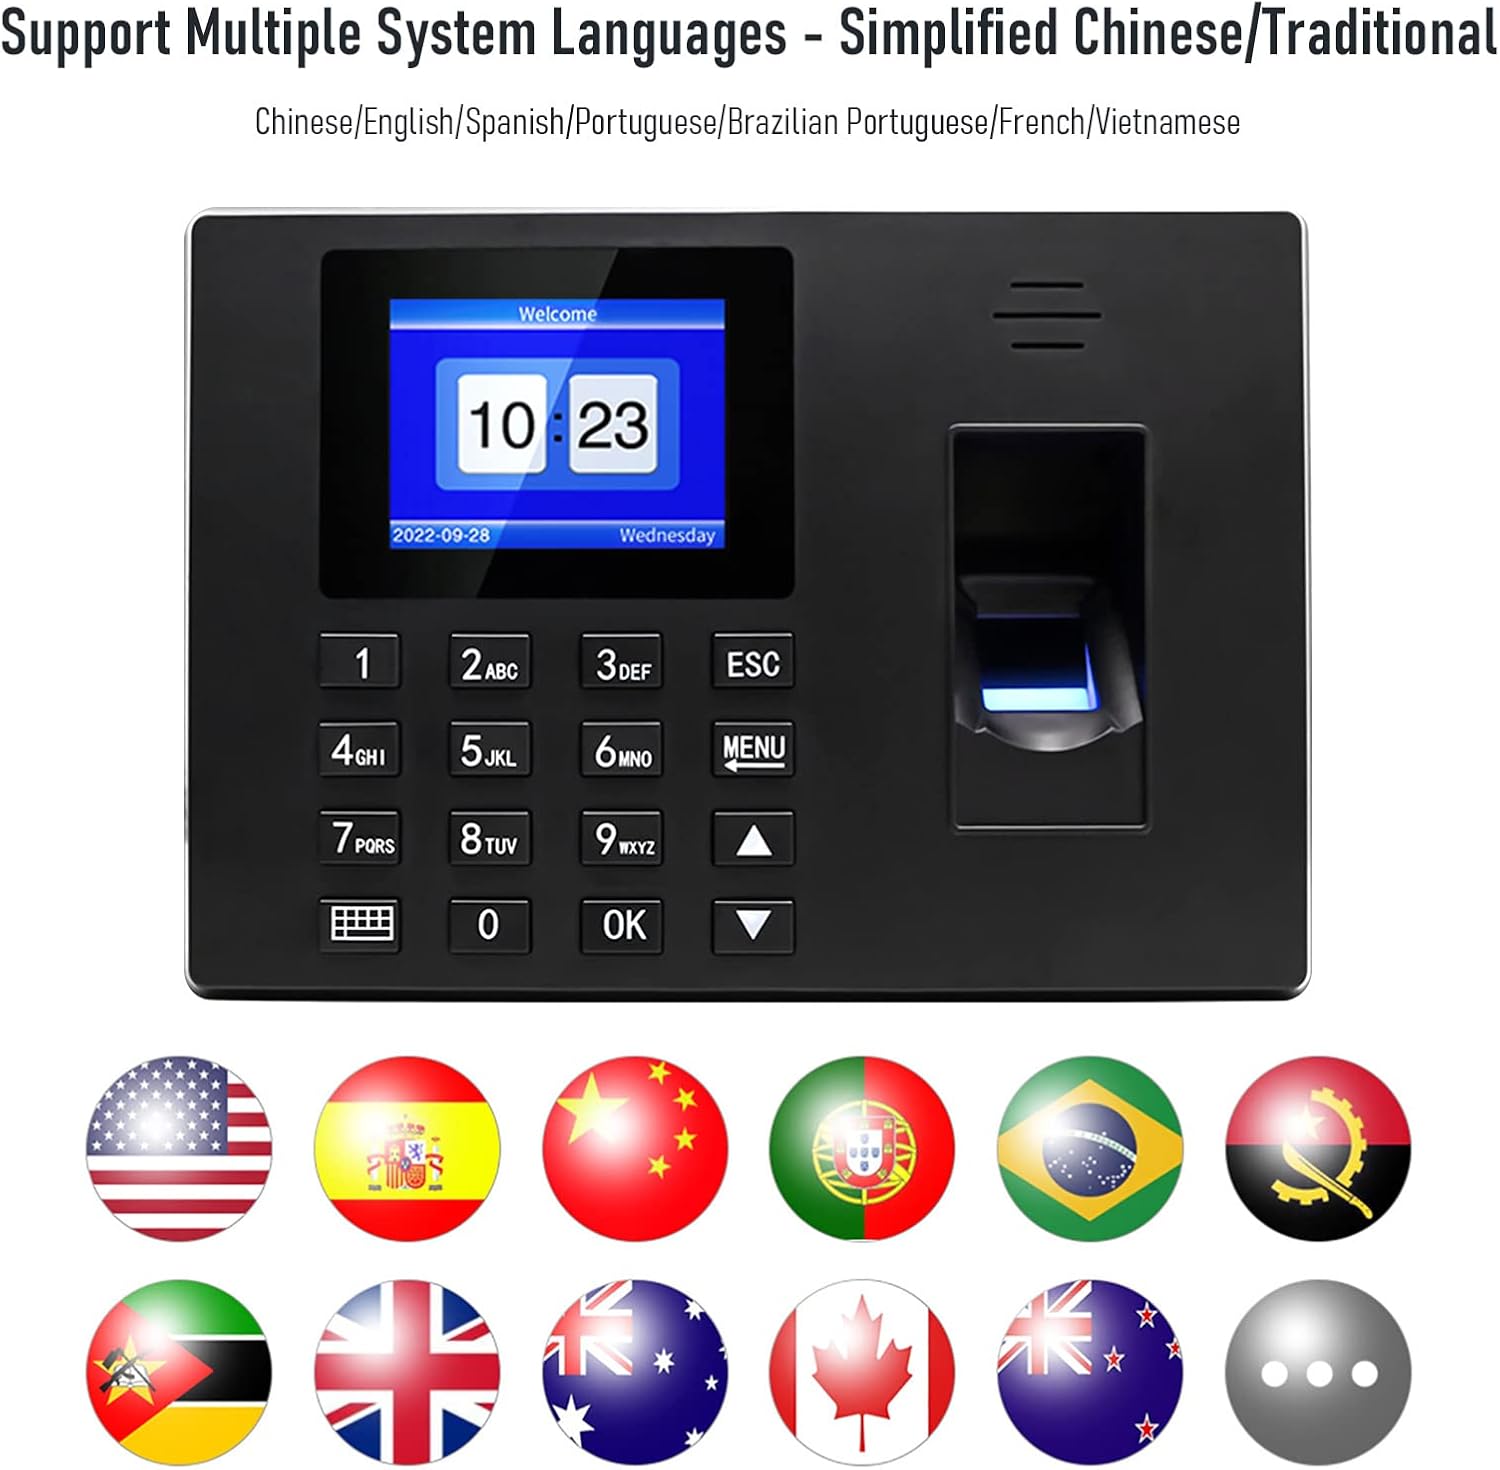
Front view of the Bisofice Biometric Fingerprint Time Attendance Machine, showing the screen, keypad, and fingerprint scanner.
2. Product Overview
2.1 Key Features
- Large Capacity: Supports up to 1000 fingerprints, 1000 passwords, and 100,000 data records, suitable for businesses with multiple departments.
- Fast Identification: High-precision optical scanner for recognition speeds under 1 second.
- Clear Display & Intuitive Keypad: Features a 2.4-inch high-definition color screen and a comfortable T9 input keypad for easy navigation and data entry.
- Easy Data Management: Supports USB flash disk insertion for convenient attendance report download and data export.
- Multi-language Support: Includes Simplified Chinese, Traditional Chinese, English, Spanish, Portuguese, Brazilian Portuguese, French, and Vietnamese.
- Wide Application: Ideal for offices, factories, hotels, schools, restaurants, retail stores, and hospitals.
2.2 Product Components

The package includes the time attendance machine, power adapter, user manual, and mounting screws with wall plugs.
2.3 Capacity Overview

The device supports 1000 fingerprints, 1000 passwords, and 100,000 attendance records.
3. Setup
3.1 Initial Power-on
- Connect the power adapter to the DC 5V 1A port on the side of the device.
- Plug the power adapter into a standard electrical outlet.
- The device will power on automatically and display the welcome screen.
3.2 Mounting the Device

Follow these steps to securely mount the device on a wall.
- Use the provided mounting template (if included) or measure the distances between the mounting holes on the back of the device.
- Mark the drilling points on the desired wall surface.
- Drill holes at the marked points using an appropriate drill bit.
- Insert the provided wall plugs into the drilled holes.
- Secure the device to the wall using the provided screws.
- Ensure the device is firmly attached and stable.
3.3 Language Selection
The device supports various languages including English, Spanish, Portuguese, French, and Vietnamese.
Upon first power-on or after a factory reset, you may need to select your preferred system language. Navigate through the menu using the arrow keys and confirm with the 'OK' button. The device supports Simplified Chinese, Traditional Chinese, English, Spanish, Portuguese, Brazilian Portuguese, French, and Vietnamese.
4. Operating Instructions
4.1 Accessing the Menu
Press the MENU button to access the main menu. You will typically need administrator privileges (fingerprint or password) to enter the settings menu.
4.2 Employee Registration

Screenshots showing the process for employee registration, department settings, and shift arrangements.
- From the main menu, select Employee Management.
- Choose Register Employee.
- Enter the employee ID (if applicable) and name using the keypad.
- To register a fingerprint: Select Fingerprint and follow the on-screen prompts to place the employee's finger on the scanner multiple times until successfully registered.
- To register a password: Select Password and enter a numeric password. Confirm the password when prompted.
- Save the employee information.
4.3 Time Recording (Punching In/Out)
Employees can record their attendance using their registered fingerprint or password.
- Fingerprint: Place a registered finger on the scanner. The device will confirm successful recognition.
- Password: Enter the registered password using the keypad and press OK.
4.4 Department and Shift Settings
The device allows for the configuration of departments and work shifts to better organize attendance data.
- From the main menu, select Attendance Settings.
- Department Setting: Create or edit department names.
- Shift Setting: Define work shifts, including start and end times, and assign them to employees or departments.
4.5 Data Management and Report Export

The device supports high-speed attendance report download via USB disk.
Attendance data can be easily exported to a USB flash drive for further analysis on a computer.
- Insert a FAT32 formatted USB flash drive into the USB port on the side of the device.
- From the main menu, navigate to Data Management or Report Export.
- Select the desired report type (e.g., attendance summary, individual records) and time range.
- Confirm to export the data. The report will be saved as a file (e.g., Excel compatible format) on the USB drive.
- Safely remove the USB drive once the export is complete.
5. Maintenance
- Cleaning: Regularly wipe the screen and fingerprint scanner with a soft, dry cloth. Avoid using abrasive cleaners or solvents.
- Data Backup: Periodically export attendance data to a computer via USB to prevent data loss.
- Firmware Updates: Check the manufacturer's website for any available firmware updates to ensure optimal performance and security.
- Environmental Conditions: Operate the device within the specified working temperature range (0-45°C) and storage temperature range (0-50°C). Avoid exposure to direct sunlight, excessive humidity, or extreme temperatures. The device meets IP54 standard for dust and water resistance, but avoid direct water exposure.
6. Troubleshooting
6.1 Common Issues and Solutions
| Problem | Possible Cause | Solution |
|---|---|---|
| Fingerprint not recognized | Finger is dirty, wet, or scarred; fingerprint not properly registered; scanner is dirty. | Ensure finger is clean and dry. Re-register fingerprint if necessary, ensuring proper placement. Clean the fingerprint scanner with a soft cloth. |
| Cannot export data to USB | USB drive not formatted to FAT32; USB drive is full or corrupted; incorrect export steps. | Ensure USB drive is formatted to FAT32. Try a different USB drive. Follow the data export instructions carefully. |
| Device does not power on | Power adapter not connected; power outlet issue; faulty adapter. | Check power adapter connection. Try a different power outlet. Ensure the adapter is working correctly. |
| Difficulty with menu navigation/language | Unfamiliarity with menu structure; incorrect language setting. | Refer to the 'Operating Instructions' section. Navigate to language settings and select your preferred language. |
7. Specifications

Diagram showing the dimensions and key technical specifications of the device.
| Parameter | Value |
|---|---|
| Model | OTE0776466210164GH (F06) |
| Color | Black |
| Dimensions (LxWxH) | 170mm x 120mm x 35.3mm |
| Weight | 250g |
| Rejection Rate | <0.0001% |
| Misjudgment Rate | 0.0001% |
| Authentication Mode | Fingerprint, Password |
| Attendance Speed | <1s/time |
| Fingerprint Storage | 1000 pcs |
| Attendance Record Capacity | 100,000 records |
| Communication Mode | USB (drive-free) |
| Voice Prompt | Multi-language |
| System Language Support | Simplified Chinese, Traditional Chinese, English, Spanish, Portuguese, Brazilian Portuguese, French, Vietnamese |
| Secondary Development | Not supported |
| Collector Type | High-precision total reflection optical collector |
| Drop Resistance | Can withstand 1.2 meters free fall 3 times |
| Waterproof and Dustproof | IP54 Standard |
| Working Temperature Range | 0-45°C |
| Storage Temperature Range | 0-50°C |
| Ambient Light Intensity | 1000LUX |
| Power Supply | 5V 1A |
| Data Download | U disk (Not included) |
| U Disk Support Format | FAT32 |
8. Warranty and Support
Information regarding product warranty and customer support is not available in this manual. Please refer to the product packaging, purchase documentation, or the official Bisofice website for details on warranty coverage and how to contact customer support for assistance.


