1. Product Overview
The NOEVSBIG Magnetic Helping Hands Soldering Station is a versatile tool designed to assist with various soldering and electronic repair tasks. It features a heavy-duty magnetic base, flexible arms with alligator clips, an LED magnifying lamp, a 12V solder fume extractor, and a hot air gun holder. This comprehensive setup aims to enhance precision, safety, and efficiency during intricate work.

Figure 1: Complete NOEVSBIG Magnetic Helping Hands Soldering Station.
Key Features:
- Heavy-Duty Magnetic Base: Provides stability and allows flexible positioning of components.
- Flexible Arms: Four adjustable metal gooseneck arms with strong magnetic bases and alligator clips for secure component holding.
- LED Magnifying Lamp: 3X and 6X magnification with dimmable LED light (3 color temperatures, 10 brightness levels) for detailed work.
- 12V Solder Fume Extractor: High-efficiency 2800 RPM fan with carbon filters to absorb toxic fumes.
- Hot Air Gun Holder: 360° rotational bracket for securing hot air guns.
- PCB Circuit Board Holder: Includes four PCB pillars for stable board positioning.
- Magnetic Vise Clamp: Adjustable clamp suitable for holding small electronic parts.
2. Safety Information
Please read and understand all safety instructions before operating the soldering station. Failure to follow these guidelines may result in injury or damage to the product.
- Eye Protection: Always wear appropriate eye protection (safety glasses or goggles) when soldering to protect against solder splashes and fumes.
- Ventilation: Use the solder fume extractor in a well-ventilated area. While the extractor helps, additional room ventilation is recommended to minimize exposure to soldering fumes.
- Hot Surfaces: Soldering irons, hot air guns, and soldered components become extremely hot. Avoid direct contact. Use heat-resistant gloves if necessary.
- Electrical Safety: Ensure the power adapter is correctly connected and the voltage matches your power supply. Do not operate with damaged cords or plugs.
- Stability: Ensure the heavy-duty base is placed on a stable, level, and heat-resistant surface to prevent tipping.
- Flammable Materials: Keep flammable materials away from the soldering area.
- Children and Pets: Keep the soldering station out of reach of children and pets.
- ESD Safety: The station is ESD safe. However, always follow proper electrostatic discharge (ESD) precautions when working with sensitive electronic components.
3. Package Contents
Verify that all items listed below are present in your package:
- 1 x Iron Base (Heavy-Duty Metal Base)
- 1 x 12V Solder Fume Extractor
- 4 x Carbon Filters (for fume extractor)
- 1 x 3X & 6X LED Magnifying Lamp
- 1 x USB Adapter (for magnifying lamp)
- 4 x Flexible Arms (Gooseneck)
- 4 x Alligator Clips (for flexible arms)
- 4 x PCB Board Fixed Clips (Pillars)
- 1 x 360 Degree Rotation Hot Air Gun Frame
- 1 x Magnetic Vise Clamp (3C-B)

Figure 2: Diagram of included components and their approximate dimensions.
4. Setup Instructions
Follow these steps to assemble your soldering station:
- Position the Base: Place the heavy-duty iron base on a clean, stable, and level work surface. Ensure the rubber feet are properly attached to prevent scratches and provide stability.
- Attach Flexible Arms: Insert the magnetic bases of the flexible arms into desired positions on the iron base. The strong magnets will secure them. Attach the alligator clips to the ends of the flexible arms. Each clip comes with rubber sleeves to protect your work.
- Install Magnifying Lamp: Place the magnetic base of the LED magnifying lamp onto the iron base. Connect the USB cable to the provided USB adapter and plug it into a power outlet.
- Set up Fume Extractor: Position the 12V solder fume extractor on the iron base or nearby. Ensure the carbon filter is correctly installed inside the unit. Connect the power adapter for the fume extractor and plug it into a power outlet.
- Mount Hot Air Gun Holder: Attach the magnetic base of the 360° rotational hot air gun frame to the iron base. Secure your hot air gun into the clamp, ensuring it is stable. Note: Firmly tighten the flower nut to secure the arm in place.
- Place PCB Holders: Position the four PCB board fixed clips (pillars) on the magnetic base as needed to support your circuit board.
- Attach Magnetic Vise Clamp: If using, place the magnetic vise clamp on the base. Adjust the jaws to hold small components securely.

Figure 3: Assembly of the 360° rotating bracket for hot air gun or PCB clamp.

Figure 4: Magnetic vise clamp for securing small parts.
5. Operating Instructions
5.1 Using the Flexible Arms and Alligator Clips
The four flexible arms can be positioned anywhere on the magnetic base. Adjust their angle and height to securely hold PCBs, wires, or other components using the alligator clips. The rubber sleeves on the clips prevent damage to delicate surfaces.
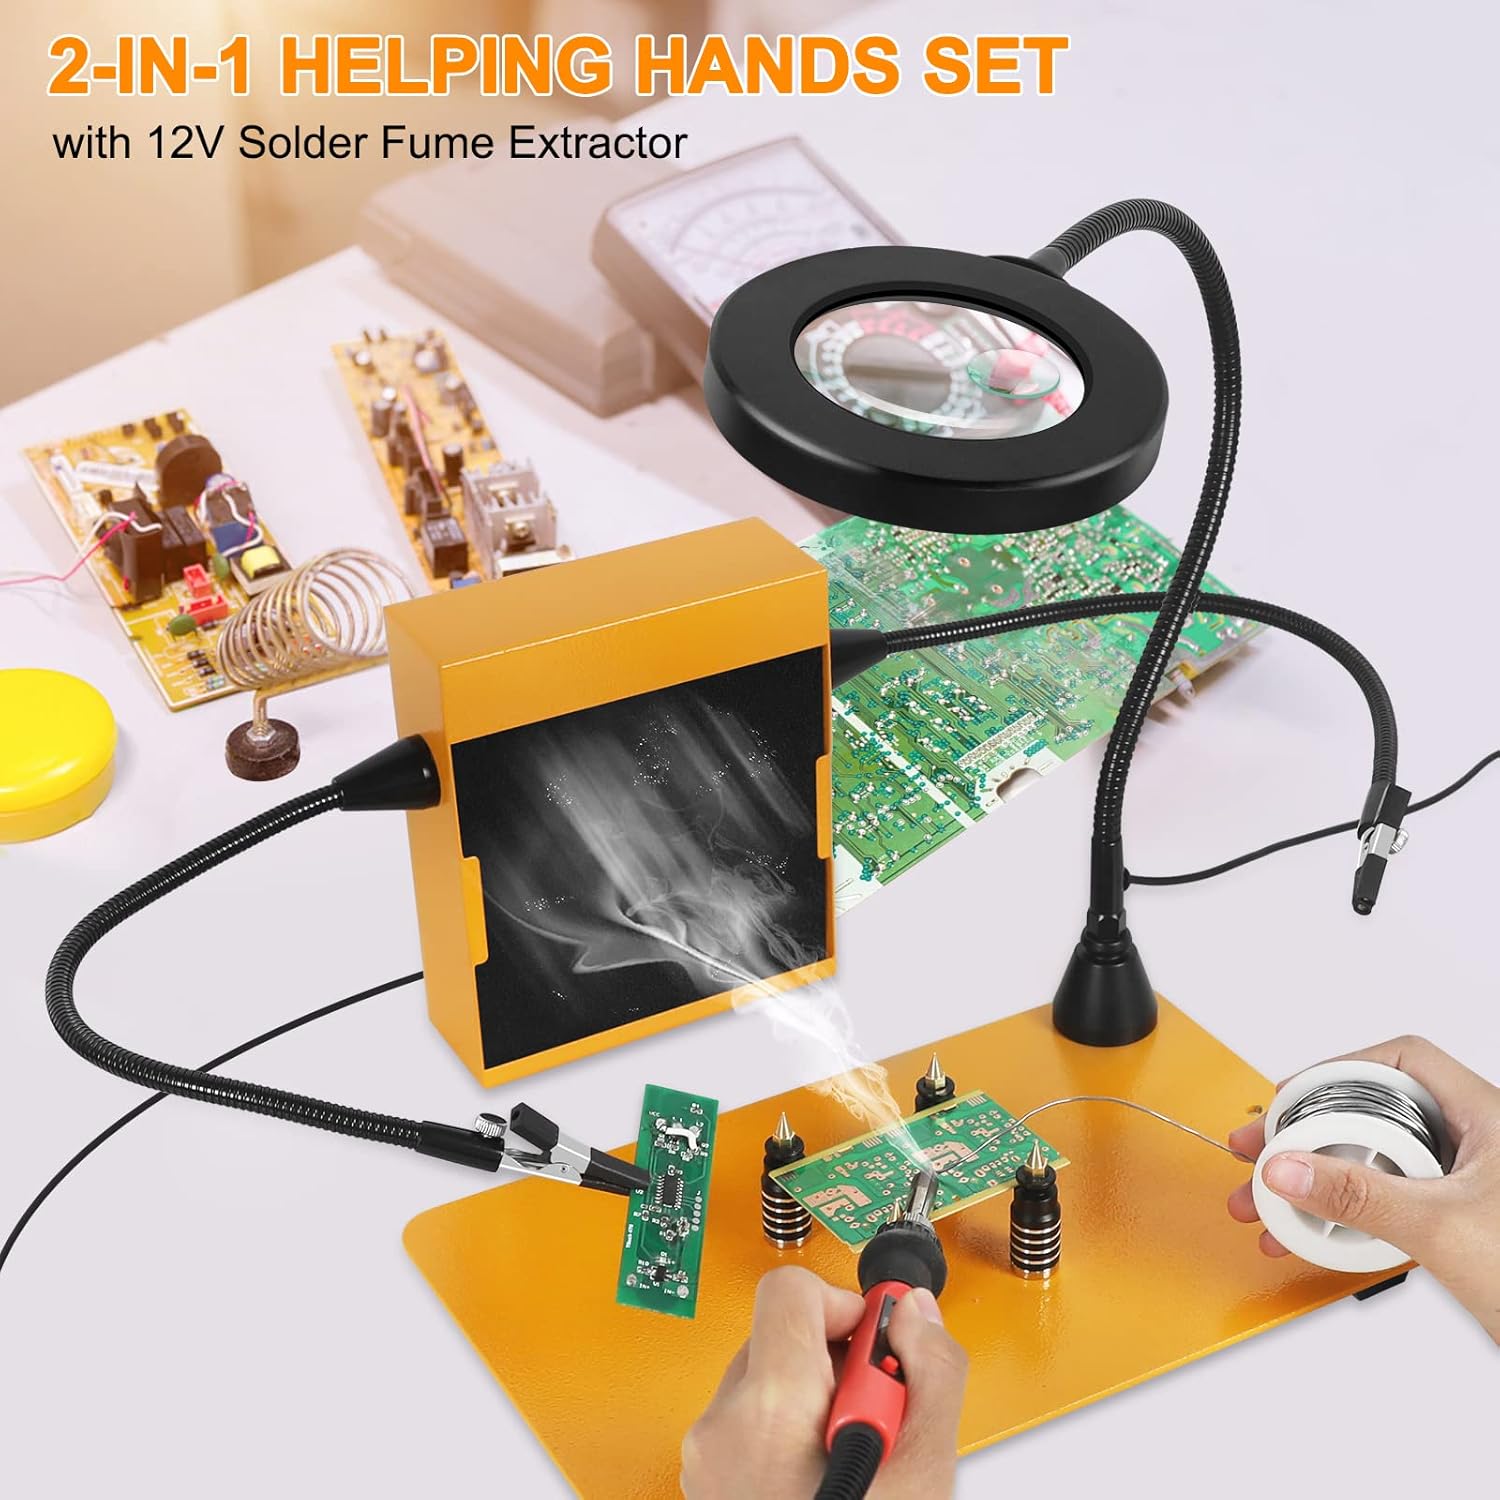
Figure 5: Soldering station in operation, demonstrating the use of flexible arms and fume extractor.
5.2 Operating the LED Magnifying Lamp
Once plugged in, the magnifying lamp can be adjusted for optimal viewing. Use the controls on the cable to:
- Power On/Off: Press the power button to turn the light on or off.
- Adjust Brightness: Use the '+' and '-' buttons to cycle through 10 levels of brightness.
- Change Color Temperature: Press the color temperature button to switch between 3 color modes (Yellow, Warm, White) to suit your preference and task.

Figure 6: Magnifying lamp with 3X and 6X magnification, and adjustable LED lighting.
5.3 Using the Solder Fume Extractor
The fume extractor helps to remove harmful fumes generated during soldering. Position the extractor near your soldering area, ensuring the fan opening faces the source of the fumes. Turn on the extractor using its power switch. The 2800 RPM fan will draw in fumes through the carbon filter.

Figure 7: Solder fume extractor actively absorbing fumes during soldering.
5.4 Utilizing the Hot Air Gun Holder and PCB Holders
The 360° rotational hot air gun holder allows for hands-free operation of your hot air gun, ideal for SMD rework. Secure your PCB using the magnetic PCB pillars for stable support during soldering or inspection.

Figure 8: Hot air gun in its holder, demonstrating hands-free operation over a PCB.
6. Maintenance
Regular maintenance ensures the longevity and optimal performance of your soldering station.
- Cleaning the Base and Arms: Wipe down the metal base and flexible arms with a damp cloth to remove dust and solder residue. Ensure all components are dry before use.
- Fume Extractor Filter Replacement: The carbon filters in the fume extractor should be replaced periodically, depending on usage frequency. Replace them when you notice reduced absorption efficiency or a persistent odor. Four spare filters are included.
- Magnifying Lamp Care: Keep the magnifying glass clean and free of dust or smudges for clear viewing. Use a soft, lint-free cloth for cleaning.
- Alligator Clips: Inspect alligator clips for wear or damage. Replace if necessary to ensure secure holding.
7. Troubleshooting
If you encounter issues with your soldering station, refer to the following common problems and solutions:
| Problem | Possible Cause | Solution |
|---|---|---|
| Fume extractor not turning on or weak suction. | Not plugged in; power switch off; clogged filter; fan malfunction. | Ensure power adapter is connected and switch is on. Replace carbon filter. If problem persists, contact customer support. |
| Magnifying lamp not lighting up. | USB cable not connected; USB adapter not plugged in; power button off. | Check all connections. Press the power button on the lamp's control. |
| Flexible arms or hot air gun holder not holding position. | Nuts not tightened sufficiently; excessive weight. | Ensure all flower nuts and adjustment points are firmly tightened. Reduce the weight on the arm if it exceeds 4.4 lbs (2 kg). |
| Magnetic components sliding on the base. | Base not level; excessive force applied. | Ensure the base is on a flat, stable surface. Avoid applying excessive sideways force to magnetic components. |
8. Specifications
| Feature | Detail |
|---|---|
| Model Number | FL-120YW-5C-US |
| Brand | NOEVSBIG |
| Material | Stainless Steel |
| Item Weight | 9.55 pounds (approx. 4.33 kg) |
| Product Dimensions | 11.4"D x 7.1"W x 20.4"H (Base: 11.4" x 7.1") |
| Power Source | DC/AC |
| Voltage | 12 Volts |
| Magnifying Lamp | 3X & 6X Magnification, Dimmable LED (3 colors, 10 brightness levels) |
| Fume Extractor Fan Speed | 2800 RPM |
| Hot Air Gun Holder Rotation | 360 Degrees |
| Flexible Arm Load Capacity | Up to 4.4 lbs (2 kg) per arm |
9. Warranty and Support
NOEVSBIG is committed to providing quality products and customer satisfaction.
- Warranty: This product comes with a 3-year after-sales service.
- Returns/Exchanges: Customers are eligible for a 3-month unconditional exchange or return policy from the date of purchase.
- Customer Support: For any questions, technical assistance, or warranty claims, please contact NOEVSBIG customer service through the platform where the product was purchased.