Introduction
The CARELIVING BGM101 Blood Glucose Monitor Kit is designed to provide accurate and reliable blood sugar measurements for effective diabetes management at home. This kit utilizes advanced technology to ensure precise results and a user-friendly experience. It features a simple 6-step operating system, a large, easy-to-read screen, and requires only a small 1 µL blood sample for results in less than 5 seconds.
The monitor can store up to 350 test results and provides 14 and 30-day average blood glucose values, enabling easy tracking of daily blood sugar levels to better manage your diabetes treatment plan.
What's in the Box
Your CARELIVING BGM101 Blood Glucose Monitor Kit includes the following components:
- 1 Blood Glucose Monitor (BGM101)
- 50 Test Strips
- 50 Lancets
- 1 Lancing Device
- 1 Control Solution
- 1 Product Instruction Manual
- 1 Quick Start Guide
- 1 Carrying Bag

Image: Complete CARELIVING BGM101 Blood Glucose Monitoring System kit, showing the meter, test strips, lancets, lancing device, control solution, and carrying bag.
Product Overview
Familiarize yourself with the main components of your blood glucose monitoring system.

Image: Close-up of the CARELIVING BGM101 Blood Glucose Meter display, showing the time, date, and a blood glucose reading.

Image: Close-up of the CARELIVING lancing device, illustrating its adjustable depth settings and the micro lancet for blood sampling.
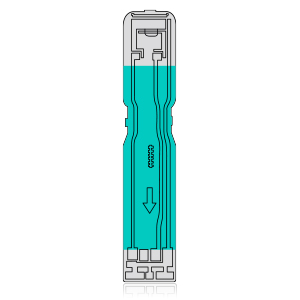
Image: A single CARELIVING Blood Glucose Test Strip, designed for use with the BGM101 meter.
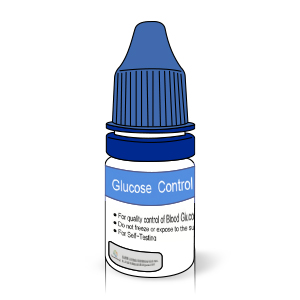
Image: CARELIVING Glucose Control Solution bottle, used for verifying meter and strip accuracy.
Setup
1. Installing Batteries
Open the battery compartment on the back of the blood glucose meter. Insert two AAA batteries, ensuring correct polarity. Close the battery compartment securely.
2. Setting Date and Time
Upon first use or after battery replacement, you may need to set the date and time. Refer to the Quick Start Guide or the full instruction manual for detailed steps on navigating the meter's settings menu to adjust these parameters.
3. Preparing the Lancing Device
Unscrew the cap of the lancing device. Insert a new lancet firmly into the lancet holder. Twist off the protective cap from the lancet and replace the lancing device cap. Adjust the depth setting on the lancing device to your comfort level. The device offers 12 customizable depth settings to ensure an appropriate sample size with minimal discomfort.
Image: The CARELIVING lancing device, illustrating its 12 adjustable depth settings for personalized comfort during blood sampling.
Operating Instructions
Performing a Blood Glucose Test
Follow these steps for an accurate blood glucose measurement:
- Wash Your Hands: Thoroughly wash your hands with soap and warm water, then dry them completely.
- Prepare Lancing Device: Load a new lancet into the lancing device and set the desired penetration depth.
- Insert Test Strip: Insert a fresh test strip into the test port of the meter. The meter will automatically turn on.
- Obtain Blood Sample: Prick the side of your fingertip with the lancing device. Gently squeeze your finger to form a small drop of blood (approximately 1 µL).
- Apply Blood Sample: Touch the tip of the test strip to the blood drop. The strip will draw the blood into the reaction area.
- Read Results: The meter will display your blood glucose result in less than 5 seconds.

Image: A visual guide detailing the 6 steps for measuring blood glucose levels, from hand washing to reading the result on the CARELIVING meter.
Understanding Results
The meter displays your blood glucose level in mg/dL. The device stores up to 350 test results and can calculate 14-day and 30-day average blood glucose values, which can be accessed through the meter's memory function. Consult your healthcare professional to understand what your results mean for your personal health management.
Maintenance
Cleaning the Meter and Lancing Device
Clean the exterior of the meter and lancing device regularly with a soft, damp cloth. Do not immerse the devices in water or use harsh cleaning agents. Ensure no liquid enters the test strip port.
Storage
Store the blood glucose meter, test strips, and lancets in a cool, dry place, away from direct sunlight and extreme temperatures. Keep test strips in their original vial and close the cap immediately after removing a strip to prevent moisture exposure. Do not store test strips outside the vial.
Control Solution Test
Perform a control solution test to verify the accuracy of your meter and test strips. This should be done when opening a new vial of test strips, if you suspect the meter is not working correctly, or if your test results do not match how you feel. Follow the instructions provided with the control solution for proper testing procedures.
Image: CARELIVING Glucose Control Solution bottle, used for quality control of the blood glucose monitoring system.
Troubleshooting
Common Issues and Solutions
- Meter does not turn on: Check if batteries are inserted correctly and have sufficient charge. Replace batteries if necessary.
- No blood sample obtained with lancing device: Adjust the lancing device to a deeper penetration setting. Ensure the lancing device is pressed firmly against the skin before activation.
- Error message on display: Refer to the full instruction manual for a list of error codes and their corresponding solutions. Common errors may relate to insufficient blood sample, expired test strips, or temperature outside operating range.
- Meter does not prompt for strip insertion after displaying last reading: The meter is designed to activate automatically upon insertion of a fresh test strip. You do not need to wait for a specific 'READYSTRIP' sign; simply insert the strip to begin.
- Inaccurate or inconsistent results: Perform a control solution test to verify meter and strip accuracy. Check the expiration date of your test strips. Ensure proper storage conditions for strips and meter. Consult your healthcare professional if concerns persist.
Specifications
| Feature | Specification |
|---|---|
| Brand | CARELIVING |
| Model Name | BGM101 |
| Item Model Number | BGM101 |
| Operating Time | 5 Seconds |
| Blood Sample Volume | 1 µL |
| Memory Capacity | Up to 350 test results |
| Average Values | 14 and 30-day averages |
| Battery Cell Composition | Zinc (AAA batteries) |
| Item Weight | 8.4 ounces |
| Package Dimensions | 6.73 x 4.65 x 2.24 inches |
| Included Components | Blood glucose monitor, test strips, lancets, lancing device, control solution, instruction manual, quick start guide, carrying bag |
Warranty and Support
CARELIVING is committed to providing high-quality products and customer satisfaction. If you encounter any product problems or require immediate assistance, please contact our customer support team. We aim to reply and actively resolve your concerns within 24 hours.
For further support or warranty information, please refer to the contact details provided in your Quick Start Guide or visit the official CARELIVING website.
