1. Introduction
This manual provides comprehensive instructions for the safe and efficient operation, maintenance, and care of your Janome 4120QDC-G Computerized Quilting and Sewing Machine. Please read this manual thoroughly before using the machine to ensure proper function and to familiarize yourself with all its features.
2. Safety Instructions
- Always unplug the machine from the electrical outlet when removing covers, lubricating, or when making any other user servicing adjustments mentioned in the instruction manual.
- Keep fingers away from all moving parts. Special care is required around the sewing machine needle.
- Use the proper needle plate. The wrong plate can cause the needle to break.
- Do not pull or push fabric while stitching. This may deflect the needle, causing it to break.
- Use only accessories recommended by the manufacturer as contained in this manual.
- Never operate the machine with any air openings blocked. Keep ventilation openings of the sewing machine and foot controller free from the accumulation of lint, dust, and loose cloth.
3. Package Contents
Your Janome 4120QDC-G machine comes with the following items:
- Janome 4120QDC-G Sewing Machine
- Hard Cover
- Instructional DVD
- Extension Table
- Quilting Set
- Various Presser Feet (Snap-on)
- Spool Holders
- Bobbins
- Needle Set
- Seam Ripper
- Cleaning Brush
- Screwdriver

Figure 3.1: Included accessories for the Janome 4120QDC-G.

Figure 3.2: Specialized quilting set accessories.
4. Setup
4.1 Machine Placement and Power Connection
Place the machine on a stable, flat surface. Connect the power cord to the machine and then to a suitable electrical outlet. Ensure the power switch, located on the side of the machine, is in the OFF position before connecting.

Figure 4.1: Power connection and switch location.
4.2 Attaching the Extension Table
The included extension table provides a larger work surface, which is particularly useful for quilting and larger projects. To attach, slide the table onto the free arm of the machine until it clicks securely into place.

Figure 4.2: Extension table attached to the machine.

Figure 4.3: The free arm, which can be used for smaller, tubular projects or with the extension table.
4.3 Threading the Machine
Follow the numbered guides on the machine for correct upper thread path. Ensure the thread is properly seated in the tension discs and take-up lever.

Figure 4.4: Spool pin and thread guide for bobbin winding.
4.4 Bobbin Winding and Insertion
The machine features an auto-declutch bobbin winder for convenience. Follow the winding path indicated on the machine. For insertion, the horizontal full rotary hook bobbin system allows for easy drop-in bobbin placement.

Figure 4.5: Bobbin compartment access.
5. Operating Instructions
5.1 Control Panel and LCD Screen
The machine features an LCD screen with an enhanced informational display and a touch panel for easy navigation. Use the numeric keypad and mode buttons to select stitches and adjust settings.
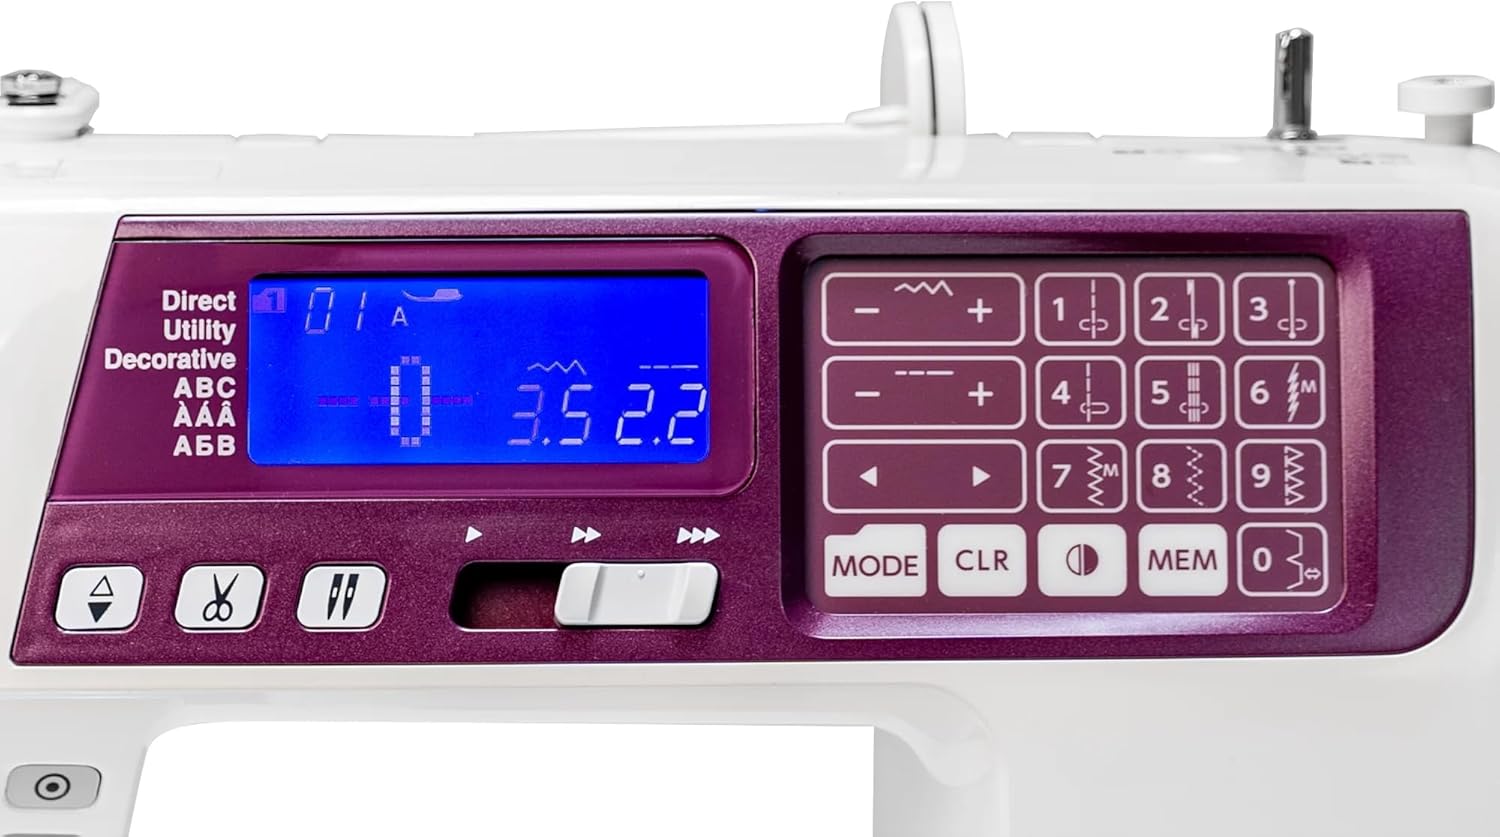
Figure 5.1: Detailed view of the control panel and LCD screen.
5.2 Stitch Selection and Adjustment
Choose from 120 built-in stitches, including utility, decorative, and alphabet fonts (American, European, and Cyrillic). The pop-up stitch chart provides a quick reference. Adjust stitch width (up to 7mm) and length (up to 5mm) as needed.

Figure 5.2: Pop-up stitch chart for easy stitch selection.
5.3 Automatic Needle Threader
Utilize the built-in one-hand needle threader for quick and easy threading of the needle. Ensure the needle is in its highest position before engaging the threader.

Figure 5.3: Automatic needle threader in action.
5.4 Start/Stop Button and Speed Control
Operate the machine using the Start/Stop button for pedal-free sewing. Adjust the sewing speed with the speed control slider. The machine also supports an optional foot pedal for traditional control.

Figure 5.4: Start/Stop button and speed control slider.
5.5 Automatic Thread Cutter
The built-in thread cutter automatically trims both the upper and bobbin threads at the end of a seam, saving time and thread.
5.6 Manual Thread Tension Control and Foot Pressure Adjustment
While the machine features automatic tension, manual thread tension control is available for fine-tuning. Foot pressure adjustment allows for optimal feeding of various fabric types.
6. Maintenance
6.1 Cleaning
Regularly clean the bobbin area and feed dogs to remove lint and dust. Use the provided cleaning brush. Ensure the machine is unplugged before cleaning.
6.2 Needle Replacement
Replace needles frequently, especially when sewing dense fabrics or if the needle shows signs of dullness or bending. Always use needles appropriate for your fabric type and machine model.
7. Troubleshooting
Refer to the instructional DVD or the full user manual for detailed troubleshooting steps. Common issues and their solutions include:
- Skipped Stitches: Check needle insertion, ensure correct needle type for fabric, rethread the machine.
- Thread Breakage: Verify proper threading, check for burrs on needle or thread path, adjust tension.
- Fabric Jamming: Ensure correct presser foot is used, do not force fabric, clean feed dogs.
8. Specifications
| Feature | Detail |
|---|---|
| Product Dimensions | 19.5"D x 16.35"W x 11.45"H |
| Item Weight | 21.9 pounds |
| Built-in Stitches | 120 (plus Alphabet fonts: American, European, Cyrillic) |
| Buttonholes | 7 one-step |
| Maximum Stitch Width | 7mm |
| Maximum Stitch Length | 5mm |
| Needle Threader | Built-in one-hand |
| Bobbin System | Horizontal full rotary hook |
| Feed Dog | 7-piece |
| Control | Start/Stop button, Speed control slider, Optional foot pedal |
| Special Features | Automatic thread cutter, Memorized needle up/down, Locking stitch button, Stitch pattern memory, Auto declutch bobbin winder, Extra high presser foot lift, LCD screen, Foot pressure adjustment |

Figure 8.1: Machine dimensions.
9. Warranty and Support
For warranty information and customer support, please refer to the documentation included with your product or visit the official Janome website. Keep your purchase receipt as proof of purchase for warranty claims.
For additional assistance, you may contact Janome customer service directly or consult authorized Janome dealers.