
1. Introduction
Thank you for choosing the Fisher-Price BB1226 Bottle Warmer and Sterilizer. This appliance is designed to simplify your daily routine by safely warming milk and food, and sterilizing baby bottles. It can warm or sterilize up to two bottles simultaneously, features an intuitive LCD screen for easy control, and includes a smart processor that signals the end of a cycle. This product is 100% BPA-free, ensuring safety for your baby.
2. Important Safety Instructions
Please read all instructions carefully before using the appliance. Failure to follow these instructions may result in electric shock, fire, or serious injury.
- Always ensure the appliance is connected to a power outlet with the correct voltage (220V).
- Do not immerse the appliance, cord, or plug in water or other liquids.
- Keep the appliance out of reach of children. Close supervision is necessary when any appliance is used near children.
- Unplug from the outlet when not in use and before cleaning. Allow to cool before putting on or taking off parts, and before cleaning the appliance.
- Do not operate any appliance with a damaged cord or plug, or after the appliance malfunctions or has been damaged in any manner. Contact customer support for assistance.
- Use only attachments and accessories recommended by the manufacturer.
- Do not place on or near a hot gas or electric burner, or in a heated oven.
- Extreme caution must be used when moving an appliance containing hot liquids.
- Always check the temperature of warmed milk or food before feeding your baby.
- This appliance is for household use only. Do not use outdoors.
3. Product Components
Familiarize yourself with the parts of your Fisher-Price BB1226 Bottle Warmer and Sterilizer.
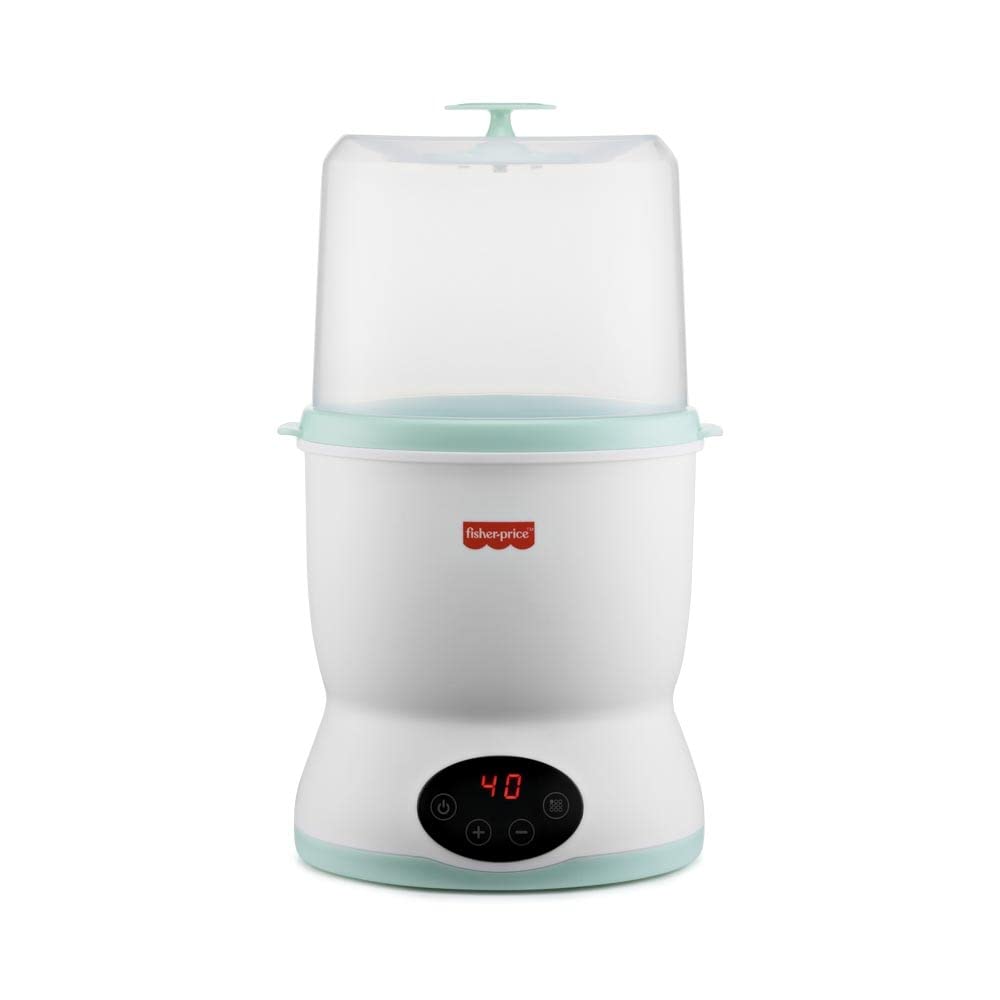
- Main Unit: The primary body of the appliance containing the heating element and control panel.
- Control Panel: Located at the front, with an LCD screen and buttons for power, function selection, and temperature adjustment.
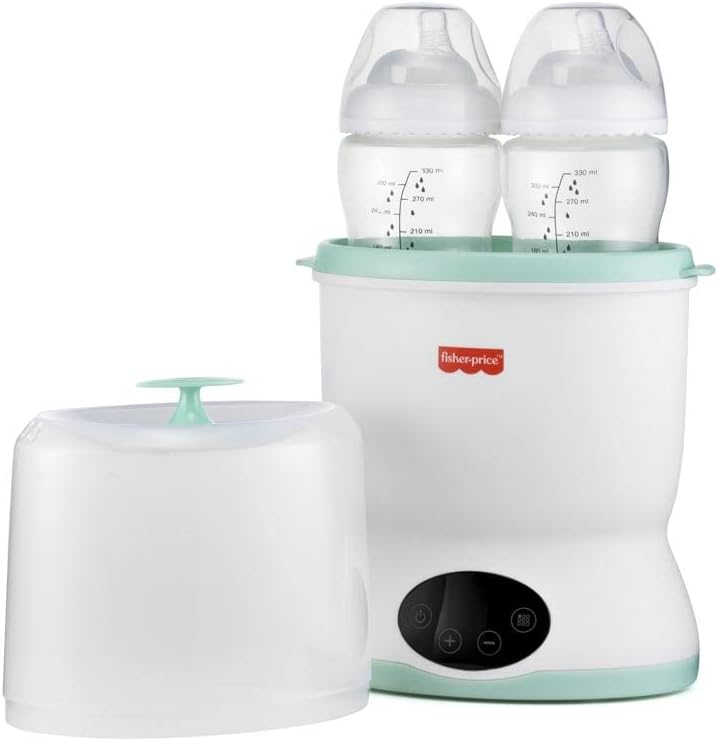
- Bottle Compartment: Designed to hold up to two baby bottles for warming or sterilizing.
- Lid: Covers the bottle compartment during operation.
- Sterilizing Basket/Rack: An internal component used to hold bottles and accessories during sterilization.


4. Setup and First Use
- Unpack: Carefully remove all components from the packaging. Retain packaging for future storage or transport.
- Clean: Before first use, wash all removable parts (sterilizing basket, lid) in warm soapy water, rinse thoroughly, and dry. Wipe the main unit with a damp cloth. Do not immerse the main unit in water.
- Placement: Place the appliance on a stable, flat, heat-resistant surface, away from heat sources and direct sunlight. Ensure adequate ventilation.
- Power Connection: Plug the power cord into a suitable 220V electrical outlet. The LCD screen will illuminate.
5. Operating Instructions
5.1. Warming Milk or Food
- Prepare Bottle/Food: Fill the baby bottle with milk or place baby food in a suitable container. Ensure the bottle/container fits within the warming compartment.
- Add Water: Pour the recommended amount of distilled water into the heating chamber. Refer to the markings inside the unit or the instruction manual for precise water levels for different warming needs.
- Place Bottle: Carefully place one or two bottles into the warming compartment.
- Select Function: Press the power button to turn on the unit. Use the function selection button (often indicated by a menu or mode icon) to choose the warming mode.
- Adjust Temperature/Time: Use the '+' and '-' buttons to set the desired warming temperature or time, as displayed on the LCD screen.
- Start Warming: The unit will begin the warming cycle. The LCD screen will show the current temperature or remaining time.
- Cycle Completion: Once the warming cycle is complete, the unit will emit a "bip" sound. Carefully remove the bottle/food, checking the temperature before feeding.
5.2. Sterilizing Bottles
- Clean Bottles: Ensure bottles, nipples, and accessories are thoroughly washed before sterilization.
- Add Water: Pour the recommended amount of distilled water into the heating chamber.
- Load Basket: Place the clean bottles upside down into the sterilizing basket. Arrange nipples and other small accessories in the designated areas or on top of the bottles.
- Place Basket: Insert the loaded sterilizing basket into the main unit.
- Cover: Place the lid securely on top of the unit.
- Select Function: Press the power button, then use the function selection button to choose the sterilization mode.
- Start Sterilization: The unit will begin the sterilization cycle.
- Cycle Completion: A "bip" sound will indicate the end of the sterilization cycle. Allow the unit to cool for a few minutes before carefully removing the lid and sterilized items. Use tongs to handle hot items.
6. Maintenance and Cleaning
Regular cleaning and maintenance will ensure the longevity and efficient operation of your appliance.
- Daily Cleaning: After each use, unplug the unit and allow it to cool. Remove any remaining water from the heating chamber. Wipe the interior and exterior of the main unit with a damp cloth. Wash removable parts (basket, lid) with warm soapy water and rinse thoroughly.
- Descaling: Mineral deposits (limescale) may build up in the heating chamber over time, especially with hard water. Descale the unit every 2-4 weeks, or more frequently if needed.
- Unplug the unit and ensure it is cool.
- Mix 50ml of white vinegar with 100ml of cold water. Pour the solution into the heating chamber.
- Do not turn on the unit. Let the solution sit for 30 minutes to 1 hour, or until the limescale dissolves. For stubborn deposits, you may gently scrub with a soft brush.
- Pour out the solution and rinse the heating chamber thoroughly with clean water several times to remove all vinegar residue.
- Wipe dry with a clean cloth.
- Do not use abrasive cleaners, scouring pads, or solvents, as these can damage the appliance.
7. Troubleshooting
If you encounter issues with your appliance, refer to the following table for common problems and solutions.
| Problem | Possible Cause | Solution |
|---|---|---|
| Unit does not turn on. | No power supply; damaged cord/plug. | Check if the power cord is securely plugged into a working 220V outlet. Inspect the cord and plug for damage. If damaged, do not use and contact customer support. |
| Milk/Food not warming properly. | Insufficient water; incorrect temperature setting; limescale buildup. | Ensure sufficient water is added to the heating chamber. Verify the temperature setting on the LCD. Descale the unit if limescale is present. |
| Sterilization cycle is ineffective. | Insufficient water; lid not properly sealed; excessive items. | Ensure the correct amount of water is used for sterilization. Make sure the lid is securely placed. Do not overload the sterilizing basket. |
| Unit emits a burning smell. | No water in heating chamber; foreign object. | Immediately unplug the unit. Check if water was added. Inspect for any foreign objects. Allow to cool completely before inspecting further. Do not use if the smell persists. |
If the problem persists after attempting these solutions, please contact customer support.
8. Specifications
| Model: | BB1226 |
| Brand: | Fisher-Price |
| Voltage: | 220 Volts |
| Power Source: | Electric |
| Composition: | Polypropylene (BPA-free) |
| Product Dimensions: | 23.8 x 13.5 x 20.5 cm |
| Product Weight: | 800 g |
| Certification: | Inmetro: UL-BR 22.3380 |
| GTIN/EAN: | 7908414466517 |
9. Warranty and Support
For warranty information, technical support, or service inquiries, please refer to the warranty card included with your product or contact Fisher-Price customer service. The manufacturer of this product is Multilaser. Keep your purchase receipt as proof of purchase.