
FONBEAR FB-9009
FONBEAR Adjustable Squat Rack (Model FB-9009) Instruction Manual
For safe assembly, operation, and maintenance.
1. Introduction
Thank you for choosing the FONBEAR Adjustable Squat Rack. This equipment is designed to provide a versatile and stable platform for various strength training exercises in a home gym environment. Please read this manual thoroughly before assembly and use to ensure safe and effective operation.

Image 1.1: The FONBEAR Adjustable Squat Rack in a home gym setting, demonstrating a user performing squats.
2. Important Safety Information
Always follow these safety precautions to reduce the risk of injury:
- Consult a physician before starting any exercise program.
- Inspect the rack for loose parts, damage, or wear before each use. Do not use if damaged.
- Ensure all bolts and fasteners are securely tightened before use.
- Place the squat rack on a flat, stable surface.
- Do not exceed the maximum weight capacity of 550 lbs (250 kg).
- Use safety spotter arms when lifting heavy weights, especially during squats and bench presses.
- Keep children and pets away from the equipment during use.
- Wear appropriate athletic footwear and clothing.
- Do not attempt to modify the equipment.
- Always use a spotter when lifting heavy weights.
3. Product Components and Features
The FONBEAR Adjustable Squat Rack includes the following key components:
- Barbell Shelves: Upper rests for barbells.
- Spotter Arms: Adjustable safety arms to catch the barbell.
- Hand Screws: For adjusting height and width.
- Weight Plate Storage: Integrated posts for storing weight plates.
- Anti-Slip Pads: Rubber feet for stability and floor protection.
- Thick High-Quality Steel Tube: Main structural material (50x50mm).

Image 3.1: Detailed view of the squat rack's components, highlighting the barbell shelf, hand screw, spotter arm, weight plate storage, and anti-slip pad.
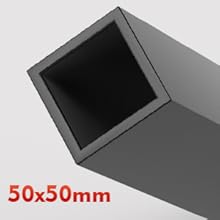
Image 3.2: Close-up of the 50x50mm thick steel tube, illustrating the robust construction material.

Image 3.3: Non-slip rubber feet provide stability and protect flooring.
4. Setup and Assembly
The FONBEAR Squat Rack requires minimal assembly. All necessary tools are typically included. Follow these general steps:
- Unpack all components and verify against the parts list (refer to your packaging for a detailed list).
- Attach the base supports to the vertical uprights using the provided hardware.
- Secure the weight plate storage posts to the base.
- Insert the adjustable barbell shelves and spotter arms into the desired height positions on the uprights.
- Tighten all hand screws and bolts to ensure stability.
- Place the anti-slip pads on the bottom of the base supports.
Note: Ensure all connections are firm before proceeding to adjustments or use.
Video 4.1: This video demonstrates the assembly and setup of a similar heavy lifting bench press rack, providing a visual guide for installation.
5. Operation and Adjustments
The FONBEAR Squat Rack is designed for versatility. Follow these guidelines for operation:
5.1 Adjusting Height
To adjust the height of the barbell shelves and spotter arms:
- Loosen the hand screw on the desired upright.
- Slide the barbell shelf or spotter arm to the appropriate height.
- Ensure the pin fully engages in the adjustment hole.
- Tighten the hand screw securely.
- Repeat for the other upright, ensuring both sides are at the same height.

Image 5.1: The adjustable height range of the squat rack, from 33.5 to 61 inches.
5.2 Adjusting Width
The rack features 6 levels of adjustable width to accommodate different barbell lengths and user preferences:
- Loosen the locking mechanisms on the connecting bar at the base.
- Slide the uprights inward or outward to the desired width (range 31.1 to 40.9 inches).
- Ensure the locking mechanisms are fully engaged in the adjustment holes.
- Tighten the locking mechanisms securely.

Image 5.2: The adjustable width feature of the squat rack, showing 6 levels of adjustment from 33.3 to 40.4 inches.
5.3 Exercise Applications
This multi-functional rack supports various exercises:
- Squats: Position the barbell shelves at shoulder height. Use spotter arms for safety.
- Bench Press: Use with a weight bench. Adjust barbell shelves to a height that allows for safe racking and unracking. Utilize spotter arms.
- Pull-ups/Dips: The rack can be configured for pull-ups or used as a dip station depending on the setup and accessories.
- Push-ups: The base or lower sections can be used for elevated push-ups.

Image 5.3: Examples of multi-functional use, including squats and a dip station setup.

Image 5.4: The squat rack configured for bench press and general weightlifting exercises.
Video 5.1: A review demonstrating the use of the metal squat barbell rack for bench press and other exercises.
6. Maintenance
Regular maintenance ensures the longevity and safety of your squat rack:
- Cleaning: Wipe down the frame with a damp cloth after each use to remove sweat and dust. Avoid abrasive cleaners.
- Inspection: Periodically check all bolts, nuts, and adjustment pins for tightness. Tighten any loose fasteners.
- Wear and Tear: Inspect for any signs of rust, cracks, or damage to the steel frame or rubber components. Replace damaged parts immediately.
- Lubrication: If adjustment mechanisms become stiff, apply a small amount of silicone-based lubricant to the sliding parts.
7. Troubleshooting
| Problem | Possible Cause | Solution |
|---|---|---|
| Rack feels wobbly or unstable. | Loose bolts; uneven floor; incorrect assembly. | Ensure all bolts are securely tightened. Place the rack on a flat, level surface. Re-check assembly steps. |
| Adjustment pins do not engage properly. | Obstruction in adjustment holes; pin misalignment. | Clear any debris from the holes. Ensure the pin is aligned correctly before pushing it through. |
| Barbell shelves or spotter arms slide down. | Hand screws not tightened sufficiently. | Ensure hand screws are fully tightened after adjusting height. |
8. Specifications
- Model: FB-9009
- Brand: FONBEAR
- Material: Alloy Steel
- Maximum Load Capacity: 550 lbs (250 kg)
- Item Weight: 13.36 kg (29.45 lbs)
- Adjustable Height Range: Approximately 33.5 - 61 inches
- Adjustable Width Range: Approximately 31.1 - 40.9 inches
- Color: Black, Red
- UPC: 676821595812
9. Warranty Information
The FONBEAR Adjustable Squat Rack (Model FB-9009) comes with a 3-year manufacturer warranty. This warranty covers defects in materials and workmanship under normal use. Please retain your proof of purchase for warranty claims. For detailed terms and conditions, please contact FONBEAR customer support.
10. Customer Support
If you have any questions, require assistance with assembly, or need to make a warranty claim, please contact FONBEAR customer support through the retailer where you purchased the product or visit the official FONBEAR website for contact information.
Website: www.fonbear.com (Note: This is a placeholder URL, please refer to actual product documentation for official website.)
Ask a question about this manual
Ask about setup, troubleshooting, compatibility, parts, safety, or missing instructions. Manuals+ will review the question and use this page’s manual context to help answer it.