
1. Introduction
This manual provides detailed instructions for setting up, operating, and maintaining your AISHICHEN 8.8-Inch PC Temperature Display. This IPS USB mini screen is designed to function as a secondary monitor for displaying real-time system information such as CPU, GPU, and RAM usage and temperature, network speed, date, time, and weather forecasts. It is suitable for use with ARGB computer cases, industrial computers, and various mini PCs.

Figure 1: AISHICHEN 8.8-Inch IPS Expansion Display showcasing system data.
2. Package Contents
Please verify that all items are present in your package:
- 1 x AISHICHEN 8.8-Inch PC Temperature Display
- 1 x HDMI Cable (for data transmission)
- 1 x USB Power Cable
- 1 x User Manual (this document)

Figure 2: Display unit with HDMI and USB cables.
3. Setup Guide
3.1 Initial Connection
- Ensure Compatibility: Before connecting, confirm that your device (PC, Raspberry Pi, etc.) has available HDMI interfaces for video output and USB ports for power.
- Connect HDMI Cable: Connect one end of the provided HDMI cable to the HDMI port on the AISHICHEN display and the other end to an available HDMI output on your computer or device.
- Connect USB Power Cable: Connect the provided USB power cable to the USB power port on the AISHICHEN display and an available USB port on your computer or a 5V/3A power adapter.
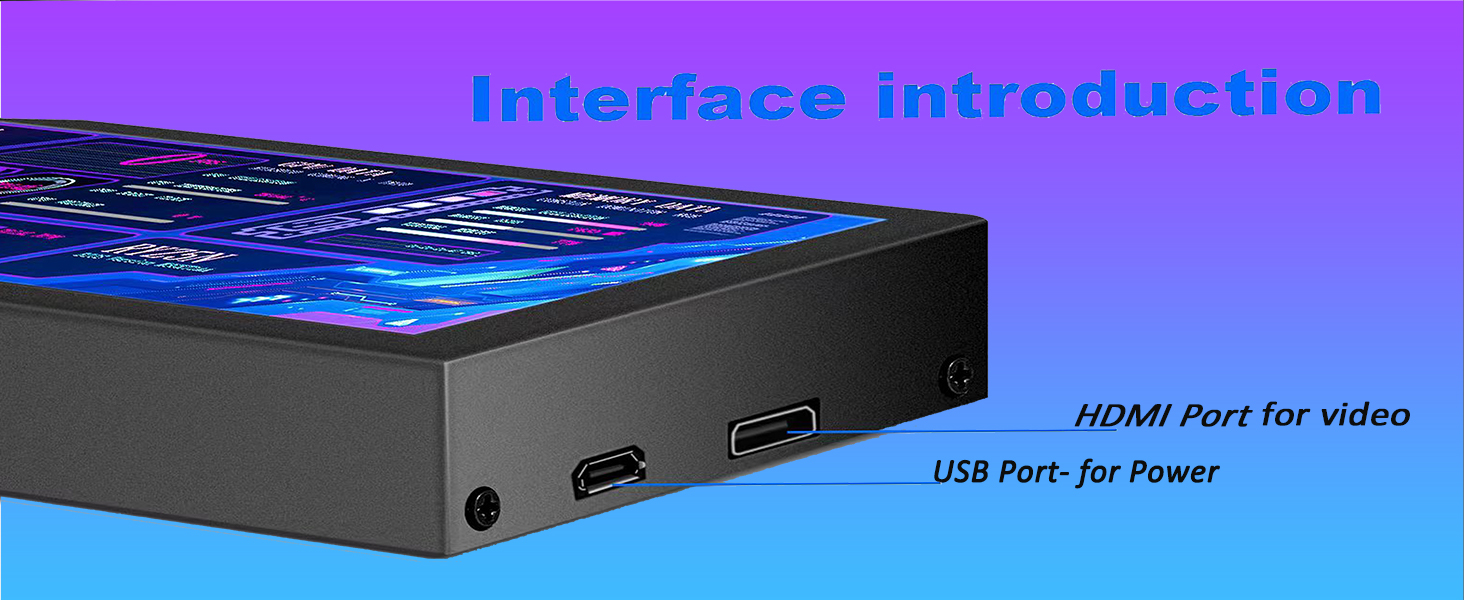
Figure 3: Interface introduction with HDMI and USB ports labeled.
3.2 Software Installation (AIDA64)
To display detailed system information, AIDA64 software is recommended. Follow these steps:
- Download AIDA64: Visit the official AIDA64 website (www.aida64.com/downloads) and download the AIDA64 Extreme version.
- Install AIDA64: Run the installer and follow the on-screen instructions to complete the installation.
- Download SensorPanel Templates: Obtain suitable SensorPanel templates. These can often be found on community forums or provided by the manufacturer.
- Configure AIDA64 SensorPanel:
- Open AIDA64 Extreme.
- Navigate to File > Preferences > SensorPanel.
- Enable the SensorPanel.
- Right-click on the SensorPanel icon in the system tray (lower right corner of your main display).
- Select Management Panel, then right-click and choose Edit Panel.
- Click Import Template and select your desired template file. Confirm with OK.
- Drag SensorPanel to Display: Left-click and hold the mouse on the AIDA64 SensorPanel window on your main screen. Drag it to the AISHICHEN 8.8-inch display. You may need to confirm the display's position in your Windows display settings first.
Video 1: Guide on using the PC sensor panel, including AIDA64 setup.
Video 2: Instructions for downloading AIDA64 software and templates.
4. Operating Instructions
4.1 Displaying System Data
Once AIDA64 SensorPanel is configured and moved to the AISHICHEN display, it will automatically show real-time data for your CPU, GPU, RAM, and other system components based on the loaded template.
Video 3: Demonstration of AIDA64 SensorPanel displaying system information on the screen.
4.2 Customization and Modes
- Customizable Layouts: Utilize the AIDA64 Visual Theme Editor to drag and drop elements, creating personalized display layouts.
- Horizontal and Vertical Switching: The display supports both landscape and portrait orientations. Adjust the rotation angle through your operating system's display settings (e.g., Windows Display Settings).
- Brightness Adjustment: The display supports a wide range of brightness adjustment from 300cd to 600cd to suit your environment and protect your eyes.
- Extended Screen Functionality: You can drag any webpage or application window to the AISHICHEN display to use it as an extended screen for watching videos or other content.

Figure 4: The display supports both landscape and vertical modes.
5. Maintenance
- Cleaning: Use a soft, lint-free cloth to gently wipe the screen. Avoid abrasive cleaners or solvents that could damage the display surface.
- Handling: Handle the display with care to prevent physical damage. The metal surface is protected by tempered glass.
- Storage: When not in use for extended periods, store the display in a cool, dry place away from direct sunlight and extreme temperatures.

Figure 5: Tempered glass panel and metal appearance of the display.
6. Troubleshooting
- Display Not Turning On:
- Ensure both the HDMI cable (for signal) and USB cable (for power) are securely connected.
- Verify the USB power source is providing sufficient power (5V).
- Check if your computer's display settings recognize the secondary monitor.
- No Signal/Flickering Display:
- Confirm the HDMI cable is fully inserted and not damaged.
- Try a different HDMI port on your computer, if available.
- Update your graphics card drivers.
- Ensure the display resolution is correctly configured for 1920x480.
- AIDA64 SensorPanel Not Appearing:
- Ensure AIDA64 Extreme is running and the SensorPanel feature is enabled in its preferences.
- Verify that a SensorPanel template has been successfully imported.
- Check your main display for the SensorPanel window and drag it to the AISHICHEN display.
- Incorrect Display Orientation:
- Right-click on your desktop and select Display settings.
- Select the AISHICHEN display (usually labeled as '2').
- Under Display orientation, choose the desired orientation (Landscape, Portrait, etc.) and apply.
7. Specifications
| Feature | Specification |
|---|---|
| Model Number | 8.8-No Touch |
| Screen Size | 8.8 Inches |
| Resolution | 1920 x 480 (FHD) |
| Aspect Ratio | 16:9 |
| Refresh Rate | 60Hz |
| Panel Type | IPS Full View |
| Image Brightness | 400 Candela (adjustable 300-600cd) |
| Voltage | 5 Volts |
| Total USB Ports | 1 (for power) |
| Product Dimensions | 9.87 x 7.87 x 2.76 inches |
| Item Weight | 3.52 ounces |

Figure 6: Detailed dimensions of the display unit.
8. Warranty and Support
AISHICHEN is committed to customer satisfaction. If you encounter any problems with your product or require technical assistance, please contact our customer service team. We are ready to provide professional technical support.
For specific inquiries or issues, please refer to the contact information provided with your purchase or visit the official AISHICHEN store on Amazon: AISHICHEN Store.


