1. Product Overview
The KeeGone Ice Maker is designed for efficient and convenient ice production. It utilizes compressor cooling technology and environmentally friendly R600a refrigerant for rapid ice making. The unit features a micro-computer control system with an intuitive LED display and touch buttons, providing precise temperature control and error notifications. It automatically detects low water levels and indicates when the ice basket is full. The design includes a generous 2-liter water tank, an ice storage basket, and a transparent viewing window to monitor ice production. This versatile appliance is suitable for various settings, including homes, bars, restaurants, and RVs.
Important Note: Always use drinking water for ice production. If using pure or distilled water, add a small amount of salt to prevent false 'low water' alarms, as the sensor may not detect pure water effectively.

Figure 1: KeeGone Ice Maker with accessories. This image shows the compact design and included ice scoop, ready for use.
2. Safety Information
- Read all instructions before operating the appliance.
- Ensure the voltage matches your local power supply (220 Volts).
- Do not immerse the appliance, power cord, or plug in water or other liquids.
- Unplug the ice maker from the power outlet when not in use, before cleaning, and before servicing.
- Keep children away from the ice maker. This appliance is not intended for use by persons (including children) with reduced physical, sensory, or mental capabilities, or lack of experience and knowledge, unless they have been given supervision or instruction concerning use of the appliance by a person responsible for their safety.
- Place the ice maker on a stable, level surface with adequate ventilation around it. Maintain at least 15 cm (6 inches) of clearance on all sides.
- Do not operate any appliance with a damaged cord or plug, or after the appliance malfunctions or has been damaged in any manner.
- Do not use outdoors.
- Do not use abrasive cleaners or sharp objects to clean the interior.
3. Setup
- Unpack the Appliance: Carefully remove all packaging materials and inspect the ice maker for any damage. Retain packaging for future transport if needed.
- Placement: Place the ice maker on a flat, stable, and heat-resistant surface. Ensure there is sufficient space (at least 15 cm) around the unit for proper ventilation. Avoid direct sunlight or heat sources.
- Initial Cleaning: Before first use, clean the interior of the ice maker. Refer to the 'Maintenance and Cleaning' section for detailed instructions.
- Allow to Rest: After transport, allow the ice maker to stand upright for at least 2-4 hours before plugging it in. This allows the refrigerant to settle.
- Connect Power: Plug the power cord into a grounded electrical outlet.
4. Operating Instructions
4.1 Control Panel Overview

Figure 2: Intelligent Touch Control Panel. The LED display shows time, ice full, and water shortage indicators, along with touch buttons for power, timer, ice size, and self-cleaning.
- Power Button (⏻): Turns the ice maker ON or OFF.
- Timer Button (⏱): Activates the time reservation function for delayed ice production.
- Ice Size Button (⚡): Selects between small (S) and large (L) ice cube sizes.
- Self-Cleaning Button (🚿): Initiates the automatic self-cleaning cycle (press and hold for 3 seconds).
- Water Shortage Indicator (⚠): Illuminates when the water tank needs refilling.
- Ice Full Indicator (🧊): Illuminates when the ice basket is full.
4.2 First Use and Ice Production
- Add Water: Open the lid and fill the water tank with drinking water up to the MAX fill line. Do not overfill.
- Power On: Press the Power button (⏻) to turn on the ice maker.
- Select Ice Size: Press the Ice Size button (⚡) to choose between small (S) or large (L) ice cubes. The default setting is usually large.
- Start Production: The ice maker will automatically begin the ice-making cycle. The first batch of ice may take slightly longer (6-12 minutes) and might be smaller or irregular. Discard the first 2-3 batches of ice.
- Monitor Ice: The ice maker will produce up to 9 bullet-shaped ice cubes per cycle. The ice full indicator (🧊) will light up when the ice basket is full, and the machine will pause.
- Collect Ice: Use the provided ice scoop to remove ice from the basket. The machine will resume ice production once ice is removed.

Figure 3: Fast Ice Production. The ice maker produces clear, bullet-shaped ice cubes in approximately 6-12 minutes per cycle.
4.3 Time Reservation Function
The time reservation function allows you to set a delayed start for ice production.
- With the machine ON, press the Timer button (⏱). The display will show a default time.
- Use the Ice Size button (⚡) to adjust the desired delay time in hours. Each press increases the time.
- Once the desired time is set, press the Timer button (⏱) again to confirm. The timer icon will illuminate.
- The ice maker will start production after the set delay time has elapsed.

Figure 4: Time Reservation Function. This feature allows users to schedule ice production, for example, to have fresh ice ready in the morning.
5. Maintenance and Cleaning
5.1 Self-Cleaning Function
The KeeGone Ice Maker features a convenient self-cleaning function to simplify maintenance.
- Ensure the ice maker is empty of ice and water.
- Fill the water tank with clean drinking water up to the MAX line.
- Press and hold the Self-Cleaning button (🚿) for 3 seconds to activate the self-cleaning cycle. The machine will run through a cleaning process.
- Once the cycle is complete, drain the water from the unit using the drain plug located at the bottom.
- Rinse the interior with fresh water and drain again.

Figure 5: Hands-Free Self-Cleaning. This feature automates the cleaning process, saving time and effort compared to manual cleaning.
5.2 Regular Cleaning
- Exterior: Wipe the exterior with a soft, damp cloth. Do not use harsh chemicals or abrasive cleaners. The robust ABS casing with a stainless steel finish is easy to clean.
- Interior: Regularly clean the water tank, ice basket, and ice-making components. Use a mild detergent and warm water, then rinse thoroughly.
- Draining: To completely drain the water from the unit, locate the drain plug at the bottom of the ice maker. Place a container underneath and remove the plug to allow water to flow out. Reinsert the plug securely after draining.
- Storage: If storing the ice maker for an extended period, ensure it is thoroughly cleaned and dried. Store in a cool, dry place.
6. Troubleshooting
If you encounter issues with your KeeGone Ice Maker, please refer to the following common problems and solutions:
| Problem | Possible Cause | Solution |
|---|---|---|
| Ice maker not turning on | No power; Power cord not plugged in; Fuse blown/circuit breaker tripped. | Check power outlet; Ensure cord is securely plugged in; Reset circuit breaker. |
| No ice production | No water in tank; Water pump malfunction; Ambient temperature too high. | Fill water tank; Contact customer support; Ensure proper ventilation and suitable room temperature. |
| "Water Shortage" indicator on, but tank has water | Using pure/distilled water without salt; Water sensor dirty. | Add a pinch of salt to the water; Clean the water sensor. |
| Ice cubes are small or cloudy | First few cycles; Water quality; Ambient temperature. | Discard first batches; Use fresh, cold drinking water; Ensure proper ventilation. |
| Ice full indicator on, but basket not full | Ice cubes are blocking the sensor. | Rearrange ice cubes in the basket. |
| Unusual noise | Normal operation sounds (compressor, water pump); Unit not level. | Ensure unit is on a level surface; If noise is excessive or unusual, contact support. |
If the problem persists after attempting these solutions, please contact KeeGone customer support for assistance.
7. Specifications
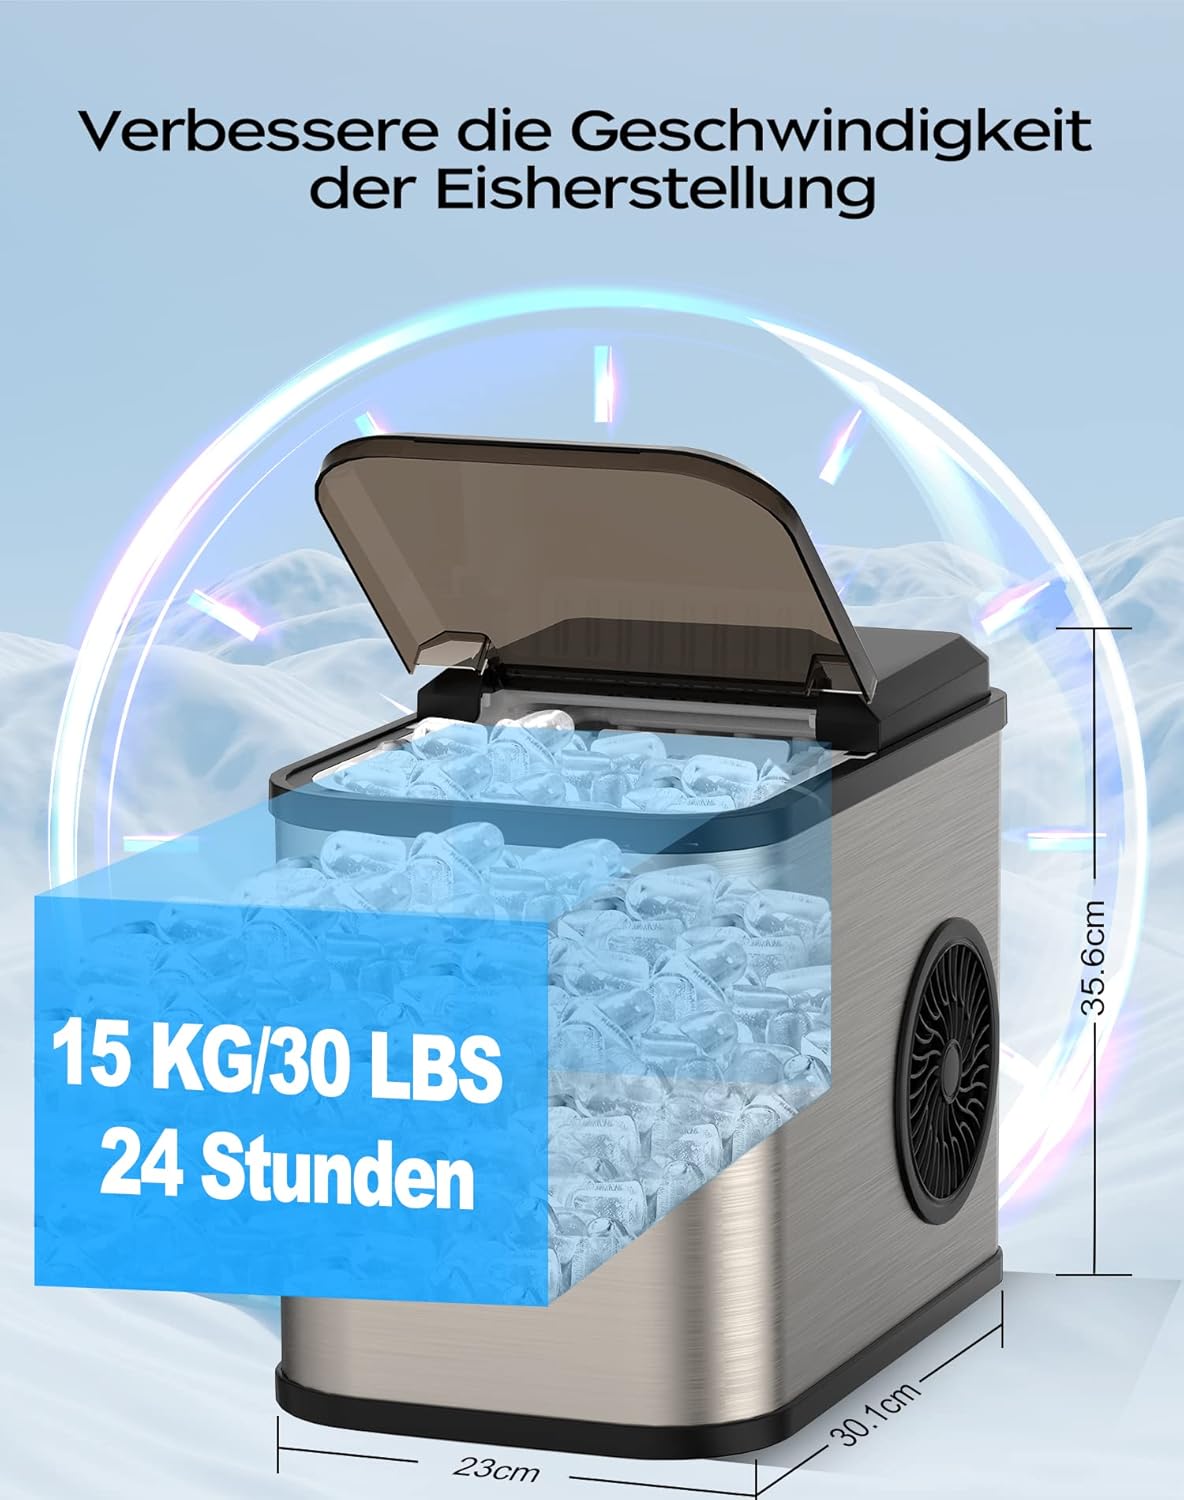
Figure 6: Product Dimensions. The compact size makes it suitable for various countertop spaces.
| Feature | Specification |
|---|---|
| Brand | KeeGone |
| Model Number | YT-E-009BA |
| Dimensions (L x W x H) | 35.6 x 23 x 30.1 cm |
| Weight | 9 kg |
| Water Tank Capacity | 2 Liters |
| Ice Production Capacity | Up to 15 kg per 24 hours |
| Ice Production Cycle | 6-12 minutes per batch (9 cubes) |
| Ice Cube Shape | Bullet-shaped (2 sizes: S/L) |
| Voltage | 220 Volts |
| Refrigerant | R600a |
| Material | Stainless Steel finish over ABS casing |
| Noise Level | Approximately 35dB |
| UPC | 727536767190 |

Figure 7: Low Noise Operation. The KeeGone ice maker operates at approximately 35dB, ensuring a quiet environment.

Figure 8: Versatile Ice Cubes. The ice maker produces two sizes of bullet ice, suitable for various beverages and uses.
8. Warranty and Support
For warranty information, please refer to the documentation provided with your purchase or contact your retailer. If you require technical support or have questions not covered in this manual, please contact KeeGone customer service through the retailer's platform or the official KeeGone website.


