1. Introduction
This instruction manual provides essential information for the safe and correct installation, operation, and maintenance of your Samoser Triple Water Inlet Valve. This valve is designed as an aftermarket replacement part for various GE top load washing machine models. Please read this manual thoroughly before proceeding with installation or any maintenance to ensure proper function and to prevent potential damage or injury.
2. Product Overview
The Samoser Triple Water Inlet Valve controls the flow of hot and cold water into your washing machine. A malfunctioning inlet valve can lead to issues such as improper water filling, leaks, or no water supply to the washer. This replacement part is engineered to meet the specifications required for compatible GE top load washers.
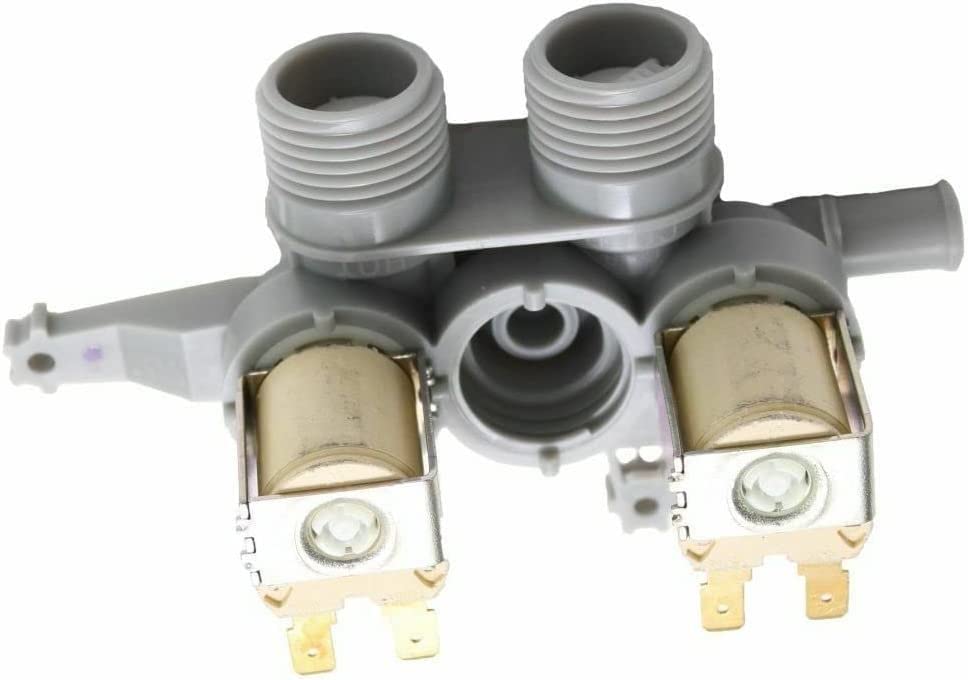
Figure 2.1: Samoser Triple Water Inlet Valve. This image displays the complete valve assembly with its various connection points for water lines and electrical wiring.
2.1 Package Contents
- 1x Samoser Triple Water Inlet Valve
2.2 Key Features
- Direct replacement for original GE washer inlet valves.
- Constructed with durable metal components.
- Designed for reliable water flow control.
3. Compatibility
This Samoser Triple Water Inlet Valve is compatible with a wide range of GE top load washer models. Please verify your washer's model number against the list below to ensure compatibility. The model number is typically located on a label inside the washer's lid, on the back of the washer, or on the frame near the door opening.
Compatible GE Top Load Washer Models include:
- GCWN4950D0WS
- GCWN4950D1WS
- GCWN5550D0WW
- GHWN4250D0WW
- GHWN4250D1WW
- GHWN4250D2WW
- GHWN5250D0WS
- GHWN5250D1WS
- GLWN5250D0WW
- GLWN5250D1WW
- GLWN5550D0WW
- GLWN5550D1WW
- GMAN4250F0WS
- GMAN4250F1WS
- GMAN5650D0WW
- GMAN5650D1WW
- GRWN5550D0WS
- GRWN5550D0WW
- GRWN5550D1WS
- GTAN4250D0WW
- GTAN4250D1WW
- GTAN4250D2WW
- GTAN5250D0WW
- GTAN5250D1WW
- GTAN5250D2WW
- GTAN5550D0WW
- GTAN5550D1WW
- GTAP2250D0WW
- GTAP2250D1WW
- GTMP280ED6WW
- GTWN4250D0WS
- GTWN4250D1WW
- GTWN4250D2WW
- GTWN4950D0WS
- GTWN4950D1WS
- GTWN4950F0WW
- GTWN5250D0WW
- GTWN5250D1WW
- GTWN5350D0WW
- GTWN5350D1WW
- GTWN5450D0WW
- GTWN5450D1WW
- GTWN5450D2WW
- GTWN5550D0WW
- GTWN5550D1WW
- GTWN5650D0WW
- GTWN5650D1WW
- GTWN5650F0WS
- GTWN5650F1WS
- GTWN5650F2WS
- GTWN5750D0WW
- GTWN5850D0WW
- GTWN5850D1WW
- GTWN5950D0WW
- GTWP2000F0WW
- GTWP2000F1WW
- GTWP2250D0WW
- GTWN4250DIWS
4. Safety Information
WARNING: Always disconnect power to the washing machine and turn off water supply valves before attempting any installation, repair, or maintenance. Failure to do so can result in electric shock, water damage, or personal injury.
- Wear appropriate personal protective equipment (PPE), such as gloves and eye protection, during installation.
- Ensure the work area is well-lit and clear of obstructions.
- If you are unsure about any step, consult a qualified appliance technician.
- Keep children and pets away from the work area.
5. Installation Instructions
The following steps outline the general procedure for replacing a triple water inlet valve in a GE top load washer. Specific steps may vary slightly depending on your washer model. Refer to your washer's service manual for detailed model-specific instructions if available.
5.1 Tools Required
- Screwdriver (Phillips and/or Flathead)
- Pliers or adjustable wrench
- Bucket and towels (for water drainage)
- New Samoser Triple Water Inlet Valve
5.2 Step-by-Step Installation
- Disconnect Power and Water: Unplug the washing machine from the electrical outlet. Turn off the hot and cold water supply valves located behind the washer.
- Drain Water Hoses: Disconnect the hot and cold water inlet hoses from the back of the washer. Place the ends of the hoses into a bucket to drain any residual water.
- Access the Valve: Depending on your washer model, you may need to remove the back panel or the top control panel to access the water inlet valve. Use a screwdriver to remove any retaining screws.
- Disconnect Electrical Connections: Carefully disconnect the electrical wiring harness from the old water inlet valve. Note the position of each wire if they are not color-coded or keyed.
- Remove Old Valve: Disconnect the internal water hoses from the old valve. Use pliers or a wrench to loosen any clamps or nuts. Remove any mounting screws or clips holding the old valve in place and carefully pull it out.
- Install New Valve: Position the new Samoser Triple Water Inlet Valve in the same location as the old one. Secure it with the mounting screws or clips.
- Connect Internal Hoses: Reconnect the internal water hoses to the new valve, ensuring all connections are secure and leak-free.
- Reconnect Electrical: Attach the electrical wiring harness to the new valve. Ensure connections are firm.
- Reassemble Washer: Reattach the back panel or top control panel, securing it with screws.
- Reconnect External Hoses and Power: Reconnect the hot and cold water inlet hoses to the new valve. Turn on the hot and cold water supply valves. Plug the washing machine back into the electrical outlet.
- Test for Leaks: Run a short wash cycle and carefully check all connections for any leaks. Tighten connections as necessary.
6. Operation
The Samoser Triple Water Inlet Valve operates automatically as part of your washing machine's normal cycle. Once installed, it requires no direct user interaction. Ensure that both hot and cold water supply valves are fully open for proper washer function.
7. Maintenance
Regular maintenance of the water inlet valve itself is generally not required. However, periodic checks of the water inlet screens can help prevent issues:
- Check Inlet Screens: Periodically (e.g., every 6-12 months), turn off the water supply and disconnect the inlet hoses from the back of the washer. Inspect the small screens inside the valve's inlet ports for debris or sediment.
- Clean Screens: If screens are clogged, carefully remove them with pliers and rinse them under running water. Use a soft brush if necessary to remove stubborn deposits.
- Reinstall: Reinsert the clean screens, reconnect the hoses, and turn on the water supply. Check for leaks.
8. Troubleshooting
If your washing machine is experiencing water-related issues after valve replacement, consider the following:
| Problem | Possible Cause | Solution |
|---|---|---|
| No water filling or slow fill |
|
|
| Water leaks from valve connections |
|
|
| Washer overfills or continuously fills |
|
|
If troubleshooting steps do not resolve the issue, please contact customer support or a qualified appliance repair technician.
9. Specifications
| Feature | Detail |
|---|---|
| Brand | Samoser |
| Part Type | Triple Water Inlet Valve |
| Material | Metal |
| Exterior Finish | Stainless Steel |
| Inlet Connection Type | Compression |
| Outlet Connection Type | Compression |
| Number of Ports | 2 |
| Thread Size | 1/2 inch |
| Thread Type | NPT |
| Valve Type | Ball Valve |
| UPC | 734665730087 |
10. Warranty and Support
Specific warranty information for this aftermarket part is not provided in the product details. For warranty inquiries or technical support, please contact the seller directly through the platform where the purchase was made. They can provide assistance with compatibility questions, installation guidance, or defective part claims.
If you are unsure about the compatibility or installation process, it is recommended to contact the seller for advice. They aim to resolve issues within 24 hours.