1. Introduction
This manual provides essential information for the installation and use of the Samoser Dryer Timer replacement part. This component is designed to replace the original timer in various Maytag, Whirlpool, Crosley, and Kenmore dryer models. Please read these instructions carefully before proceeding with installation to ensure safe and correct operation.
2. Safety Information
WARNING: Risk of Electric Shock. Disconnect power before servicing.
- Always disconnect the dryer from its power source (unplug or turn off circuit breaker) before attempting any installation or repair.
- Wear appropriate personal protective equipment, such as gloves, to prevent injury.
- If you are unsure about any step, consult a qualified appliance repair technician.
- Ensure all connections are secure and correctly wired before restoring power.
3. Package Contents
Verify that all components are present in the package:
- 1x Dryer Timer (as pictured)
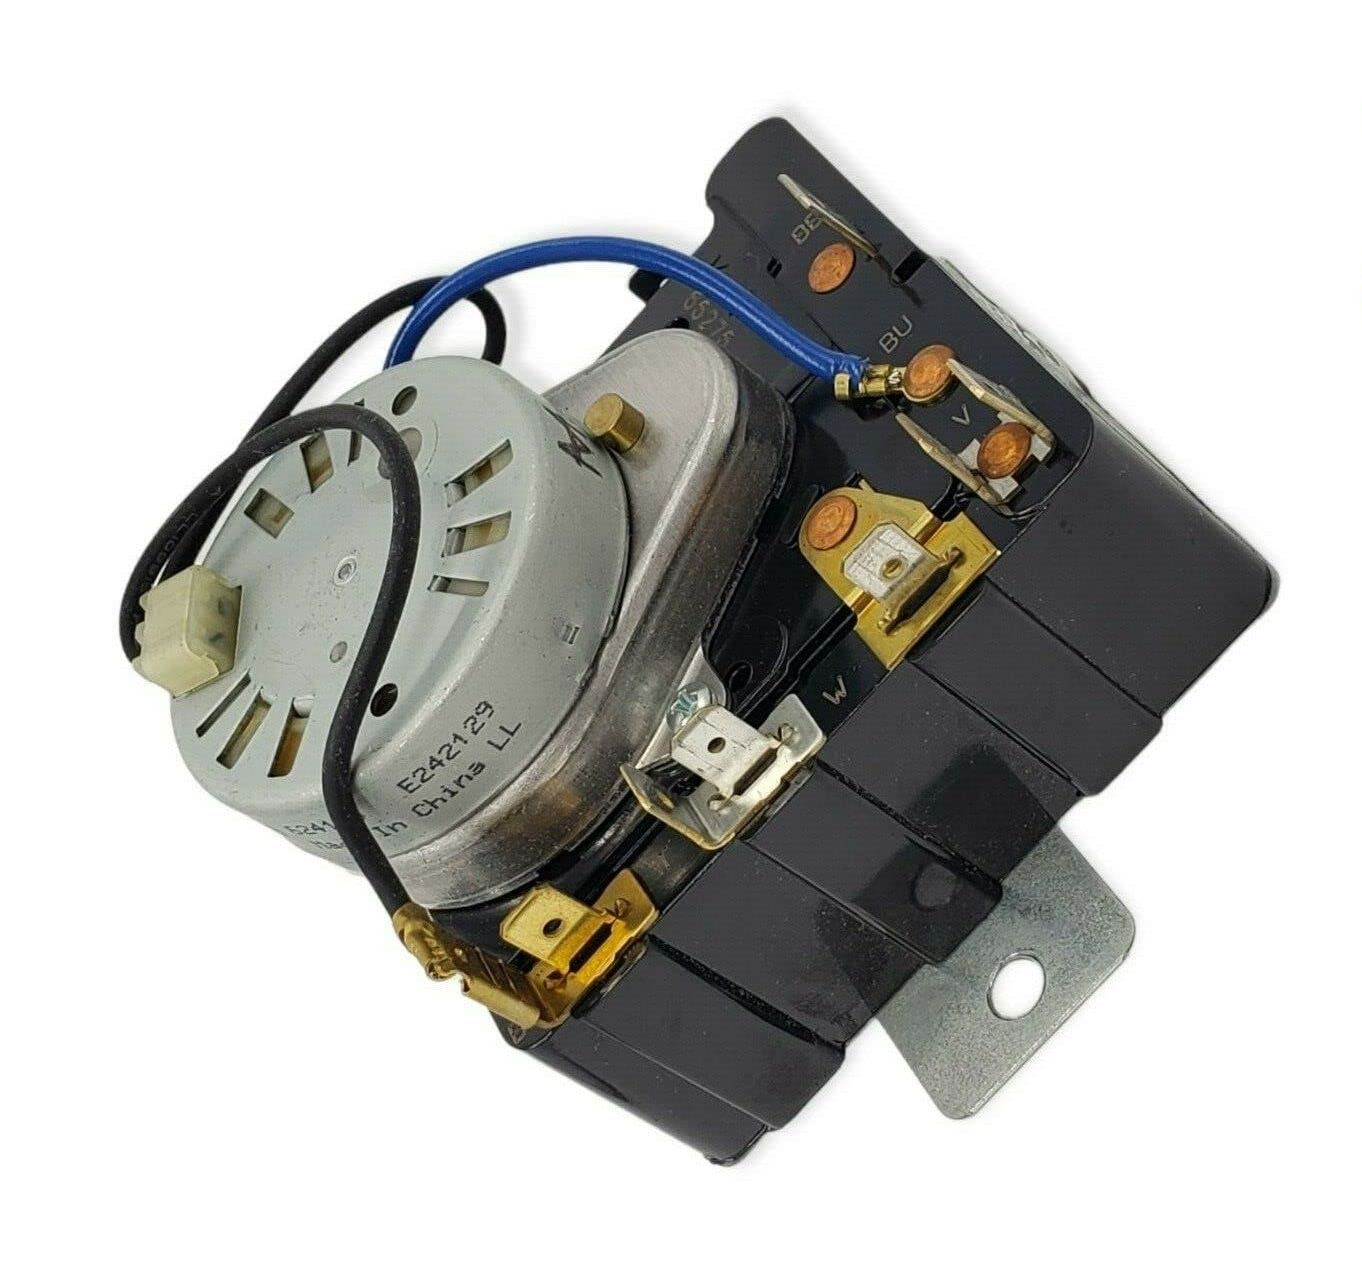
Image of the Samoser dryer timer replacement part, showing its overall design and connection points.
4. Compatibility
This Samoser dryer timer is an aftermarket replacement part compatible with a wide range of Maytag, Whirlpool, Crosley, and Kenmore dryer models. To confirm compatibility, please check your dryer's model number against the list below. You can typically find your model number on a label inside the dryer door, on the back, or on the control panel.
Compatible Models include:
- MED5700TQ0
- MED5700TQ1
- MED5707TQ0
- MED5707TQ1
- MED5720TQ0
- MED5721TQ0
- MED5730TQ0
- MED5740TQ0
- MED5740TQ1
- MED5770TQ0
- MED5800TW0
- MED5800TW1
- MED5801TW0
- MED5805TW0
- MED5805TW1
- MED5830TW0
- MED5830TW1
- MED5870TW0
- MED5870TW1
- MEDC300XW0
- MEDC300XW1
- MEDC400BW0
- MEDC500VW0 RESIDENTIAL
- MEDC700VJ0
- MEDC700VW0
- MGD5700TQ0
- MGD5700TQ1
- MGD5707TQ0
- MGD5707TQ1
- MGD5720TQ0
- MGD5721TQ0
- MGD5730TQ0
- MGD5740TQ0
- MGD5740TQ1
- MGD5770TQ0
- MGD5770TQ1
- MGD5800TW0
- MGD5800TW1
- MGD5801TW0
- MGD5805TW0
- MGD5805TW1
- MGD5830TW0
- MGD5830TW1
- MGD5870TW0
- MGD5870TW1
- MGDC300XW0
- MGDC300XW1
- MGDC300XW3
- MGDC400BW0
- MGDC500VW0
- MGDC700VJ0
- MGDC700VW0
- YMED5700TQ0
- YMED5700TQ1
- YMED5707TQ0
- YMED5720TQ0
- YMED5720TQ1
- YMED5740TQ0
- YMED5740TQ1
- YMED5800TW0
- YMEDC300XW0
- YMEDC300XW1
- YMEDC400BW0
- YMEDC500VW0
- YMEDC700VJ0
- YMEDC700VW0
- YWED4850BW0
- YWED4900XW0
- YWED4900XW1
If your model number is not listed or you are unsure, please contact the seller for assistance.
5. Installation Instructions
The following steps provide general guidance for replacing a dryer timer. Specific procedures may vary depending on your dryer model. It is highly recommended to consult your dryer's original service manual or a professional technician for detailed, model-specific instructions.
- Disconnect Power: Unplug the dryer from the wall outlet or turn off the circuit breaker supplying power to the dryer. This is a critical safety step.
- Access the Control Panel: Depending on your dryer model, you may need to remove screws from the back of the control panel or lift the top panel to gain access to the timer.
- Locate the Old Timer: Identify the existing dryer timer. Note its position and how it is mounted.
- Document Wiring: Before disconnecting any wires, take clear photos of the wiring connections to the old timer. This will serve as a reference for connecting the new timer. Label wires if necessary.
- Disconnect Wires: Carefully disconnect all wires from the old timer.
- Remove Old Timer: Unscrew or unclip the old timer from its mounting bracket.
- Install New Timer: Mount the new Samoser dryer timer in the same position as the old one. Secure it with screws or clips.
- Connect Wiring: Refer to your photos and labels to connect the wires to the new timer. Ensure each wire is securely attached to its corresponding terminal.
- Reassemble Dryer: Carefully reassemble the control panel and any other parts removed to access the timer.
- Restore Power and Test: Plug the dryer back into the wall outlet or turn on the circuit breaker. Test the dryer through various cycles to ensure the new timer functions correctly.
6. Operation
The dryer timer controls the duration and sequence of drying cycles. Once installed, the operation of your dryer timer will be consistent with its original functionality. To operate:
- Load your laundry into the dryer.
- Select the desired drying cycle and temperature settings using the control knob.
- Press the start button. The timer will advance through the selected cycle, turning off the dryer once the cycle is complete.
Refer to your dryer's original user manual for specific instructions on selecting cycles and features.
7. Maintenance
The dryer timer itself typically requires no routine maintenance. However, proper dryer maintenance can extend the life of all components, including the timer.
- Clean Lint Filter: Clean the lint filter before or after every load to ensure proper airflow and prevent overheating.
- Inspect Venting: Periodically check the dryer vent for blockages and ensure it is clean and unobstructed.
- Avoid Overloading: Do not overload the dryer, as this can strain components and lead to premature wear.
8. Troubleshooting
If your dryer is not functioning correctly after replacing the timer, consider the following common issues:
| Problem | Possible Cause | Solution |
|---|---|---|
| Dryer does not start. | No power, door switch issue, thermal fuse blown, start button fault. | Check power supply. Ensure door is fully closed. Inspect other safety components. |
| Timer does not advance. | Faulty timer (unlikely if new), motor issue, belt broken. | Verify wiring connections. Check motor and belt. |
| Dryer runs continuously. | Faulty timer, stuck contact. | Ensure timer knob is correctly seated. If problem persists, timer may be defective. |
| No heat. | Heating element failure, thermal fuse, thermostat, igniter (gas dryer). | This is usually not a timer issue. Inspect heating components. |
For complex issues or if troubleshooting steps do not resolve the problem, it is recommended to contact a qualified appliance repair technician.
9. Specifications
- Brand: Samoser
- Part Number: MEDC300XW, MED5805TW1
- Item Model Number: MED5830TW, MED5870TW
- UPC: 734665722457
- Manufacturer: Samoser
- Date First Available: March 18, 2023
10. Warranty and Support
For information regarding warranty coverage or technical support, please contact the seller directly through the platform where the product was purchased. Provide your order number and a detailed description of the issue for prompt assistance.
If you are unsure about compatibility or require further advice, the seller is available to assist within 24 hours.