1. Introduction
The YunLone Galaxy Projector BL-DQY02 transforms any room into a captivating cosmic display. This 13-in-1 projector offers a variety of celestial scenes, including planets, galaxies, and nebulae, creating an immersive experience. Designed for ease of use, it features adjustable focus, rotation, and a timer function, making it suitable for various environments and preferences.
2. Package Contents
Please verify that all items are present in your package:
- 1 x YunLone Galaxy Projector
- 13 x HD Film Discs (12 separate + 1 integrated)
- 1 x USB-C Charging Cable
- 1 x Cleaning Cloth
- 1 x User Manual
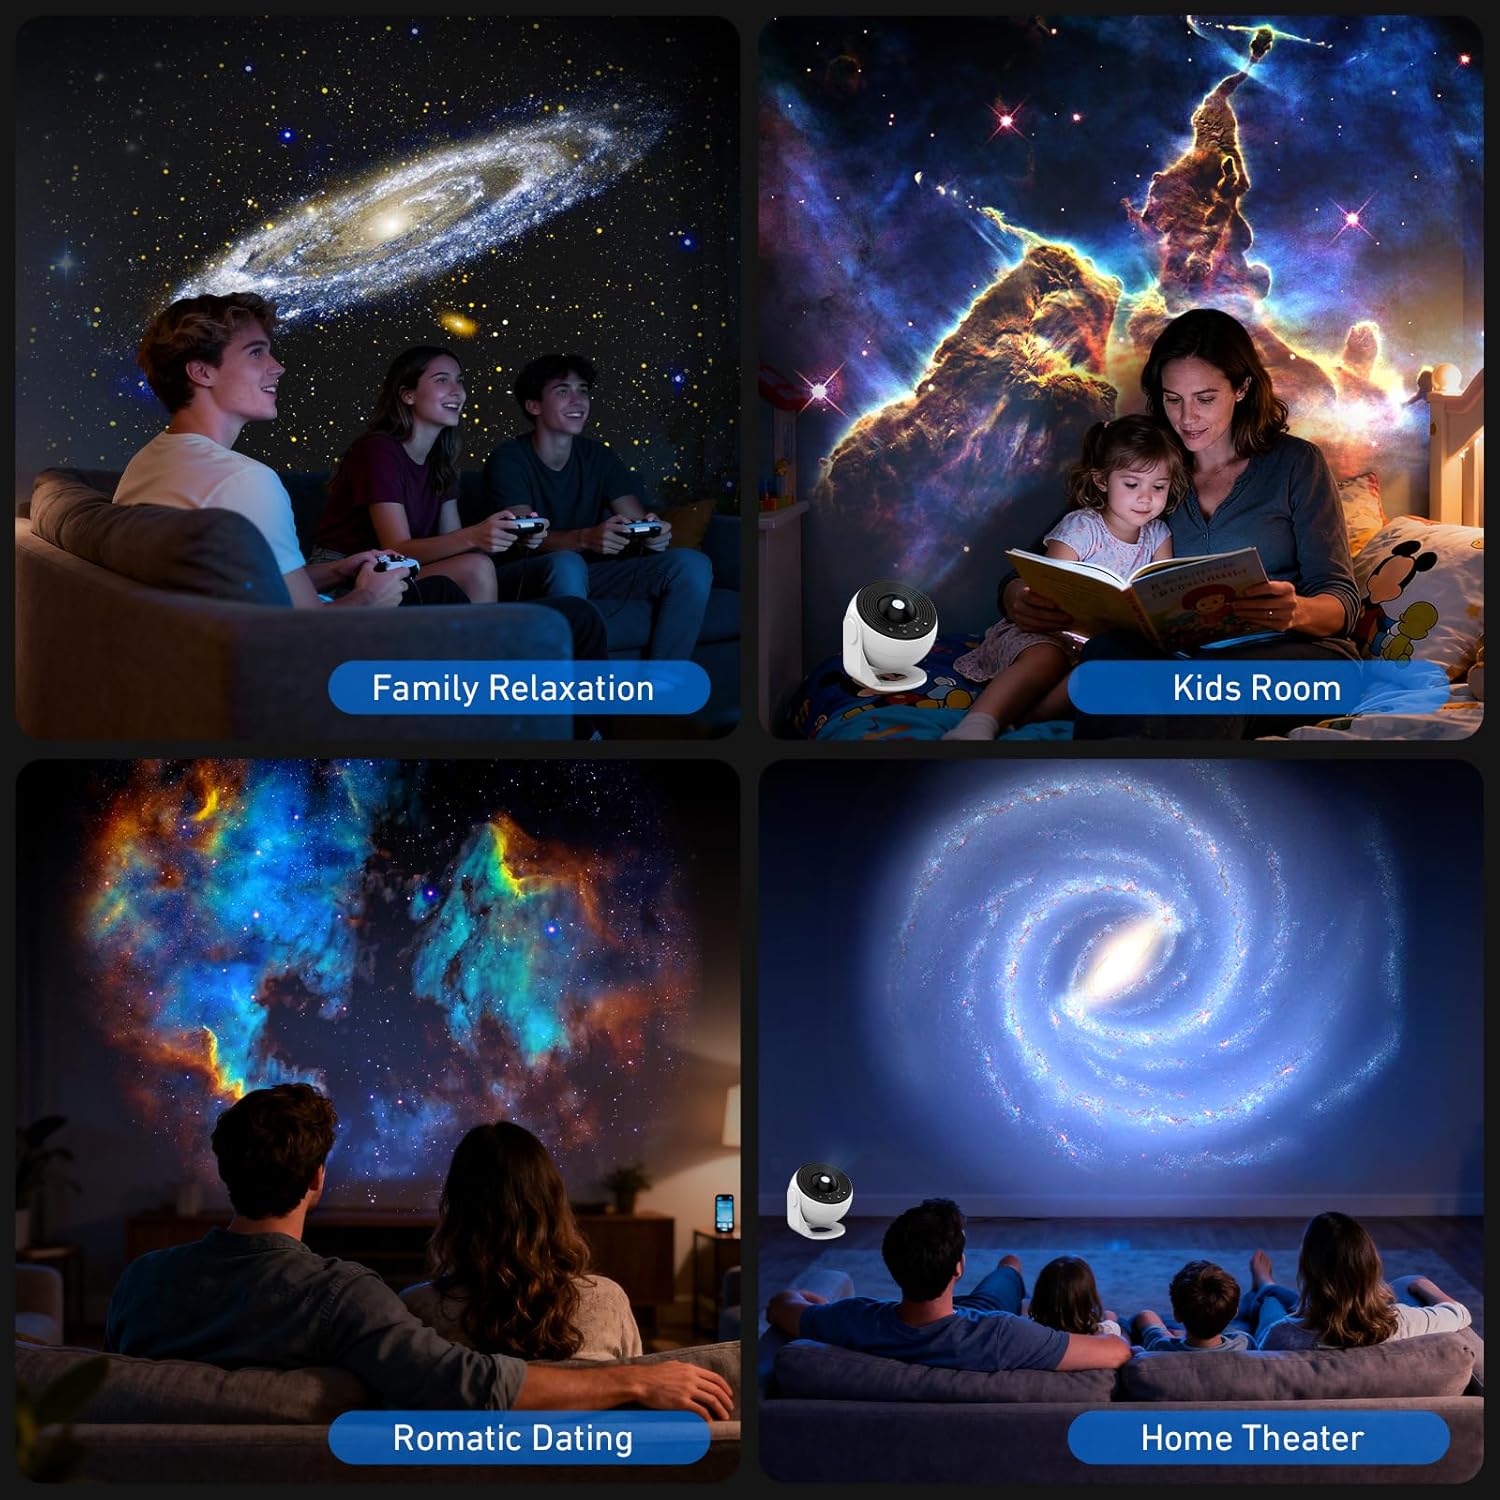
Image: The YunLone Galaxy Projector, 13 HD film discs, USB-C cable, cleaning cloth, and user manual are included in the package.
3. Product Overview
Familiarize yourself with the main components and controls of your projector.

Image: A diagram illustrating the projector's 360° rotation, HD focal adjustment, and control buttons for Power ON/OFF, Timer, Speed Control, and Stop Rotation.
Controls:
- Power ON/OFF Button: Activates or deactivates the projector.
- Timer Button: Sets the automatic shut-off time.
- Speed Control Button: Adjusts the rotation speed of the projection.
- Stop Rotation Button: Pauses the rotation of the projected image.
- Focus Knob: Located on the top, rotate to achieve a clear projection.
4. Setup
- Power Connection: Connect the provided USB-C cable to the projector and a power source. A 2A power adapter (not included) is recommended for optimal performance.
- Film Disc Insertion:
- Gently pull out the disc slot from the side of the projector.
- Insert your desired film disc into the slot, ensuring the correct orientation (image side facing the lens).
- Push the disc slot back into the projector until it clicks into place.
Image: Step-by-step guide showing how to remove the disc slot, replace the film disc, push the slot back in, and adjust the focus knob.
- Placement: Place the projector on a stable surface. For best results, ensure the room is dark. The projection distance can range from 2 to 4 meters (6.56 to 13.12 feet) to cover an entire ceiling or wall.
5. Operation
- Power On: Press the Power ON/OFF button to turn on the projector.
- Adjust Focus: Rotate the focus knob on the top of the projector until the projected image appears clear and sharp on your surface.
- Select Film Disc: Change film discs as described in the Setup section to explore different celestial scenes.

Image: A visual representation of the 13 themed film discs, including Solar System, Andromeda Galaxy, NGC 4298, Nebula, Moon, Galaxy, Small Magellanic Cloud, Hubble Deep Field, M60, NGC 6357, The Milky Way, Earth, and Mystic Mountain.
- Control Rotation:
- The projector offers 360° rotation.
- Press the Speed Control button to cycle through available rotation speeds (e.g., still, 12 min/turn, 16 min/turn).
- Press the Stop Rotation button to pause the rotation at any time.

Image: This image highlights the projector's features, including 3-stage timer options (1H, 2H, 4H) and dynamic rotating star lights with 3-stage flow speed (Still, 12min/Turn, 16min/Turn).
- Set Timer: Press the Timer button to set an automatic shut-off time. Available options are 1 hour, 2 hours, or 4 hours (default). This feature promotes a peaceful sleep environment.

Image: A child sleeping peacefully with the projector displaying a nebula on the ceiling, demonstrating the 3-stage timer and the projector's quiet operation (below 20db).
6. Maintenance
To ensure the longevity and optimal performance of your projector, follow these maintenance guidelines:
- Cleaning the Lens: Use the provided cleaning cloth to gently wipe the projector lens. Avoid abrasive materials or harsh chemicals.
- Cleaning Film Discs: Handle film discs by their edges. If necessary, gently wipe them with the cleaning cloth to remove dust or fingerprints. Store them in their protective cases when not in use.
- General Cleaning: Wipe the exterior of the projector with a soft, dry cloth.
- Storage: Store the projector in a cool, dry place away from direct sunlight and extreme temperatures.
7. Troubleshooting
If you encounter any issues with your YunLone Galaxy Projector, please refer to the following common problems and solutions:
| Problem | Possible Cause | Solution |
|---|---|---|
| Projected image is blurry. | Focus is not adjusted correctly. | Rotate the focus knob on the top of the projector until the image is clear. |
| Projector does not turn on. | No power or insufficient power supply. | Ensure the USB-C cable is securely connected. Use a 2A power adapter. |
| Projection is dim or unclear. | Room is not dark enough; lens or film disc is dirty. | Operate in a completely dark room. Clean the lens and film discs with the provided cloth. |
| Image is not rotating. | Rotation is paused or speed is set to 'Still'. | Press the Speed Control button to select a rotation speed, or press the Stop Rotation button to resume rotation if it was paused. |
8. Specifications
| Feature | Detail |
|---|---|
| Brand | YunLone |
| Model Number | BL-DQY02 |
| Dimensions (L x W x H) | 10.16 x 10.16 x 10.16 cm |
| Weight | 450 grams |
| Power Input | 5 Volts (DC) |
| Power Consumption | 10 Watts |
| Material | Acrylic, Glass |
| Light Source Type | LED |
| Special Features | Star Projector, 360° Rotation, HD Focal Adjustment, Timer Function |
| Included Components | Projector, 13 Film Discs, USB-C Cable, Cleaning Cloth, User Manual |
9. Warranty and Support
This YunLone Galaxy Projector comes with a 12-month warranty covering any manufacturing defects or malfunctions from the date of purchase. Please retain your proof of purchase for warranty claims.
For technical support, warranty claims, or any other inquiries, please contact your retailer or the manufacturer directly through their official support channels. Refer to the packaging or the official YunLone website for contact information.


