Milwaukee M12BHCS3L-201
Milwaukee M12 BHCS3L-201 Chemical Sprayer User Manual
Model: M12BHCS3L-201
Introduction
Thank you for choosing the Milwaukee M12 BHCS3L-201 Chemical Sprayer. This manual provides essential information for the safe and effective operation, maintenance, and troubleshooting of your new sprayer. Please read this manual thoroughly before using the product and keep it for future reference.
Important Safety Information
WARNING: Always wear appropriate personal protective equipment (PPE) when operating this sprayer, including eye protection, gloves, and respiratory protection as recommended by the chemical manufacturer.
- Read and understand all chemical labels before use.
- Do not spray flammable liquids.
- Ensure proper ventilation when spraying indoors or in confined spaces.
- Keep out of reach of children and pets.
- Always disconnect the battery pack before performing any maintenance or cleaning.
- Do not modify the sprayer or use it for purposes other than those specified in this manual.
Product Overview
The Milwaukee M12 BHCS3L-201 Chemical Sprayer is designed for efficient and consistent application of various liquids. Familiarize yourself with its components:

Figure 1: Front view of the Milwaukee M12 BHCS3L-201 Chemical Sprayer, showing the main unit, wand, and hose connection.
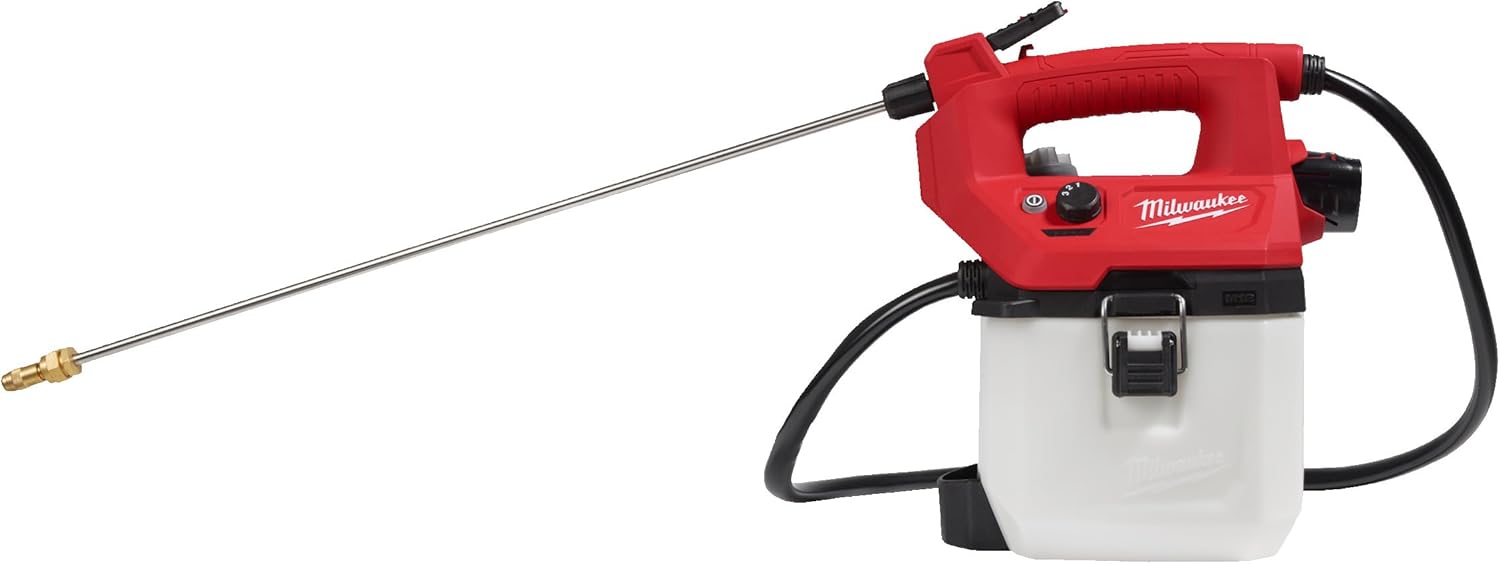
Figure 2: Side view of the sprayer, highlighting the ergonomic handle and the clear tank for liquid visibility.

Figure 3: Rear view of the sprayer, showing the battery compartment and the secure latch for the tank.

Figure 4: Close-up view of the control panel, including the power button and pressure adjustment dial.
Setup
- Charge Battery: Ensure your M12 B2 battery is fully charged using a compatible Milwaukee M12 charger.
- Install Battery: Slide the charged M12 battery pack into the battery compartment until it clicks into place.
- Fill Tank: Unscrew the tank cap and carefully pour the desired chemical solution into the tank. Do not overfill. Ensure the chemical is compatible with the sprayer's materials.
- Secure Tank Cap: Replace the tank cap and tighten it securely to prevent leaks.
- Attach Wand: Connect the spray wand to the hose connection point on the sprayer. Ensure it is firmly attached.
Operating Instructions
Powering On and Pressure Settings
- Power On: Press the power button on the control panel to turn on the sprayer.
- Adjust Pressure: The sprayer offers three pressure settings for optimal control and performance:
- Setting 1 (Low): Ideal for delicate applications or when a fine mist is required.
- Setting 2 (Medium): Suitable for general spraying tasks.
- Setting 3 (High): Provides maximum working pressure (5.5 bar) for applications requiring a strong stream or vertical spray distance up to 17 feet.
Spraying
- Prime Pump: If the sprayer has not been used recently, it may take a few seconds for the pump to prime and begin spraying.
- Activate Spray: Squeeze the trigger on the spray wand to begin spraying. Release the trigger to stop.
- Application: Direct the spray wand towards the target area. Maintain a consistent distance for even coverage.
- Battery Life: A fully charged M12 B2 battery can provide up to 300 liters of spray, depending on the pressure setting and application.
Maintenance
Regular maintenance ensures the longevity and optimal performance of your sprayer.
- After Each Use:
- Empty any remaining chemical solution from the tank.
- Rinse the tank thoroughly with clean water.
- Fill the tank with clean water and spray until the tank is empty to flush the pump and wand.
- Wipe down the exterior of the sprayer with a damp cloth.
- Storage: Store the sprayer in a cool, dry place, away from direct sunlight and freezing temperatures. Ensure the tank is empty and clean before storage.
- Battery Care: Store battery packs in a cool, dry place. Do not store fully discharged batteries.
Troubleshooting
| Problem | Possible Cause | Solution |
|---|---|---|
| Sprayer does not turn on | Battery not charged or not properly inserted | Charge battery; ensure battery is fully inserted until it clicks. |
| No spray or weak spray | Tank empty; clogged nozzle; air in system; low battery | Refill tank; clean nozzle; prime pump by spraying water; charge battery. |
| Leaking from connections | Loose connections; damaged O-rings/seals | Tighten all connections; inspect and replace damaged O-rings/seals. |
| Inconsistent pressure | Clogged filter; low battery | Clean internal filter; charge battery. |
Specifications
| Feature | Detail |
|---|---|
| Brand | Milwaukee |
| Model Number | M12BHCS3L-201 |
| Power Source | Battery Powered (M12) |
| Maximum Working Pressure | 5.5 bar |
| Vertical Spray Distance | Up to 17 feet |
| Spray Volume per Charge (M12 B2 battery) | Up to 300 liters |
| Material | Plastic |
| Item Weight | 4 Kilograms (8.8 pounds) |
| Product Dimensions | 4.72"W x 4.72"H |
| Recommended Uses | Pest Control, Sanitizing, Weed Control |
Warranty and Support
Milwaukee products are designed for durability and performance. For specific warranty information, please refer to the warranty card included with your product or visit the official Milwaukee website. For technical support, replacement parts, or service inquiries, please contact Milwaukee customer service through their official channels.
Always use genuine Milwaukee replacement parts to ensure compatibility and maintain product warranty.
Ask a question about this manual
Ask about setup, troubleshooting, compatibility, parts, safety, or missing instructions. Manuals+ will review the question and use this page’s manual context to help answer it.