1. Introduction
Welcome and thank you for choosing the WOGON WEEL 2 Tier 36-Light 48-inch Wagon Wheel Chandelier. This manual provides essential information for safe installation, operation, and maintenance of your new lighting fixture. Please read these instructions thoroughly before beginning installation and retain them for future reference.
2. Safety Information
Important Safety Instructions
- Always turn off the main power supply at the circuit breaker before installing, cleaning, or servicing the fixture.
- All electrical connections must be in accordance with local and national electrical codes. If you are unsure about wiring, consult a qualified electrician.
- This fixture is designed for indoor use only.
- Do not exceed the maximum wattage specified for the bulbs (60 watts per bulb, E12 base).
- Ensure the mounting surface can support the weight of the fixture (approximately 26.3 pounds).
- The fixture is dimmable; ensure compatible dimmable bulbs and dimmer switch are used if dimming functionality is desired.
- Handle glass components (bulbs, if applicable) with care.
3. Package Contents
What's Included
Carefully unpack all components and inspect for any damage. Keep all packaging materials until you are satisfied with the product.
- Chandelier Frame (2 tiers)
- Mounting Hardware
- Adjustable Chain
- Canopy/Ceiling Plate
- Wiring Connectors
- Instruction Sheet

Figure 1: All components included in the package. This image displays the two main circular frames, the connecting rods, the suspension chain, the ceiling canopy, and various small hardware pieces required for assembly.
4. Specifications
Product Specifications
| Feature | Detail |
|---|---|
| Brand | WOGON WEEL |
| Model Name | chelun005 |
| Dimensions (L x W x H) | 48"L x 48"W x 38"H |
| Item Weight | 26.3 Pounds |
| Material | Metal (Iron) |
| Color | Black |
| Style | Rustic, Industrial |
| Light Fixture Form | Chandelier |
| Number of Light Sources | 36 |
| Bulb Base | E12 |
| Maximum Compatible Wattage | 60 Watts per bulb |
| Voltage | 110 Volts |
| Special Feature | Dimmable |
| Installation Type | Semi Flush Mount (compatible with flat, sloped, and vaulted ceilings) |
| Indoor/Outdoor Usage | Indoor |
| Assembly Required | Yes |
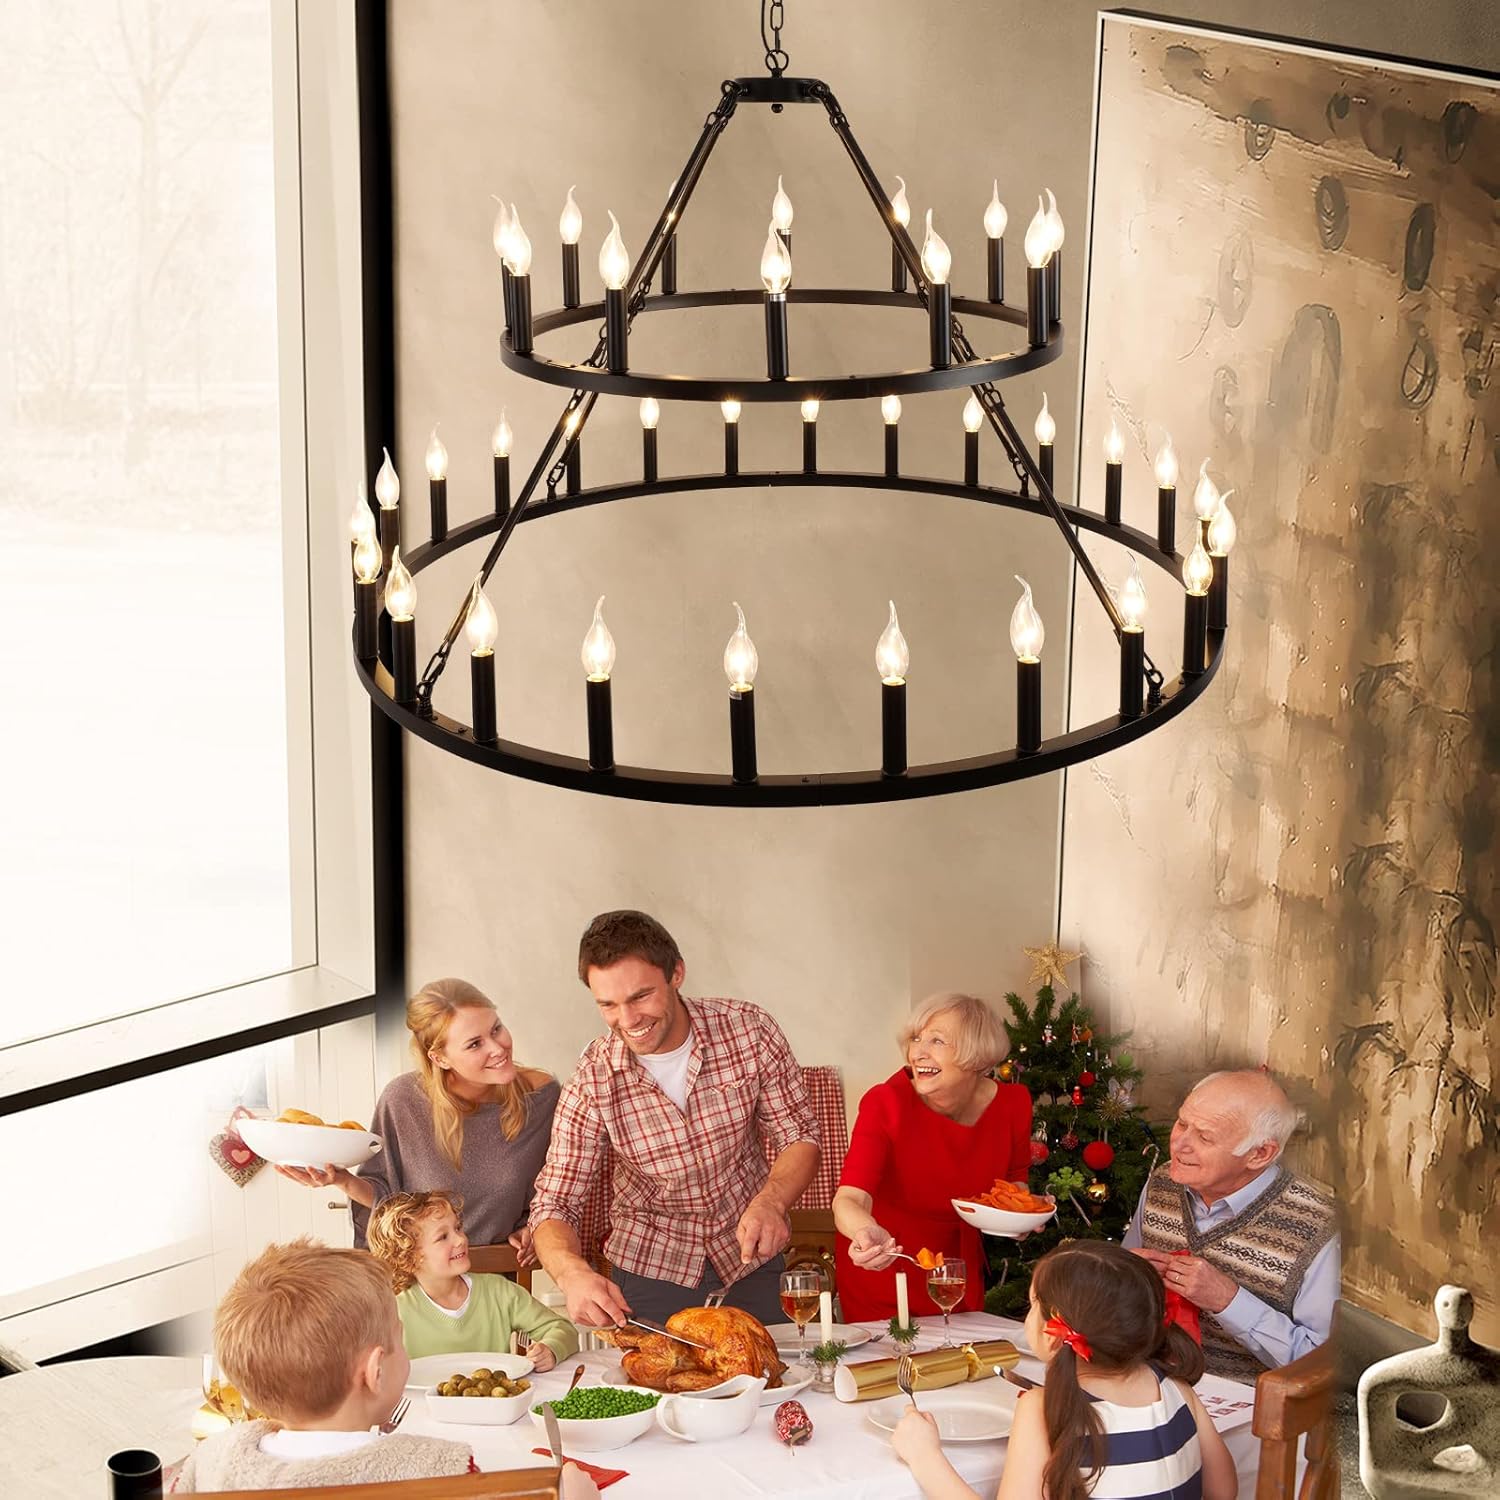
Figure 2: Dimensional drawing of the WOGON WEEL 2 Tier 36-Light 48-inch Chandelier, indicating its overall width, height, and the adjustable length of the suspension chain.
5. Setup and Installation
Installation Guide
Before You Begin: Ensure power is OFF at the circuit breaker. It is recommended to have two people for installation due to the size and weight of the fixture.
- Prepare the Mounting Surface: Ensure your ceiling junction box is securely mounted and capable of supporting the fixture's weight (26.3 lbs). This fixture is compatible with flat, sloped, and vaulted ceilings.
- Assemble the Chandelier Body:
- Connect the support rods between the two tiers of the wagon wheel frame. Ensure all connections are secure.
- Attach the candle sleeves to the bulb bases on both tiers.
- Attach the Chain and Canopy:
- Determine the desired hanging height and adjust the chain length accordingly.
- Securely attach one end of the chain to the top of the chandelier frame and the other end to the mounting loop on the canopy.
- Feed the electrical wires through the chain and canopy.
- Wiring Connections:
- Connect the fixture's live (black) wire to the house's live (black) wire.
- Connect the fixture's neutral (white) wire to the house's neutral (white) wire.
- Connect the fixture's ground wire to the house's ground wire and the mounting bracket's ground screw.
- Secure all connections with wire nuts and wrap with electrical tape for added safety.
Warning: Always follow standard electrical codes: Black to Live (L), White to Neutral (N), Green/Bare Copper to Ground (G). Disregard any conflicting instructions that advise otherwise.
- Mount the Fixture:
- Carefully lift the chandelier and secure the canopy to the ceiling junction box using the provided mounting hardware.
- Ensure the fixture is stable and level.
- Install Bulbs:
- Screw in 36 E12 base bulbs (not included) into the sockets.
- Ensure bulbs do not exceed 60 watts each.

Figure 3: Detailed view of key components for installation, including the ceiling canopy, suspension points, and the E12 bulb socket (note: image label may show E26, but product specifications confirm E12 base).

Figure 4: Illustration of the ceiling canopy and how the chain connects to it, providing support for the chandelier.
6. Operating Instructions
Using Your Chandelier
- Power On: Once installation is complete and all connections are secure, restore power at the circuit breaker.
- Switch On/Off: Operate the chandelier using your wall switch.
- Dimming Function (Optional): If you have installed dimmable E12 bulbs and a compatible dimmer switch, you can adjust the light intensity.

Figure 5: This image demonstrates the dimmable functionality of the chandelier, showing the difference between minimum and maximum light output.
7. Maintenance
Care and Cleaning
- Cleaning: Always turn off power before cleaning. Use a soft, dry cloth to wipe the fixture. Do not use abrasive cleaners or solvents, as they may damage the finish.
- Bulb Replacement: Ensure power is off and bulbs have cooled before replacing. Screw in new E12 base bulbs, ensuring they do not exceed 60 watts.
- Inspection: Periodically check all connections and mounting hardware to ensure they remain secure.
8. Troubleshooting
Common Issues and Solutions
| Problem | Possible Cause | Solution |
|---|---|---|
| Light does not turn on. | 1. Power is off. 2. Loose wiring connection. 3. Faulty bulb(s). 4. Faulty wall switch. | 1. Check circuit breaker and wall switch. 2. Turn off power, check all wiring connections. 3. Replace bulb(s). 4. Test or replace wall switch. |
| Flickering lights. | 1. Loose bulb. 2. Incompatible dimmer switch/bulbs. 3. Loose wiring. | 1. Tighten bulbs. 2. Ensure dimmable bulbs are used with a compatible dimmer. 3. Turn off power, check wiring connections. |
| Chandelier hangs unevenly. | Improper installation of mounting hardware or chain. | Turn off power, re-adjust chain length or mounting hardware to ensure level hanging. |
9. Warranty and Support
Customer Support
For any questions, missing parts, or issues not covered in this manual, please contact WOGON WEEL customer service. Refer to your purchase documentation for contact details.
While specific warranty details are not provided in this manual, please retain your proof of purchase for any warranty claims.