1. Introduction
This manual provides essential information for the proper use, installation, maintenance, and safety of your SAFEBUILDER CR06+V Construction Safety Helmet with Visor. Please read this manual thoroughly before using the product to ensure safety and optimal performance.
The SAFEBUILDER CR06+V is designed for head and eye protection in various industrial and construction environments. It features a high-strength ABS shell, an adjustable PC visor, a 6-point suspension system, and adjustable ventilation.
2. Safety Information
2.1 General Safety Guidelines
- Always inspect the helmet and visor for any damage before each use. Do not use if damaged.
- Ensure the helmet fits snugly and securely on your head.
- Do not modify the helmet or its components. Unauthorized modifications may compromise safety.
- Clean the helmet and visor regularly as per maintenance instructions.
- Store the helmet in a cool, dry place away from direct sunlight and chemicals.
- Replace the helmet after any significant impact, even if visible damage is not apparent.
2.2 Certifications
This SAFEBUILDER helmet meets the following safety standards:
- Hard Hat: ANSI Z89.1-2014 Type 1 Class C, CE EN397-2012 (-20℃)
- Visor: CE EN166, ANSI Z87.1 Approved

Image: SAFEBUILDER helmet displaying safety certifications.
3. Components
The SAFEBUILDER CR06+V Construction Safety Helmet package includes:
- 1 x SAFEBUILDER Hard Hat
- 1 x Clear Visor
4. Setup and Visor Installation
The visor comes separately and needs to be installed onto the helmet. Follow these steps for proper installation:
- Identify the visor attachment points on both sides of the helmet.
- Align the visor's attachment tabs with the slots on the helmet.
- Insert the tabs into the slots and secure them using the provided screws and a screwdriver. Ensure they are tightened firmly but do not overtighten.
- Test the visor's movement to ensure it slides smoothly up and down and stays securely in position.
4.1 Visor Installation Video Guide
Video: Step-by-step guide on how to install and replace the safety visor on your SAFEBUILDER helmet.
5. Operating Instructions
5.1 Adjusting the Fit
The helmet features a 6-point suspension system and an adjustable Y-type chinstrap for a comfortable and secure fit. The head size adjustable range is 53-63cm (20.87-24.80 inches).
- Headband Adjustment: Use the ratchet mechanism at the back of the helmet to tighten or loosen the headband until it fits snugly around your head without being too tight.
- Chinstrap Adjustment: Adjust the Y-type chinstrap to ensure it holds the helmet firmly in place. The soft chin cover provides added comfort.

Image: Internal view of the helmet showing the 6-point suspension and adjustable chinstrap for a comfortable fit.
5.2 Ventilation System
The helmet is equipped with adjustable vents to enhance airflow and reduce heat buildup, especially in warm or humid conditions.
- Locate the breather switches on the helmet.
- Slide the switches to open or close the vents as needed for optimal comfort and airflow.
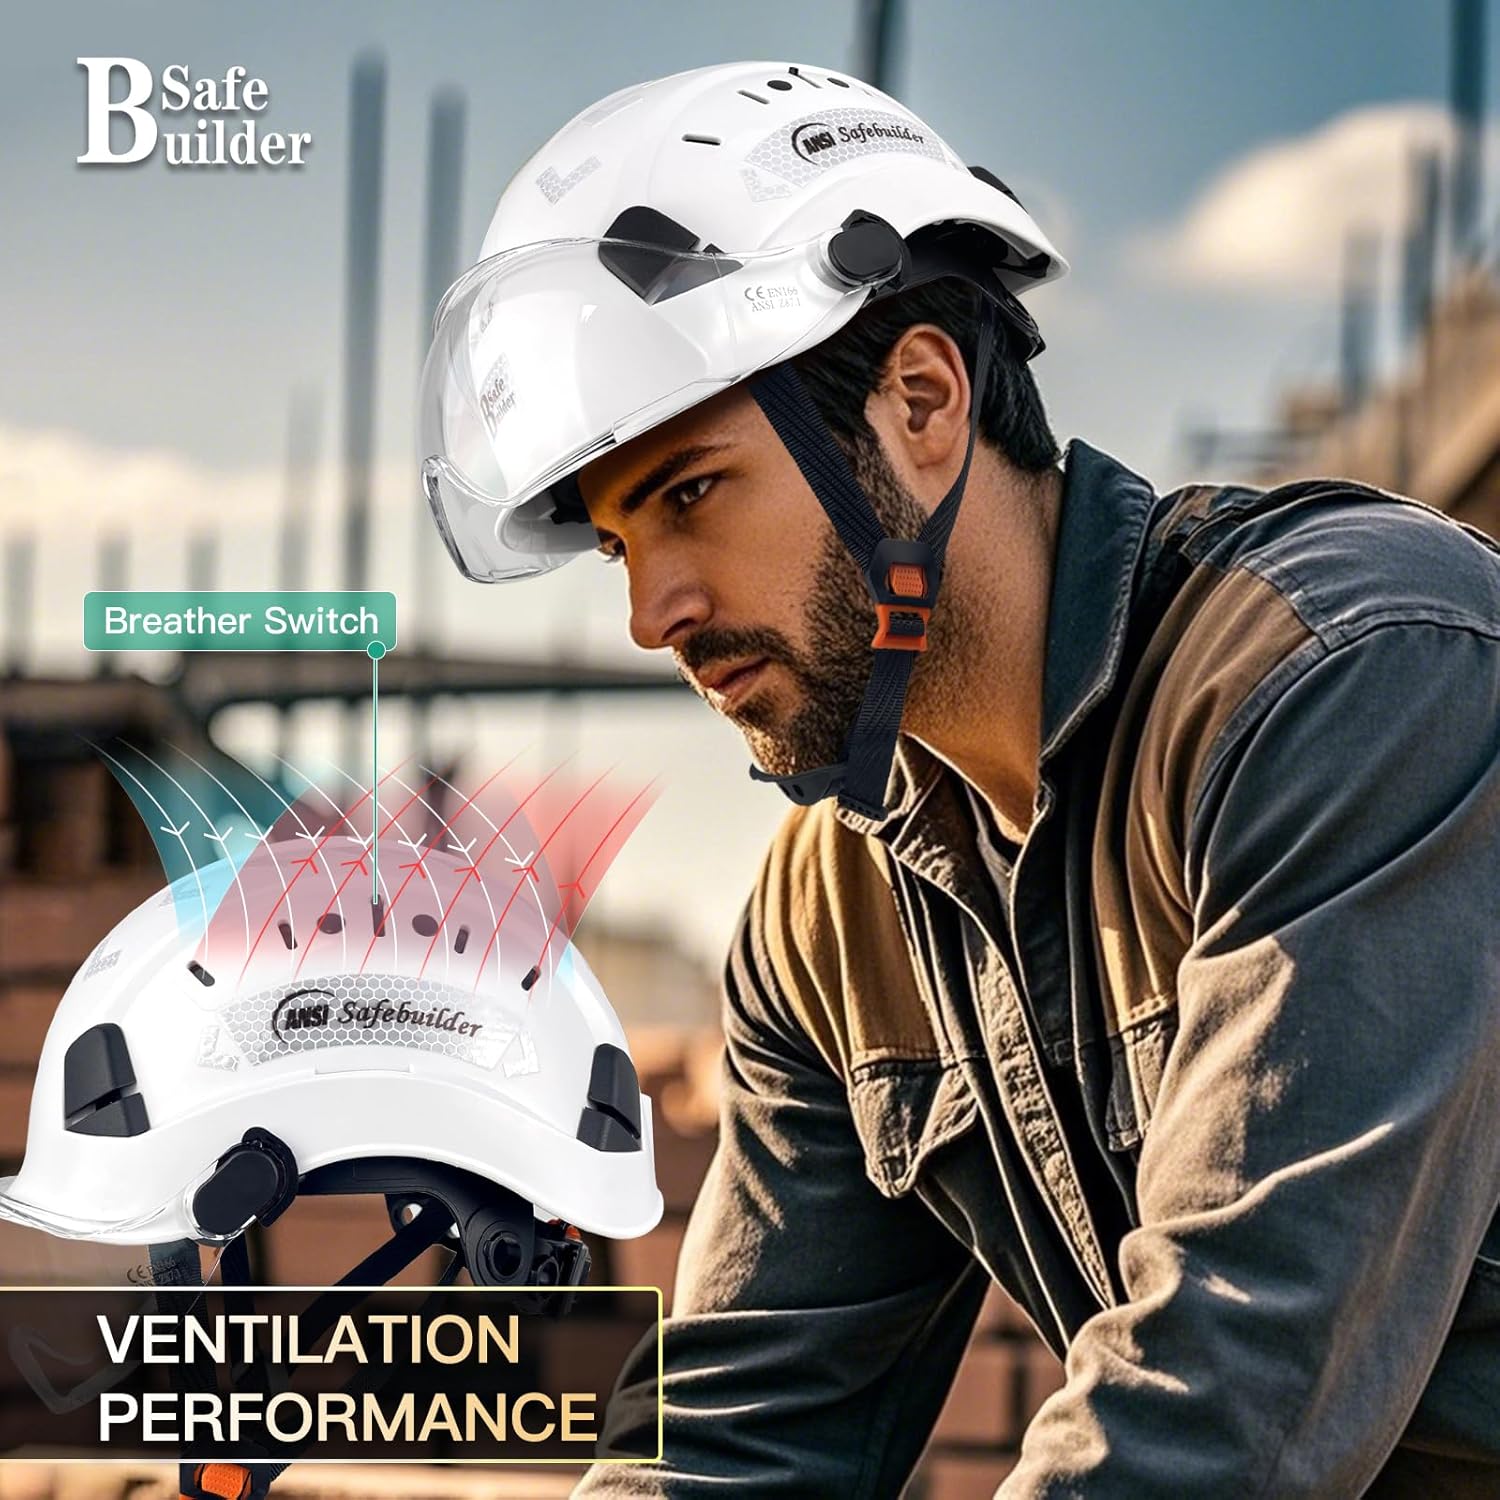
Image: Diagram showing the adjustable ventilation system on the helmet.
5.3 Visor Operation
The clear visor can be easily adjusted up or down to provide eye protection when needed, or retracted when not in use.
- To deploy the visor, gently pull it down until it covers your eyes.
- To retract the visor, push it upwards until it locks into its stored position on the helmet.

Image: Illustration of the visor in both deployed and retracted positions.
6. Maintenance
6.1 Cleaning
- Helmet Shell: Clean the ABS shell with mild soap and water. Avoid harsh chemicals, solvents, or abrasive cleaners, as these can damage the material and compromise its protective properties. Wipe dry with a soft cloth.
- Visor: Clean the PC visor with a soft, damp cloth and mild soap. Do not use abrasive materials or paper towels, which can scratch the surface. Rinse thoroughly and air dry or gently wipe with a microfiber cloth.
- Suspension System & Chinstrap: The replaceable sweatband can be detached and washed with mild soap and water. Allow all components to air dry completely before reassembly.
6.2 Storage
Store the helmet in a clean, dry environment, away from direct sunlight, extreme temperatures, and corrosive substances. Do not store heavy objects on top of the helmet.
6.3 Inspection and Replacement
Regularly inspect the helmet for cracks, dents, discoloration, or any signs of wear and tear. Check the suspension system and chinstrap for fraying or damage. Replace any damaged components or the entire helmet if its integrity is compromised or after a significant impact.
7. Troubleshooting
- Helmet feels loose: Adjust the ratchet mechanism at the back of the helmet and ensure the chinstrap is properly tightened.
- Visor does not stay in position: Check if the visor attachment screws are securely tightened. If the visor is scratched or damaged, consider replacing it.
- Discomfort during wear: Ensure the suspension system is correctly seated and adjusted to your head size. The replaceable sweatband should be clean and dry.
If you encounter issues not covered here, please contact SAFEBUILDER customer support.
8. Specifications
| Feature | Detail |
|---|---|
| Brand | SAFEBUILDER |
| Model Number | CR06+V |
| Material Type | ABS (Helmet Shell) + PC (Visor) |
| Head Size Adjustable Range | 53-63cm / 20.87-24.80 inch |
| Suspension System | 6-point |
| Chinstrap | Y-Type with soft chin cover |
| Ventilation | Adjustable Vents with Sliding Switch |
| Item Weight | 1.2 Pounds |
| Hard Hat Certification | ANSI Z89.1-2014 Type 1 Class C, CE EN397-2012 (-20℃) |
| Visor Certification | CE EN166, ANSI Z87.1 Approved |
9. Warranty Information
This SAFEBUILDER product comes with a 30-day warranty. For details regarding warranty claims or returns, please refer to your purchase documentation or contact customer support.
10. Customer Support
For any questions, assistance, or further information regarding your SAFEBUILDER CR06+V Construction Safety Helmet with Visor, please contact SAFEBUILDER customer support through the retailer where the product was purchased or visit the official SAFEBUILDER website.