Introduction
Thank you for choosing the Nikai 3-Tap Water Dispenser with Refrigerator. This appliance is designed to provide convenient access to hot, normal, and cold water, along with a compact refrigeration compartment. Please read this manual carefully before operating the dispenser to ensure safe and efficient use.
Key Features:
- Compressor cooling for efficient cold water production.
- Durable stainless steel water tank.
- Anti-bacterial design for improved hygiene.
- Integrated 16-liter refrigerator/cabinet.
- Low noise operation.
Safety Instructions
Always follow basic safety precautions when using electrical appliances to reduce the risk of fire, electric shock, and injury.
- Ensure the power supply voltage matches the rating label on the dispenser.
- Do not immerse the appliance, cord, or plug in water or other liquids.
- Unplug the dispenser from the outlet when not in use, before cleaning, or before performing any maintenance.
- Keep children away from the hot water tap to prevent burns.
- Do not operate the dispenser with a damaged cord or plug.
- Place the dispenser on a stable, level surface to prevent tipping.
- Ensure adequate ventilation around the unit, especially at the rear.
- Do not block ventilation openings.
- This appliance is intended for household use only.
Setup
- Unpacking: Carefully remove the dispenser from its packaging. Retain packaging materials for future transport or storage.
- Placement: Position the dispenser on a firm, level surface. Ensure there is at least 10-15 cm of space from walls or other objects to allow for proper ventilation, especially at the back where the compressor is located. Avoid direct sunlight or heat sources.
- Water Bottle Installation: Clean the neck of a standard 3 or 5-gallon water bottle. Remove the protective seal from the bottle. Place the bottle firmly onto the top loading receptacle of the dispenser. Ensure it is seated correctly and water begins to flow into the internal tanks.
- Initial Flushing: Before connecting to power, dispense at least 1 liter of water from each tap (hot, normal, cold) to flush out any dust or impurities from the internal lines. This also ensures the tanks are filled before heating/cooling elements are activated.
- Power Connection: Plug the power cord into a grounded electrical outlet.
- Initial Cooling/Heating: Allow the unit to operate for at least 30-60 minutes before dispensing water for optimal temperature. The hot and cold indicators will illuminate when ready.
Operating Instructions
- Power On/Off: The dispenser typically has separate switches for hot and cold water functions, usually located at the back of the unit. Turn them on as desired. The normal water tap does not require power.
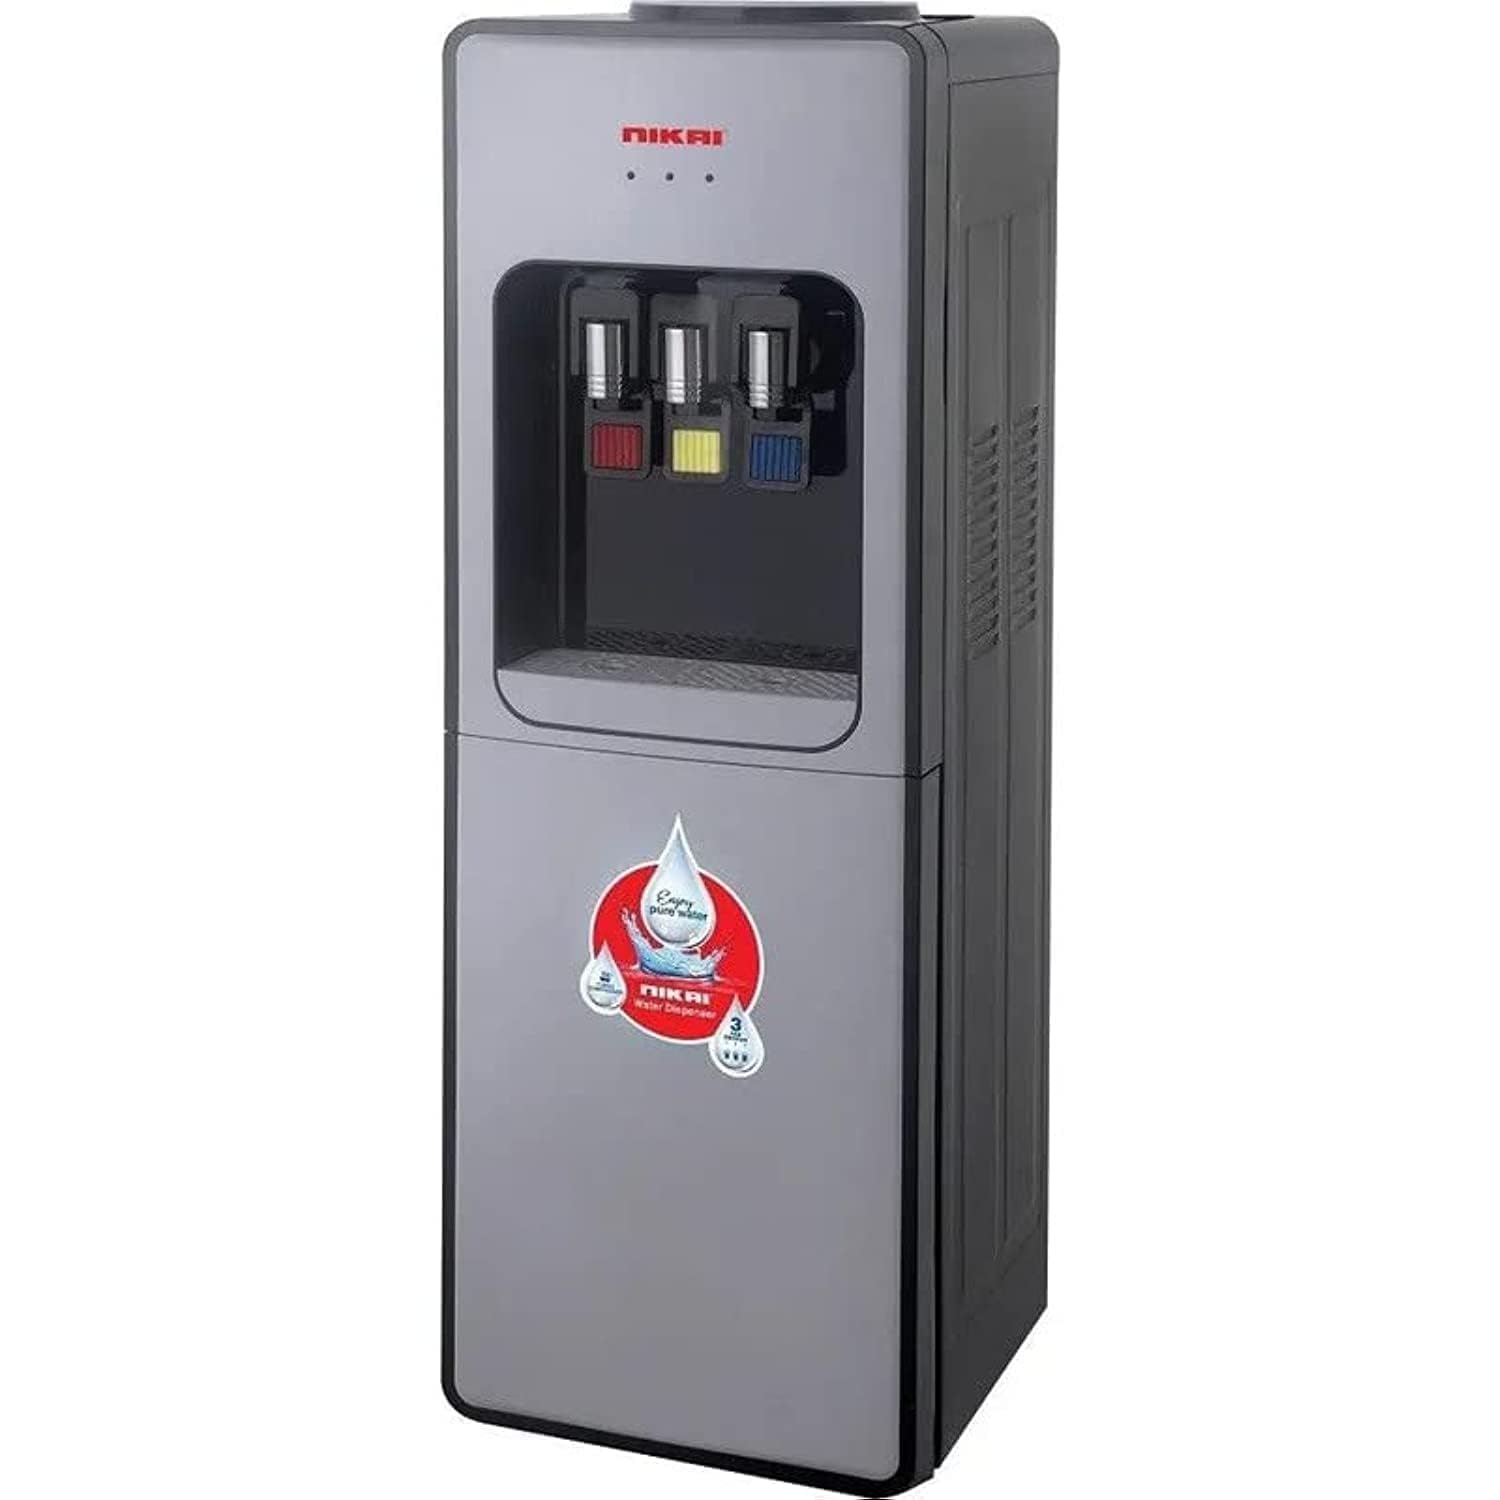
- Dispensing Water:
- Cold Water: Place a cup under the blue tap. Press the lever or button to dispense cold water.
- Normal Water: Place a cup under the yellow tap. Press the lever or button to dispense room temperature water.
- Hot Water: Place a cup under the red tap. For safety, the hot water tap usually has a child-safety lock. Push the safety button and then press the lever or button to dispense hot water. Exercise caution to prevent burns.
- Refrigerator Compartment: The lower compartment functions as a small refrigerator. Open the door to store beverages or small items. Note that its cooling capacity is less than a standard refrigerator.
- Water Bottle Replacement: When the water bottle is empty, lift it off the dispenser. Replace with a new, full bottle following the installation steps in the Setup section.
Maintenance
Regular cleaning and maintenance will prolong the life of your water dispenser and ensure water quality.
- Cleaning the Exterior: Wipe the exterior surfaces with a soft, damp cloth. Do not use abrasive cleaners or solvents.
- Drip Tray: The drip tray should be emptied and cleaned regularly to prevent overflow and bacterial growth. Remove the tray, wash with mild soap and water, rinse thoroughly, and replace.
- Draining the Unit: Periodically, or before long periods of non-use, drain the internal tanks. Unplug the unit. Locate the drain plugs (usually at the back or bottom). Place a bucket underneath and remove the plugs to drain all water. Replace plugs securely after draining.
- Internal Cleaning (Descaling): For optimal performance and hygiene, internal tanks should be cleaned every 3-6 months. Consult a qualified technician or refer to specific descaling instructions if provided by the manufacturer. Do not attempt to clean internal components without proper guidance.
Troubleshooting
Before contacting customer service, please check the following common issues:
| Problem | Possible Cause | Solution |
|---|---|---|
| No cold water | Cold water switch off; unit unplugged; insufficient cooling time; empty water bottle. | Turn on cold water switch; plug in unit; allow 30-60 minutes for cooling; replace water bottle. |
| No hot water | Hot water switch off; unit unplugged; insufficient heating time; empty water bottle. | Turn on hot water switch; plug in unit; allow 15-30 minutes for heating; replace water bottle. |
| Water leaking | Water bottle not seated correctly; drain plug loose; damaged bottle. | Re-seat water bottle; tighten drain plug; replace damaged water bottle. |
| Unusual noise | Unit not level; ventilation blocked; normal compressor operation. | Ensure unit is on a level surface; clear ventilation; some compressor noise is normal. |
Specifications
| Specification | Value |
|---|---|
| Brand Name | Nikai |
| Model Number | NWD999R |
| Product Type Name | Water Dispenser |
| Color | Silver/Black |
| Material | Stainless Steel |
| Product Dimensions (Depth x Width x Height) | 25 cm x 25 cm x 100 cm |
| Item Weight | 13 kg |
| Refrigerator Capacity | 16 Liters |
| Power Source | Corded Electric |
| Access Location | Top Load |
| Number of Settings | 3 (Hot, Normal, Cold) |
| Included Components | Water Dispenser Unit |
Warranty and Support
For warranty information, technical support, or service inquiries, please refer to the warranty card included with your product or contact Nikai customer service directly. Keep your purchase receipt as proof of purchase.