
Soonkoda Soonkoda
Soonkoda Digital Laser Photo Tachometer User Manual
Model: Soonkoda
1. Introduction
The Soonkoda Digital Laser Photo Tachometer is a non-contact device designed for accurate measurement of rotational speed (RPM) in various applications. Utilizing advanced microcomputer technology and anti-jamming capabilities, it provides precise readings for motors, wheels, engines, and other rotating machinery. Its streamlined design ensures comfortable and convenient use, featuring a large LCD for clear display of measurements.

Figure 1.1: Common applications of the Digital Laser Photo Tachometer, including motor, washing machine, car, and papermaking inspections.
2. Package Contents
Please check the package contents upon opening to ensure all items are present and undamaged:
- 1 x Soonkoda Digital Laser Photo Tachometer
- 2 x 9V Batteries (included)
- Reflective Tapes
- 1 x Carry Bag
- 1 x User Manual (this document)
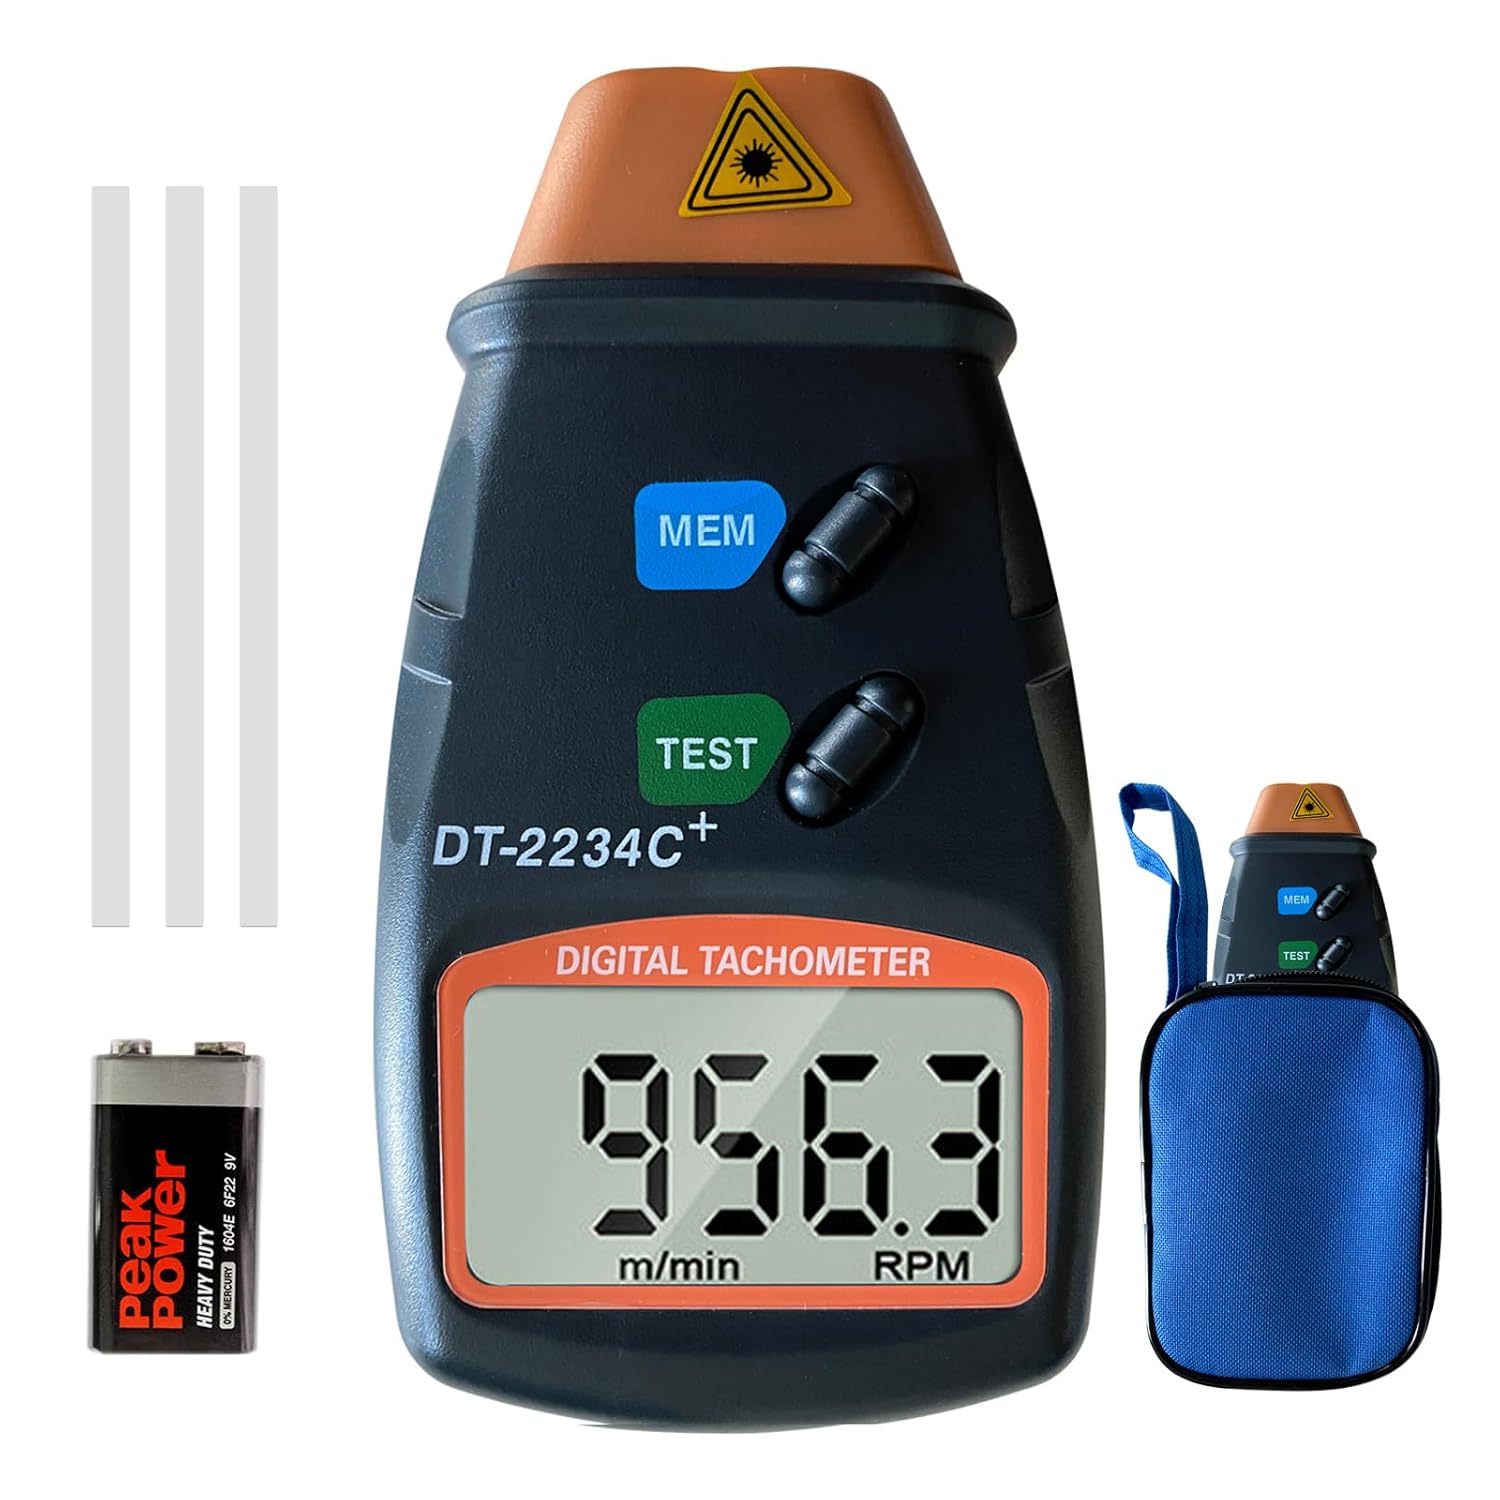
Figure 2.1: Contents included with the Digital Laser Photo Tachometer.

Figure 2.2: The tachometer and manual stored within the protective carry bag.
3. Setup
3.1 Battery Installation
The tachometer requires two 9V batteries for operation. Follow these steps to install them:
- Locate the battery compartment cover on the back of the device.
- Slide the cover open or remove it as indicated.
- Insert two 9V batteries, ensuring correct polarity (+ and -).
- Replace the battery compartment cover securely.
The device features an automatic low battery indicator. When the battery voltage falls below a predetermined value, the device will provide a warning.

Figure 3.1: Open battery compartment on the back of the tachometer.
4. Operating Instructions
This non-contact tachometer measures RPM by detecting reflections from a target surface. For accurate readings, a reflective strip must be applied to the object being measured.
4.1 Preparing the Target Object
- Ensure the surface of the object to be measured is clean and dry.
- Cut a small piece of the provided reflective tape.
- Firmly stick the reflective strip onto the rotating part of the object. Ensure it is flat and smooth.
4.2 Taking a Measurement
- Hold the tachometer firmly.
- Point the laser beam (emitted from the top front of the device) towards the reflective strip on the rotating object.
- Press and hold the TEST button. The display will show the RPM reading.
- Maintain a stable distance and aim for consistent readings.
- Release the TEST button to stop measuring. The last reading will remain on the display.

Figure 4.1: Laser emission point on the tachometer.

Figure 4.2: Front view of the tachometer showing the display and control buttons.
4.3 Using the Memory Function
The tachometer includes a memory function to store and recall measurement data.
- Press the MEM button to cycle through stored values (e.g., maximum, minimum, last reading).
- Refer to the on-screen indicators for the type of memory displayed.
Video 4.1: Demonstration of using the Digital Laser Photo Tachometer to measure RPM on a rotating object with a reflective strip. The video shows the user holding the device, pressing the TEST button, and the RPM reading appearing on the screen.
5. Maintenance
- Keep the device clean and dry. Use a soft, damp cloth for cleaning. Do not use abrasive cleaners or solvents.
- Avoid exposing the tachometer to extreme temperatures, humidity, or direct sunlight.
- When not in use for extended periods, remove the batteries to prevent leakage and damage to the device.
- Store the tachometer in its protective carry bag to prevent scratches and impacts.
6. Troubleshooting
| Problem | Possible Cause | Solution |
|---|---|---|
| No display or device not turning on. | Dead or incorrectly installed batteries. | Check battery polarity. Replace batteries if necessary. |
| Erratic or unstable readings. | Improper reflective tape application; target surface too reflective; unstable aiming; ambient light interference. | Ensure reflective tape is flat and smooth. Aim steadily at the reflective strip. Avoid highly reflective backgrounds. Test in different lighting conditions if possible. |
| "00" or no reading displayed. | Laser not hitting the reflective strip; object not rotating; distance too far or too close. | Adjust aim to ensure the laser hits the reflective strip. Verify the object is rotating. Adjust measurement distance within the specified range. |
7. Specifications
- Model: Soonkoda
- Measurement Range: 2.5 - 99,999 RPM (r/min)
- Display: Large LCD
- Power Source: 2 x 9V Batteries
- Material: Acrylonitrile Butadiene Styrene (ABS)
- Weight: Approximately 5.93 Ounces (168 grams)
- Features: Non-contact measurement, microcomputer technology, anti-jamming, wide measurement range, high resolution, low battery indicator, memory function.
8. Warranty and Support
This product is covered by a manufacturer's warranty. For detailed warranty information, technical support, or service inquiries, please refer to the contact information provided on the product packaging or visit the official Soonkoda website. Please retain your purchase receipt for warranty claims.
Ask a question about this manual
Ask about setup, troubleshooting, compatibility, parts, safety, or missing instructions. Manuals+ will review the question and use this page’s manual context to help answer it.