1. Introduction
This manual provides essential instructions for the safe and efficient installation, operation, and maintenance of the FLEXTRONICS 1100W Switching Power Supply, Model EMC-S-1100ADU00-501. Please read this manual thoroughly before using the product to ensure proper functionality and to prevent damage or injury. Retain this manual for future reference.
2. Safety Information
WARNING: Risk of electric shock. Do not open the power supply unit. Refer all servicing to qualified personnel.
- Ensure the power supply is disconnected from the main power source before installation, removal, or maintenance.
- This device is designed for indoor use only. Do not expose to moisture or extreme temperatures.
- Verify that the input voltage and frequency match the specifications listed on the power supply label.
- Proper grounding is essential for safe operation.
- Do not operate the power supply if it has been damaged or dropped.
- Ensure adequate ventilation around the unit to prevent overheating.
3. Product Overview
The FLEXTRONICS 1100W Switching Power Supply is a high-efficiency power unit designed for demanding applications. It provides stable and reliable power output for compatible systems.
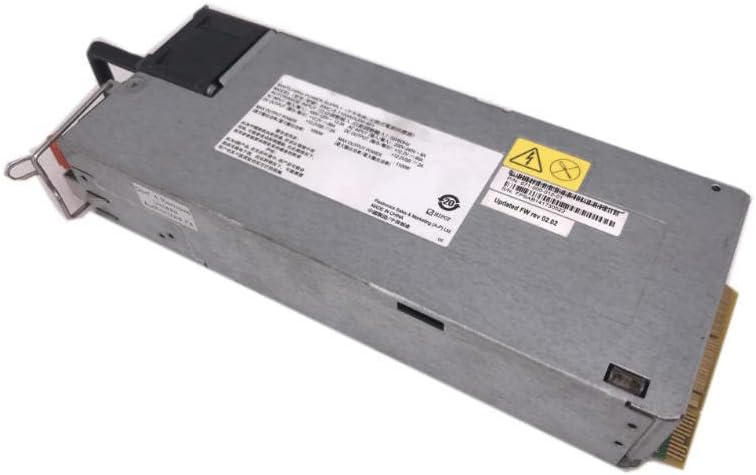
Figure 1: Angled view of the FLEXTRONICS 1100W Switching Power Supply, showing its general form factor and labeling.

Figure 2: Detailed view of the product label, indicating model number, input voltage ranges, and output specifications.
4. Setup and Installation
Follow these steps for proper installation of the power supply:
- Preparation: Ensure the system where the power supply will be installed is powered off and disconnected from all power sources.
- Mounting: Carefully slide the power supply into its designated bay or slot within the system chassis. Ensure it is securely seated and aligned with the mounting points.
- Securing: Use appropriate screws or locking mechanisms to firmly secure the power supply in place.
- Cable Connections: Connect the necessary power cables from the power supply to the motherboard, graphics cards, storage drives, and other components. Ensure all connections are firm and correctly oriented.
- Input Power: Connect the AC power cord to the power supply's input receptacle and then to a grounded electrical outlet.
- Final Check: Double-check all connections before restoring power to the system.

Figure 3: Front view of the power supply, illustrating the main connector interface for system integration.
5. Operating Instructions
Once installed, the power supply operates automatically upon receiving AC input. It is designed to provide continuous power to your system.
- Power On: After connecting the AC power cord, the power supply will be in standby mode. The system's power button will initiate full operation.
- Power Off: To power off the system, use the operating system's shutdown procedure. For complete power disconnection, unplug the AC power cord from the wall outlet.
- Ventilation: Ensure that the air vents of the power supply are not obstructed during operation to maintain proper cooling.
6. Maintenance
Regular maintenance helps ensure the longevity and optimal performance of your power supply.
- Cleaning: Periodically clean the exterior of the power supply and its fan vents using a soft, dry cloth. For internal cleaning (e.g., fan blades), use compressed air. Ensure the unit is powered off and unplugged before cleaning.
- Inspection: Routinely inspect power cables for any signs of wear, fraying, or damage. Replace damaged cables immediately.
- Environment: Maintain a clean, dust-free, and well-ventilated environment for the system to prevent dust buildup within the power supply.

Figure 4: Rear view of the power supply, highlighting the cooling fan which requires periodic cleaning to ensure proper airflow.
7. Troubleshooting
If you encounter issues with your power supply, refer to the following table for common problems and solutions.
| Problem | Possible Cause | Solution |
|---|---|---|
| System does not power on. | No AC power; loose connections; faulty power supply. | Check AC power cord and wall outlet. Verify all internal power connections. If issues persist, consult a qualified technician. |
| System powers on but shuts down unexpectedly. | Overheating; overloaded power supply; internal fault. | Ensure adequate ventilation. Reduce system load if possible. If problem continues, seek professional assistance. |
| Unusual noises (e.g., loud fan). | Dust buildup in fan; fan bearing issue. | Clean fan and vents. If noise persists, the fan may need replacement by a qualified technician. |
8. Specifications
| Parameter | Value |
|---|---|
| Model Number | EMC-S-1100ADU00-501 |
| Part Number | 071-000-012-01 |
| Rated Power | 1100W |
| AC Input (100-120V) | 100V-120V ~ 13.3A, 50/60Hz |
| AC Input (200-240V) | 200V-240V ~ 8A, 50/60Hz |
| DC Output (+12.2V @ 100-120V) | 86A |
| DC Output (+12.2V @ 200-240V) | 90A |
| DC Output (+12.2VSB) | 2A |
| Manufacturer | Generic |
9. Warranty and Support
Warranty Information
This product is covered by a standard manufacturer's warranty against defects in materials and workmanship. The warranty period typically begins from the date of purchase. Please retain your proof of purchase for warranty claims. The warranty does not cover damage caused by improper installation, misuse, unauthorized modifications, or natural disasters.
Customer Support
For technical assistance, troubleshooting beyond this manual, or warranty inquiries, please contact your vendor or the product manufacturer. Have your model number (EMC-S-1100ADU00-501) and proof of purchase ready when contacting support.