Introduction
This manual provides essential information for the safe and effective installation, operation, and maintenance of your new Samoser Gas Range Oven Igniter Broil Burner. Please read these instructions thoroughly before proceeding with installation or use. Proper installation and maintenance are crucial for the optimal performance and longevity of the igniter.
Safety Information
WARNING: Risk of Electric Shock, Gas Leak, or Fire.
- Always disconnect power to the appliance at the circuit breaker or fuse box before attempting any installation, repair, or maintenance.
- Turn off the gas supply to the appliance before beginning work.
- Installation should only be performed by a qualified technician or a person with adequate knowledge of gas appliance repair.
- Wear appropriate personal protective equipment, including gloves and eye protection.
- Ensure all gas connections are properly sealed and tested for leaks after installation. Use a non-corrosive leak detection solution.
- Do not operate the appliance if you smell gas. Immediately ventilate the area, turn off the gas supply, and contact a qualified service technician.
- This part is a replacement component. Ensure it is compatible with your specific appliance model before installation.
Product Overview
The Samoser Gas Range Oven Igniter Broil Burner is a critical component responsible for igniting the gas in your oven's broil burner. It consists of a ceramic igniter element and a metal mounting bracket.
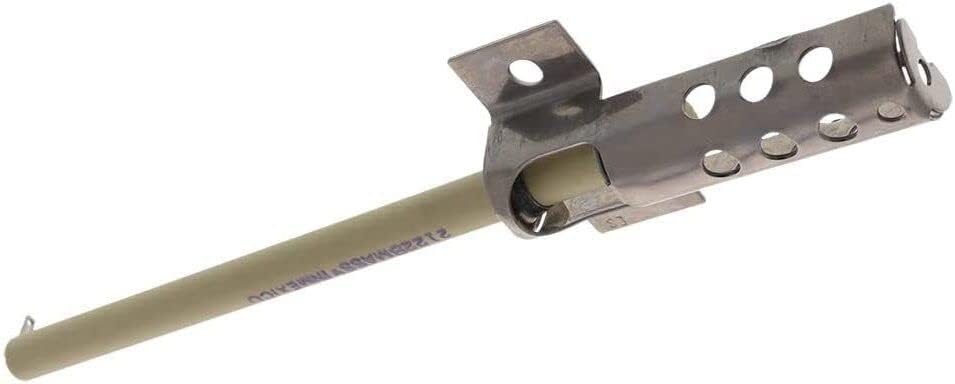
Figure 1: Main view of the igniter, showing the ceramic element and the metal mounting bracket with ventilation holes.

Figure 2: Side profile of the igniter, highlighting the elongated ceramic element and the attachment point.
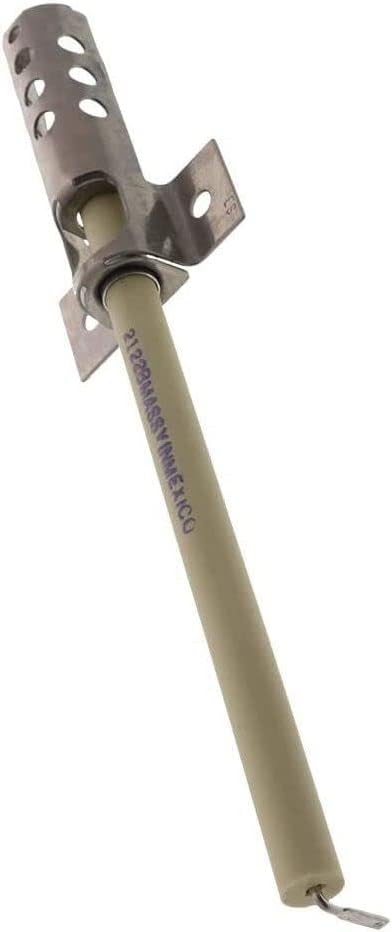
Figure 3: Angled view of the igniter, showing the connection wire and the overall structure.
Installation Instructions
This section outlines the general steps for replacing a gas oven igniter. Specific steps may vary depending on your appliance model. Refer to your appliance's service manual for detailed instructions.
- Preparation:
- Ensure the appliance is cool.
- Disconnect the appliance from the electrical power supply.
- Turn off the gas supply to the appliance.
- Gather necessary tools: screwdriver set, nut driver set, wire cutters/strippers, leak detection solution.
- Access the Igniter:
- Open the oven door.
- Remove the oven racks.
- Locate and remove the screws holding the oven bottom panel in place. Carefully lift and remove the panel.
- Identify the broil burner tube, typically located at the top of the oven cavity. The igniter will be mounted near it.
- Disconnect the Old Igniter:
- Note the routing of the igniter wires.
- Carefully disconnect the electrical connector leading to the igniter.
- Unscrew the mounting screws that secure the igniter bracket to the burner tube or oven frame.
- Gently remove the old igniter.
- Install the New Igniter:
- Position the new Samoser igniter in the same location and orientation as the old one.
- Secure the igniter bracket with the mounting screws. Do not overtighten.
- Connect the electrical connector. Ensure a secure connection.
- Reassemble and Test:
- Replace the oven bottom panel and secure it with screws.
- Replace oven racks.
- Restore the gas supply to the appliance.
- Restore electrical power to the appliance.
- Test for gas leaks around any disturbed gas connections using a leak detection solution. Bubbles indicate a leak.
- Turn on the oven to the broil setting and observe the igniter. It should glow red and then ignite the gas within a few seconds.
- If the igniter does not glow or ignite the gas, refer to the Troubleshooting section.
Operation
The igniter operates automatically when the oven is set to a broil temperature. Upon receiving a signal from the oven's control board, the igniter heats up, drawing current. As it reaches a sufficient temperature, it becomes hot enough to ignite the gas flowing from the broil burner. Once the gas ignites, the igniter continues to glow for a short period to ensure stable combustion, then typically cycles off or reduces its glow as the flame sensor confirms ignition.
Maintenance
The gas oven igniter is a sealed component and generally requires no routine maintenance. However, to ensure its longevity and proper function:
- Keep the oven interior clean to prevent grease or food debris from accumulating on or around the igniter, which could impede its function.
- Avoid physical impact to the igniter, as the ceramic element is fragile.
- If the igniter appears cracked or damaged, it should be replaced immediately.
Troubleshooting
| Problem | Possible Cause | Solution |
|---|---|---|
| Oven not heating / Broil burner not igniting | Igniter not glowing or glowing dimly. | Verify power supply to the oven. Check igniter wiring connections. If igniter is faulty, replace it. |
| Igniter glows but gas does not ignite | Weak igniter (not drawing enough current), gas supply issue, or faulty gas valve. | Ensure gas supply is on. If igniter glows but doesn't ignite gas after 30-60 seconds, it may be weak and require replacement. Consult a qualified technician for gas valve issues. |
| Burning smell after installation | Residual manufacturing oils burning off. | This is normal for new parts and should dissipate after initial use. Ensure proper ventilation. If smell persists or is strong, turn off gas/power and check for gas leaks. |
If troubleshooting steps do not resolve the issue, it is recommended to contact a qualified appliance repair technician.
Specifications
- Product Type: Gas Range Oven Broil Igniter Burner
- Brand: Samoser
- Part Number: KGRS202BSS KFGG500EWH3 (as per manufacturer's specification)
- Model Number: KFGG504KPS0 KFGS530ESS (as per manufacturer's specification)
- Compatibility: Aftermarket replacement part for various Whirlpool, Maytag, KitchenAid, Jenn-Air Gas Range models.
Compatible Models
This igniter is an aftermarket replacement part compatible with a wide range of gas range models from Whirlpool, Maytag, KitchenAid, and Jenn-Air. Please verify your appliance's model number against the list below to ensure compatibility. If your model is not listed, or if you are unsure, please contact the seller for assistance.
Note: Use Ctrl + F (or Cmd + F on Mac) to search for your model number within this list.
KFGG500EBL0, KFGG500EBL1, KFGG500EBL2, KFGG500EBS2, KFGG500EBS3, KFGG500ESS0, KFGG500ESS1, KFGG500ESS2, KFGG500EWH0, KFGG500EWH1, KFGG500EWH2, KFGG500EWH3, KFGG504KPS0, KFGS530ESS0, KFGS530ESS1, KFGS530ESS2, KGRS202BBL0, KGRS202BSS0, KGRS202BSS2, KGRS202BWH0, KGRS303BBL0, KGRS303BBL1, KGRS303BBL2, KGRS303BSS0, KGRS303BSS1, KGRS303BSS2, KGRS303BWH0, KGRS303BWH1, KGRS303BWH2, KGRS306BSS0, KGRS306BSS1, KGRS306BSS2, KGRS308BSS0, KGRS308BSS1, KGRS308BSS2, KSGB900EBL0, KSGB900ESS0, KSGB900ESS1, KSGB900ESS2, KSGB900ESS3, KSGB900ESS4, KSGB900EWH0, KSGG700EBL0, KSGG700EBL1, KSGG700EBS1, KSGG700EBS2, KSGG700ESS0, KSGG700ESS1, KSGG700ESS2, KSGG700EWH0, KSGG700EWH1
Warranty and Support
For any questions regarding compatibility, installation, or troubleshooting that is not covered in this manual, please contact the seller directly. The seller aims to resolve any issues within 24 hours. Information regarding specific warranty terms should be obtained from the point of purchase or the seller.