Trak Racer TR80 Racing Simulator MK5
Trak Racer TR80 Racing Simulator MK5 User Manual
Model: TR80 Racing Simulator MK5
1. Introduction
This manual provides comprehensive instructions for the assembly, operation, and maintenance of your Trak Racer TR80 Racing Simulator MK5. Designed for serious sim racers, the TR80 offers a robust and highly adjustable platform for an immersive racing experience. Please read this manual thoroughly before beginning assembly or operation to ensure proper setup and safe use.
2. Safety Information
WARNING: Failure to follow these safety instructions could result in injury or damage to the product.
- Ensure all bolts and fasteners are securely tightened before use. Periodically check for loose connections.
- Do not exceed the weight capacity of the simulator. Refer to specifications for details.
- Keep hands and fingers clear of moving parts during adjustment.
- Assemble the simulator on a flat, stable surface.
- Keep small parts out of reach of children.
- Disconnect all electronic peripherals from power before performing maintenance or adjustments.
3. Package Contents
Verify that all components listed below are present in your package. If any parts are missing or damaged, contact Trak Racer support.
- Aluminum Profile Frame Components (various lengths and profiles)
- Hybrid Formula & GT Pedal System Mount
- Trak Racer TR One Wheel Mount (or compatible wheel deck/uprights)
- Seat Slider Rails
- Universal TR One Gear Shift Mount
- Heavier Duty Brackets and Fasteners
- Assembly Hardware (bolts, nuts, T-nuts, washers, tools)
- Instruction Manual (this document)
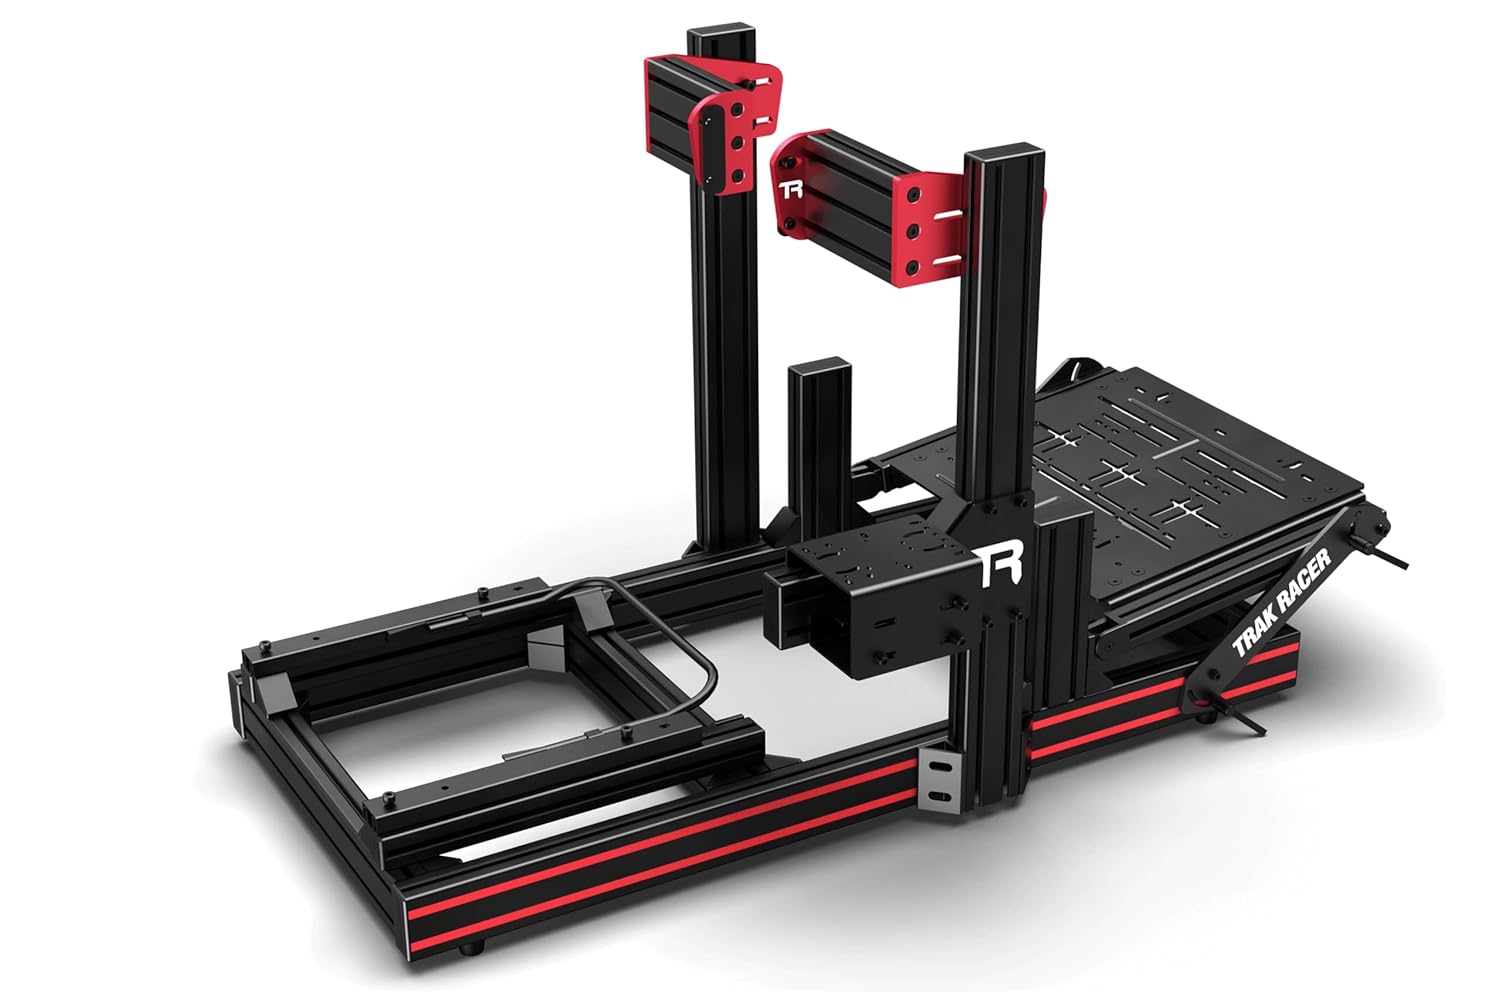
Image: Overview of the Trak Racer TR80 Racing Simulator MK5 frame components, showing the aluminum profiles, pedal plate, and wheel uprights.
4. Setup and Assembly
Assembly of the Trak Racer TR80 requires basic hand tools (often included) and can be completed by one person, though assistance is recommended for certain steps.
4.1. Frame Assembly
- Unpack all components and lay them out. Identify the base frame profiles.
- Assemble the main base frame using the provided brackets and T-nuts. Ensure all connections are snug but do not fully tighten until the frame is squared.
- Attach the uprights for the wheel mount to the main base frame.
- Install the cross-members and supports for the pedal plate and seat.

Image: Partially assembled Trak Racer TR80 frame, highlighting the pedal plate and wheel uprights.
4.2. Pedal System Installation
- Mount your pedal set to the Hybrid Formula & GT Pedal System plate using the appropriate bolts.
- Attach the pedal plate assembly to the designated frame profiles. Adjust the angle and distance as desired before tightening.
4.3. Wheel Mount Installation
- Secure your steering wheel base to the Trak Racer TR One Wheel Mount or compatible wheel deck.
- Attach the wheel mount assembly to the uprights. Adjust height and distance for optimal ergonomics.
4.4. Seat and Gear Shifter Installation
- Install the seat slider rails onto the seat mounting profiles.
- Mount your racing seat to the seat slider rails.
- Attach the universal TR One gear shift mount to the side of the frame. Secure your gear shifter to this mount.
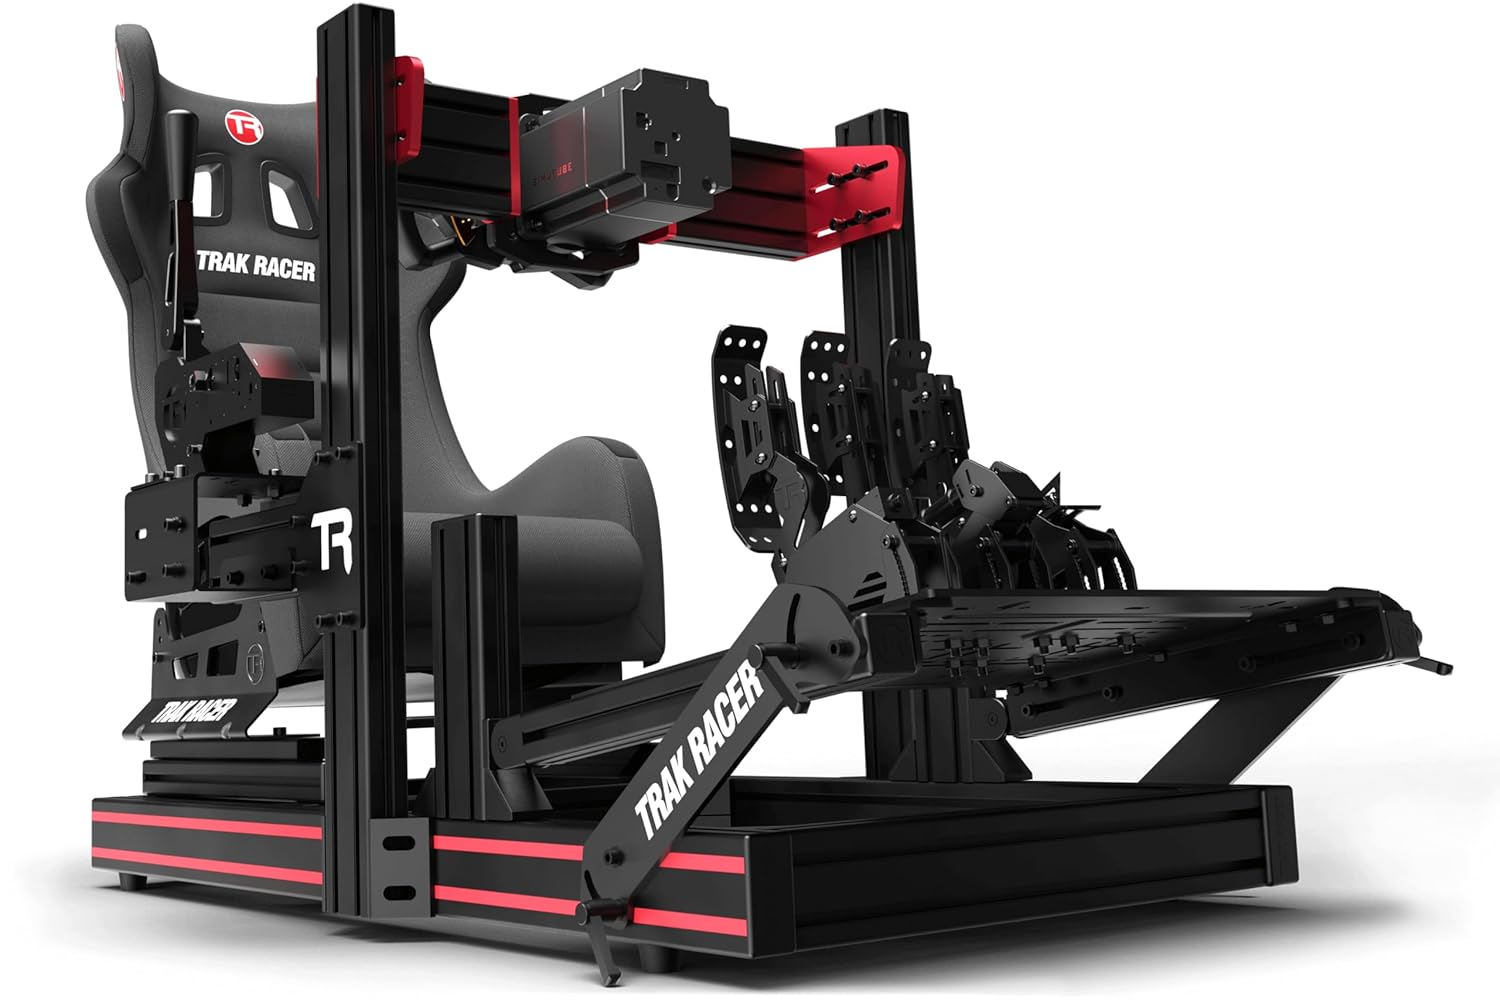
Image: Fully assembled Trak Racer TR80 Racing Simulator MK5, including a racing seat and pedal set.
5. Operating Instructions
Once assembled, the TR80 provides a stable platform for your racing peripherals.
5.1. Connecting Peripherals
- Connect your steering wheel, pedals, and gear shifter to your PC or console according to their respective manufacturer's instructions.
- Ensure all cables are routed safely to prevent tripping hazards and cable damage.
5.2. Adjusting Your Setup
- Use the seat slider to adjust your seating position forward or backward.
- The pedal plate and wheel mount offer multiple adjustment points for angle, height, and distance. Loosen the relevant bolts, adjust, and re-tighten securely.
- The gear shifter mount can also be adjusted for optimal reach.
5.3. Software Configuration
Refer to the software and driver instructions provided by your peripheral manufacturers for calibration and in-game settings.
6. Maintenance
Regular maintenance will ensure the longevity and performance of your TR80 simulator.
- Cleaning: Wipe down aluminum profiles and other surfaces with a soft, damp cloth. Avoid abrasive cleaners.
- Fastener Check: Periodically inspect all bolts, nuts, and connections for tightness. Re-tighten any loose fasteners to maintain rigidity.
- Lubrication: If seat sliders or other moving parts become stiff, apply a small amount of silicone-based lubricant.
7. Troubleshooting
This section addresses common issues you might encounter.
| Issue | Possible Cause | Solution |
|---|---|---|
| Simulator feels wobbly or unstable. | Loose fasteners; uneven assembly. | Check and tighten all bolts and connections. Ensure the frame is square during assembly. |
| Difficulty adjusting seat or peripheral mounts. | Bolts are too tight; debris in tracks. | Loosen bolts slightly before adjusting. Clean tracks if necessary. Apply lubricant to sliders. |
| Missing or damaged parts upon delivery. | Shipping damage; packing error. | Contact Trak Racer customer support immediately with proof of purchase and details of the issue. |
8. Specifications
- Model: Trak Racer TR80 Racing Simulator MK5
- Brand: Trak Racer
- ASIN: B0BY8GFVTC
- Manufacturer: Trak Racer
- Date First Available: March 13, 2023
- Construction Material: Thicker-walled Aluminum Profile
- Compatibility: PC Compatible (with appropriate peripherals)
- Key Features: Hybrid Formula & GT Pedal System, TR One Wheel Mount Compatible, Seat Slider Rails, Universal TR One Gear Shift Mount, Flight Simulator Expandable.
9. Warranty and Support
For warranty information, technical support, or to purchase additional accessories, please visit the official Trak Racer website or contact their customer service department.
Trak Racer Official Website: www.trakracer.com
Ask a question about this manual
Ask about setup, troubleshooting, compatibility, parts, safety, or missing instructions. Manuals+ will review the question and use this page’s manual context to help answer it.