Introduction
The DHRUVPRO LILY-TECH ZL-7901A is an advanced industrial intelligent temperature and humidity controller designed for precise environmental management. This device is ideal for applications such as incubators, climate chambers, and warehouses, offering high-precision PID control for temperature and comprehensive humidity management. This manual provides essential information for the proper installation, operation, and maintenance of your ZL-7901A controller.
Key Features
- Temperature control with three combination outputs and PID high-precision control.
- Humidification and dehumidification control capabilities.
- Time-based air exchange control.
- Time-based egg turning control.
- Illumination control.
- Node alarm output.
- Automatic restart function.
- Temperature/humidity over-limit warning and protection.
- Temperature/humidity sensor fault warning and protection.
- Easy-to-use button interface and large LCD display.
Technical Specifications
- Analog Quantity Input (2 ways): NTC temperature sensor 5KJ3470, Humidity sensor SHR04.
- Relay Output (8 ways):
- Main temperature control relay (250VAC/7.5A resistive load)
- Ancillary temperature relay (250VAC/7.5A resistive load)
- Humidity control relay (250VAC/7.5A resistive load)
- Lamp relay (250VAC/7.5A resistive load)
- Air exchange relay (250VAC/3A resistive load)
- Alarm output relay (250VAC/1A resistive load)
- SSR (20mA/10VDC MAX)
- Setting Range: Humidity 0~100%RH, Temperature 0~100℃.
- Measuring Accuracy: Temperature ±1%, Humidity ±5%.
- Working Environment: -20~45℃, 10~90%RH (non-condensing).
- Size: 137mm x 89mm x 56mm.
- Hole Size: 122mm x 75mm.
- Input Voltage: 100-240Vac.
- Model Name: ZL-7901A.
- UPC: 880024849911.
Setup and Installation
Physical Installation
The ZL-7901A controller is designed for panel mounting. Ensure the cutout in your panel matches the specified hole size of 122mm x 75mm. Secure the controller using the provided mounting brackets.
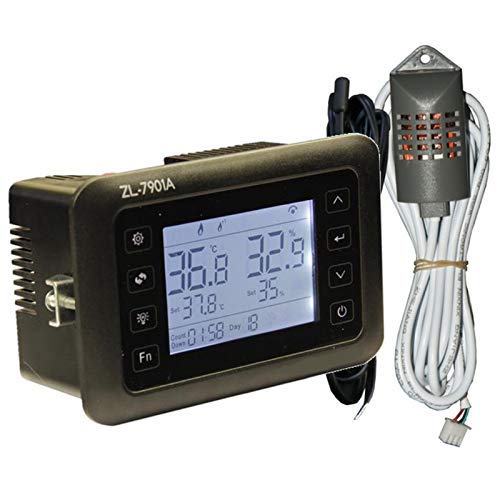
Image: Front view of the LILY-TECH ZL-7901A controller, displaying temperature and humidity readings, set points, and control buttons.
Wiring Diagram
Refer to the wiring diagram for correct connection of power, sensors, and output relays. Incorrect wiring can damage the unit or connected equipment.
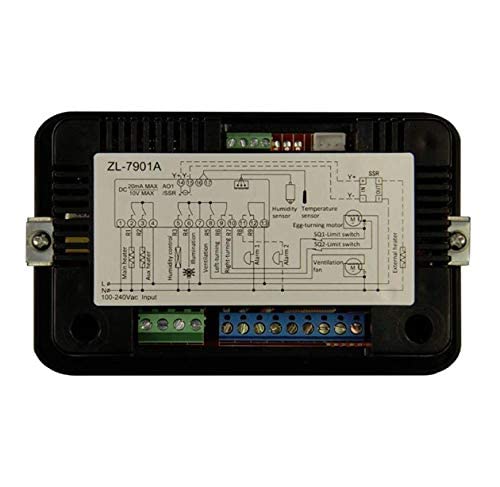
Image: Rear view of the LILY-TECH ZL-7901A controller, showing terminal blocks and a detailed wiring diagram label for connections.
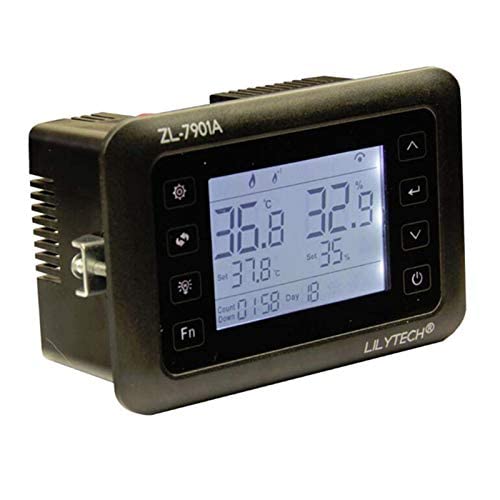
Image: Close-up of the wiring diagram for the ZL-7901A, illustrating connections for main heater, auxiliary heater, humidity control, illumination, ventilation, egg turning motors, and alarm outputs.
- Power Input: Connect 100-240Vac to the L and N terminals.
- Sensors: Connect the NTC temperature sensor and SHR04 humidity sensor to their designated terminals.
- Relay Outputs: Connect your main heater, auxiliary heater, humidifier/dehumidifier, lamp, air exchange fan, egg turning motors, and alarm devices to the corresponding relay output terminals (R1-R8).
- SSR Output: For external SSR control, connect to the dedicated SSR terminals (20mA/10VDC MAX).
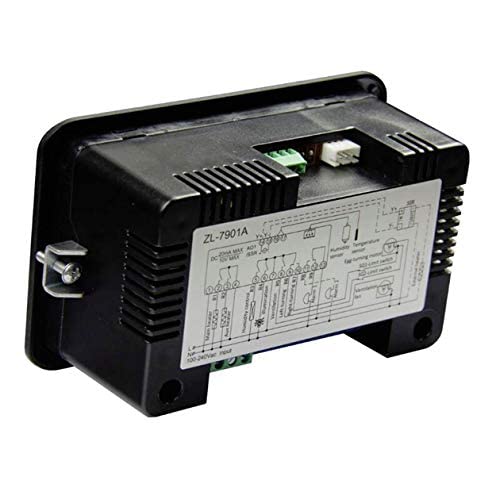
Image: Side view of the LILY-TECH ZL-7901A controller, highlighting the various terminal blocks for electrical connections.
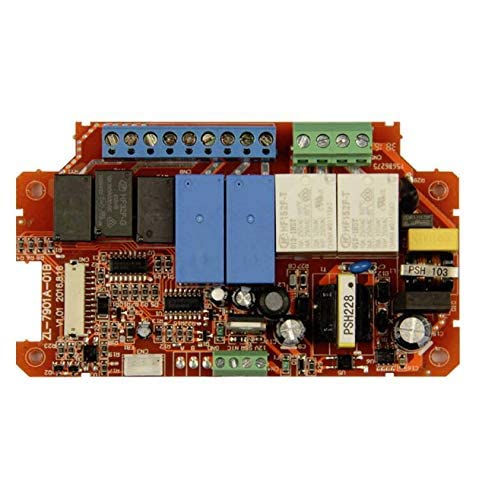
Image: Internal circuit board of the LILY-TECH ZL-7901A controller, showing relays, capacitors, and other electronic components.
Operating Instructions
Power On
Once wired correctly, apply power. The LCD display will illuminate, showing current temperature and humidity, along with set points.
Setting Parameters
Use the easy-touch buttons on the front panel to navigate through menus and adjust parameters such as temperature set point, humidity set point, egg turning intervals, and alarm thresholds. Refer to the detailed parameter list in the full manual for specific codes and ranges.
PID Control
The controller utilizes PID (Proportional-Integral-Derivative) control for precise temperature regulation. This ensures stable temperature within your incubator or climate chamber.
Maintenance
- Cleaning: Wipe the display and casing with a soft, dry cloth. Do not use abrasive cleaners or solvents.
- Sensor Calibration: Periodically check sensor accuracy. If significant drift is observed, recalibration may be necessary. Refer to the full manual for calibration procedures.
- Connections: Ensure all wiring connections remain secure and free from corrosion.
Troubleshooting
- No Display: Check power supply and wiring connections (L and N terminals).
- Incorrect Readings: Verify sensor connections. Ensure sensors are clean and not damaged.
- Outputs Not Activating: Check set points and alarm thresholds. Verify relay connections and functionality of connected devices.
- Alarm Triggered: Identify the cause of the alarm (e.g., temperature/humidity outside limits, sensor fault) and address it.
Warranty and Support
This DHRUVPRO product comes with a standard manufacturer's warranty. For warranty claims, technical support, or service inquiries, please contact DHRUVPRO customer support.
Manufacturer Contact: DHRUVcom CHENNAI, TAMIL NADU, 600001, India.
Email: support@dhruvpro.in
Phone: 7200470717
For additional information, visit the DHRUVPRO Store on Amazon.