Ambrane OP-WLGC01
Ambrane Wireless Gaming Controller OP-WLGC01 User Manual
Model: OP-WLGC01
1. Introduction
Thank you for choosing the Ambrane Wireless Gaming Controller OP-WLGC01. This controller is designed to provide an immersive gaming experience across multiple platforms, including PC (Windows), PS3 Console, and Android TV. Featuring 2.4GHz wireless technology, dual vibration motors, and dynamic RGB lighting, this manual will guide you through its setup, operation, and maintenance.

Image 1.1: The Ambrane Wireless Gaming Controller OP-WLGC01, showcasing its transparent design and illuminated elements.
2. Product Overview
The Ambrane OP-WLGC01 controller combines advanced features with a unique aesthetic. Key components and features include:
- Transparent Design: A visually distinct transparent casing.
- 2.4GHz Wireless Technology: Ensures stable and responsive connectivity.
- Integrated Dual Intensity Motor: Provides haptic feedback for an immersive gaming experience.
- Illuminated Pad (RGB Lighting): Features 16.8 million colors with breathing RGB effects.
- Ergonomic Design: Easy-to-hold body for comfortable extended gaming sessions.
- Special Function Buttons: Dedicated Turbo and Clear buttons for enhanced gameplay.

Image 2.1: Illustration of the dual vibrating motors providing haptic feedback.

Image 2.2: The controller displaying its dynamic 16.8 million color breathing RGB lighting effect.
3. Setup
3.1 Charging the Controller
Before initial use, fully charge the controller. The integrated 800mAh battery provides up to 12 hours of gameplay on a full charge.
- Connect the provided Type-C charging cable to the charging port on the controller.
- Connect the other end of the cable to a USB power source (e.g., computer USB port, USB wall adapter).
- The indicator lights on the controller will show charging status and turn off or change color when fully charged.

Image 3.1: The controller highlighting its Type-C charging port and other features.
3.2 Connecting to Devices
The controller utilizes 2.4GHz wireless technology for connection. It is compatible with PC (Windows systems, supporting X-Input & D-Input modes), PS3 consoles, and Android TV devices.
- Insert the 2.4GHz USB receiver (dongle) into an available USB port on your PC, PS3 console, or Android TV.
- Turn on the controller by pressing the MODE button.
- The controller will automatically pair with the receiver. The indicator lights will stabilize once connected.
- For PC, ensure the correct input mode (X-Input or D-Input) is selected if prompted by your game or system.

Image 3.2: The controller demonstrating its compatibility with PS3 Console, Windows System, Android TV, and PC.
4. Operating Instructions
4.1 Button Layout and Functions
Familiarize yourself with the controller's button layout for optimal gameplay.

Image 4.1: Detailed diagram of the controller's buttons, including joysticks, directional pad, action buttons (A, B, X, Y), shoulder buttons (L1, L2, R1, R2), SELECT, START, TURBO, CLEAR, MODE, and RGB Control.
- Left/Right Joysticks: For analog movement and camera control.
- Directional Button (D-Pad): For precise directional input.
- Action Buttons (A, B, X, Y): Standard game actions.
- Shoulder Buttons (L1, L2, R1, R2): For various in-game functions.
- SELECT/START: Menu and pause functions.
- MODE Button: Power on/off and mode switching.
- RGB Control: Button or combination for adjusting RGB lighting effects.
4.2 Turbo Mode
The Turbo mode allows for rapid and continuous actions by repeatedly pressing a single button. This can be useful for certain in-game scenarios.
- Press and hold the desired action button (e.g., A, B, X, Y, L1, R1).
- While holding the action button, press the TURBO button once.
- Release both buttons. The selected action button will now perform rapid presses when held down.
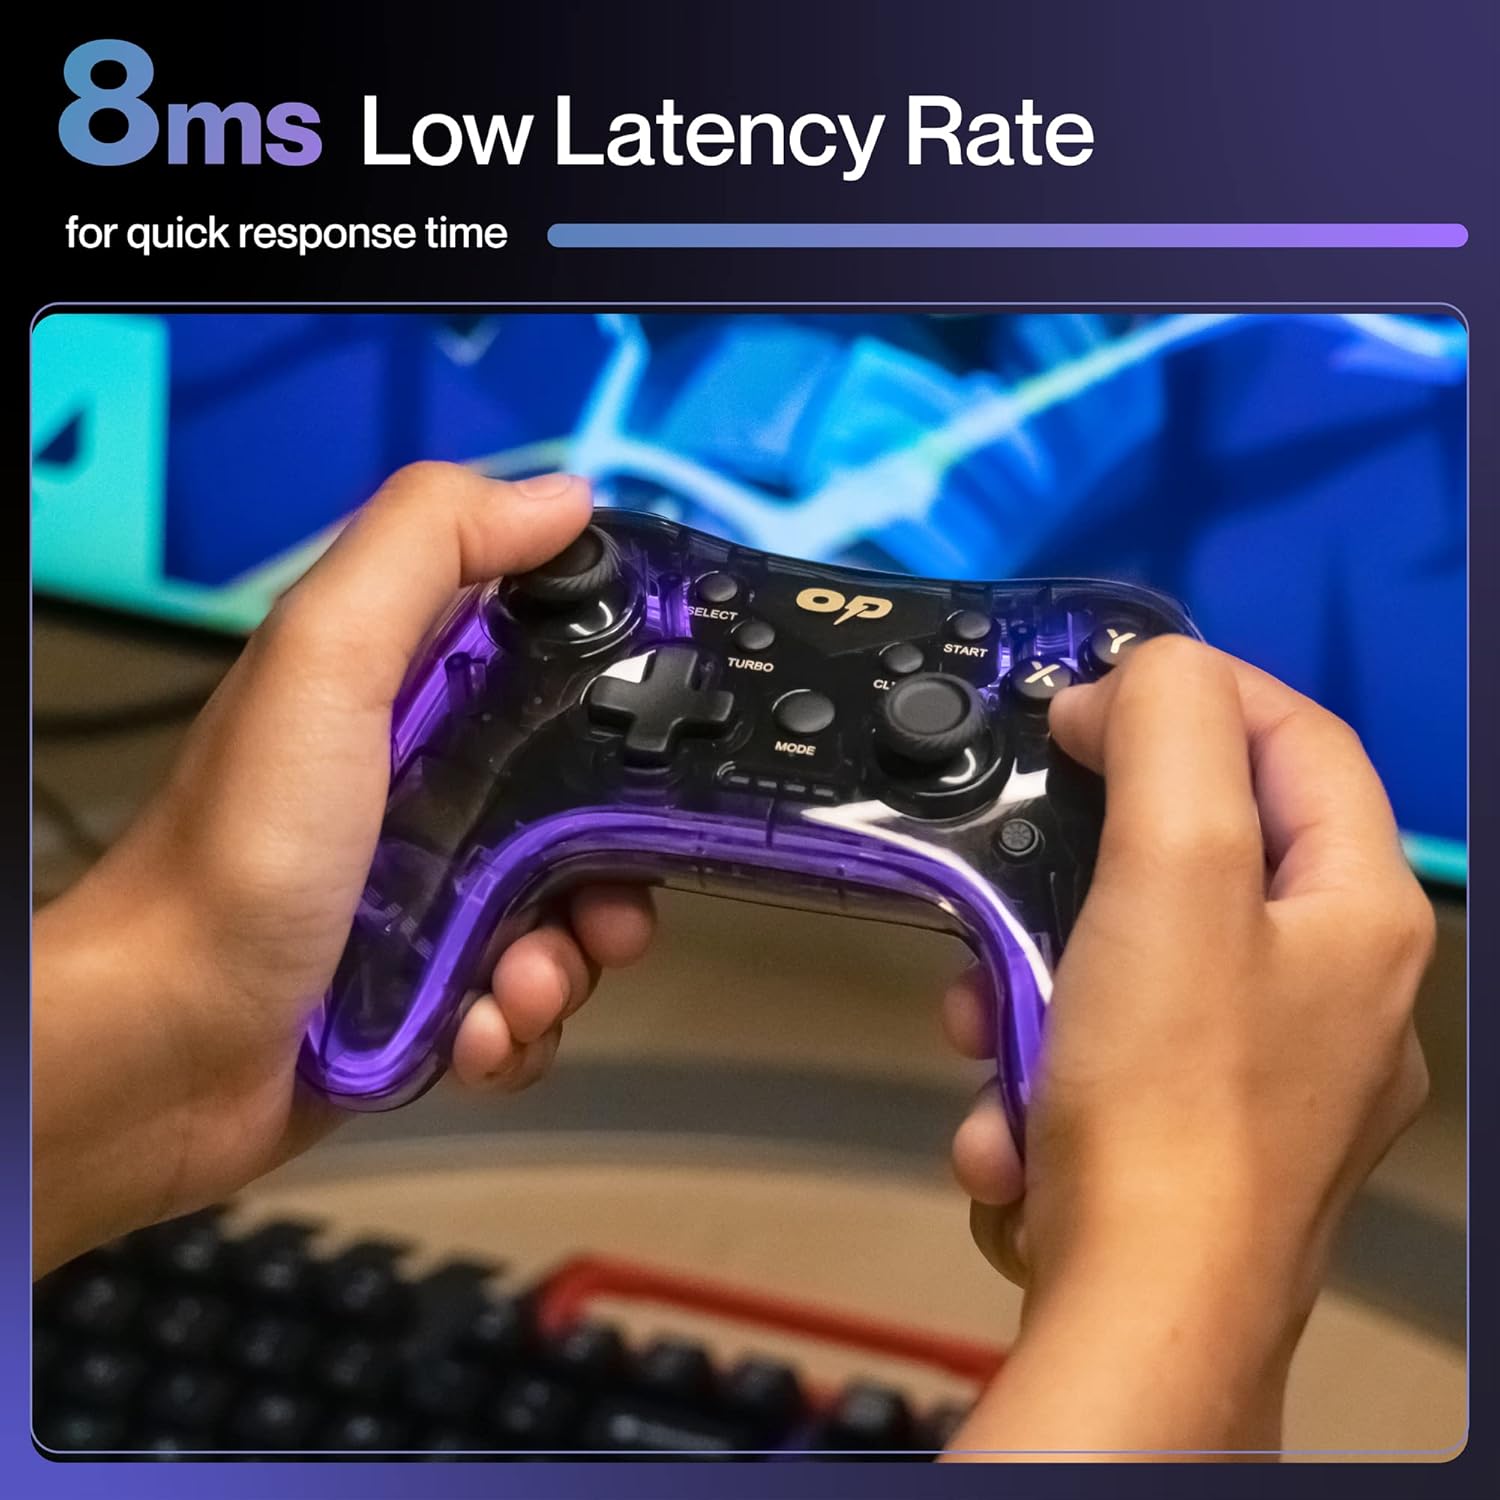
Image 4.2: Close-up view of the TURBO and CLEAR special function buttons.
4.3 Clearing Turbo Mode
To deactivate Turbo mode for a specific button:
- Press and hold the action button for which Turbo mode is active.
- While holding the action button, press the CLEAR button once.
- Release both buttons. Turbo mode for that button is now deactivated.
To clear all Turbo settings, press and hold the CLEAR button for approximately 3 seconds.
5. Maintenance
Proper maintenance ensures the longevity and optimal performance of your controller.
- Cleaning: Use a soft, dry cloth to wipe the controller. For stubborn dirt, slightly dampen the cloth with water. Avoid harsh chemicals or abrasive materials.
- Storage: Store the controller in a cool, dry place away from direct sunlight and extreme temperatures.
- Battery Care: Avoid fully discharging the battery frequently. If storing for an extended period, charge the controller to about 50% to prolong battery life.
- Avoid Drops: Protect the controller from physical impact, which can damage internal components.
6. Troubleshooting
| Problem | Possible Cause | Solution |
|---|---|---|
| Controller does not turn on. | Low battery. | Charge the controller using the provided Type-C cable. |
| Controller does not connect to device. | USB receiver not properly inserted or out of range. | Ensure the USB receiver is securely plugged in. Move closer to the receiver (within 10 meters). Re-pair by turning the controller off and on. |
| Buttons or joysticks are unresponsive. | Software glitch or physical obstruction. | Restart the controller and the connected device. Check for any physical debris around buttons/joysticks. |
| Vibration function is not working. | Game does not support vibration or feature is disabled. | Check in-game settings for vibration options. Ensure the game supports haptic feedback. |
7. Specifications
| Feature | Detail |
|---|---|
| Model Number | OP-WLGC01 |
| Connectivity | 2.4GHz Wireless |
| Compatibility | PC (Windows X-Input/D-Input), PS3 Console, Android TV |
| Battery Capacity | 800mAh Lithium Battery |
| Battery Backup | Up to 12 hours |
| Charging Port | Type-C |
| Vibration | Dual Intensity Motor |
| Lighting | 16.8M Colours Breathing RGB |
| Operating Range | Up to 10 meters |
| Dimensions (LxWxH) | 16.9 x 15.9 x 9 cm |
| Item Weight | 195 g |
8. Warranty and Support
This Ambrane product comes with a 365-day (1 Year) brand warranty against any manufacturing-related issues.
For warranty claims, technical support, or any inquiries, please contact Ambrane customer service:
- Email: Care@ambraneindia.com
Please retain your purchase receipt for warranty validation.
Ask a question about this manual
Ask about setup, troubleshooting, compatibility, parts, safety, or missing instructions. Manuals+ will review the question and use this page’s manual context to help answer it.