1. Introduction
This manual provides essential instructions for the safe and efficient use of your HERISKEER 24V 5A Fast Battery Charger, Model SJT-150E. This charger is designed for 24-volt sealed lead-acid (SLA) battery packs with 3-pin XLR charging ports, commonly found in mobility scooters and power chairs.
Important Note: This charger is not compatible with Lithium batteries. Please verify your battery type and connector specifications before use.
2. Safety Information
- Always connect the charger to the battery before plugging it into a power outlet.
- Ensure the charger is used in a well-ventilated area.
- Do not expose the charger to water or excessive moisture.
- Avoid dropping the charger or subjecting it to strong impacts.
- Do not attempt to open or modify the charger. Refer all servicing to qualified personnel.
- Keep out of reach of children.
- Disconnect the charger from the power outlet when not in use.
- If the charger or cables appear damaged, discontinue use immediately.
3. Package Contents
Verify that your package contains the following items:
- 1 x HERISKEER 24V 5A Fast Battery Charger (Model SJT-150E)
- 1 x AC Power Cord
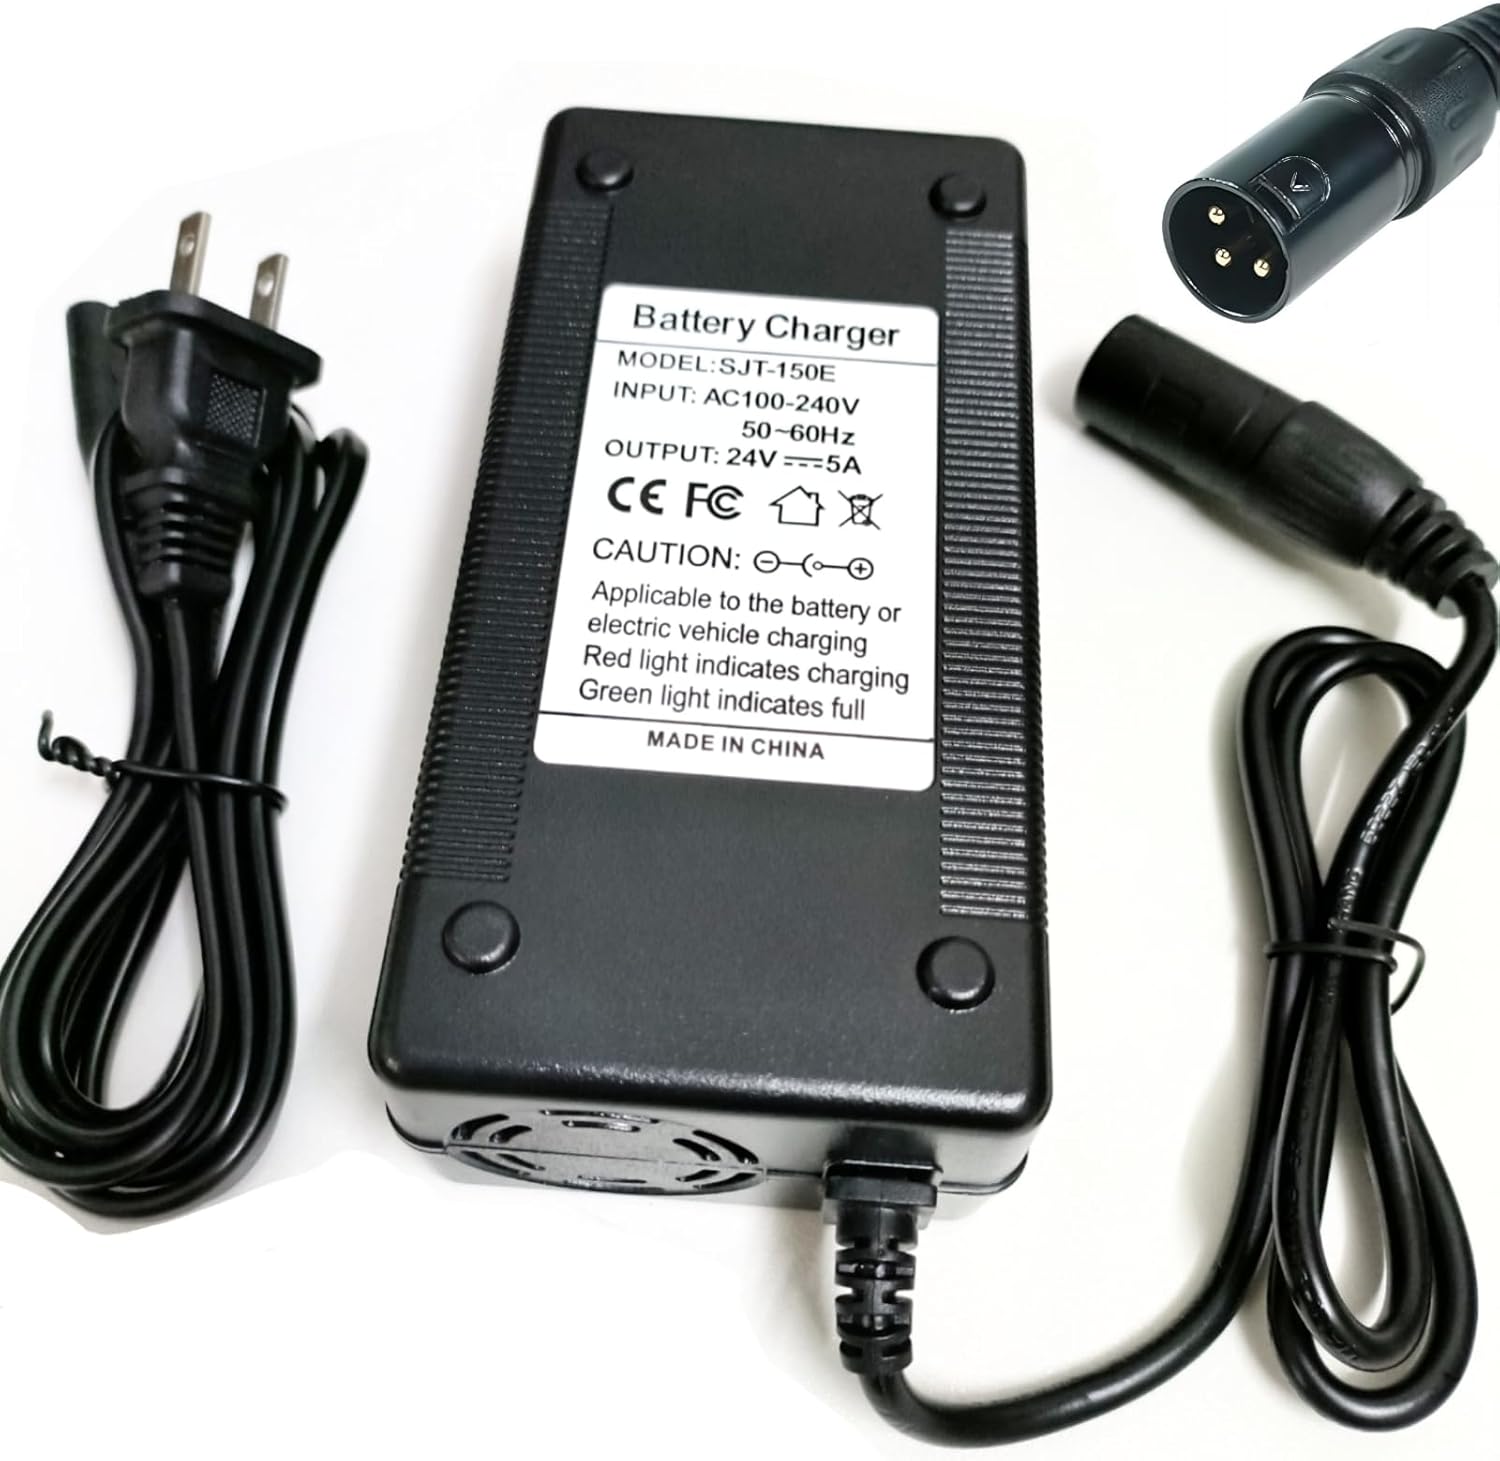
Image: The HERISKEER 24V 5A Fast Battery Charger, showing the main unit, detachable AC power cord, and the 3-pin XLR output connector.
4. Product Overview
The HERISKEER 24V 5A Fast Battery Charger is designed for efficient and safe charging of 24V lead-acid batteries. Key features include:
- Fast Charging: Delivers 5 Amps for quicker charging compared to lower amperage chargers.
- Intelligent Cooling Fan: Features an intelligent program control fan that adjusts speed based on internal temperature, reducing noise and conserving energy.
- LED Indicator: Provides clear charging status (Red for charging, Green for fully charged).
- Multiple Safety Protections: Includes Over Voltage Protection (OVP), Over Current Protection (OCP), Overload Protection, and Short-circuit Protection.
- Durable Construction: Built with precise components and exquisite workmanship for reliability.
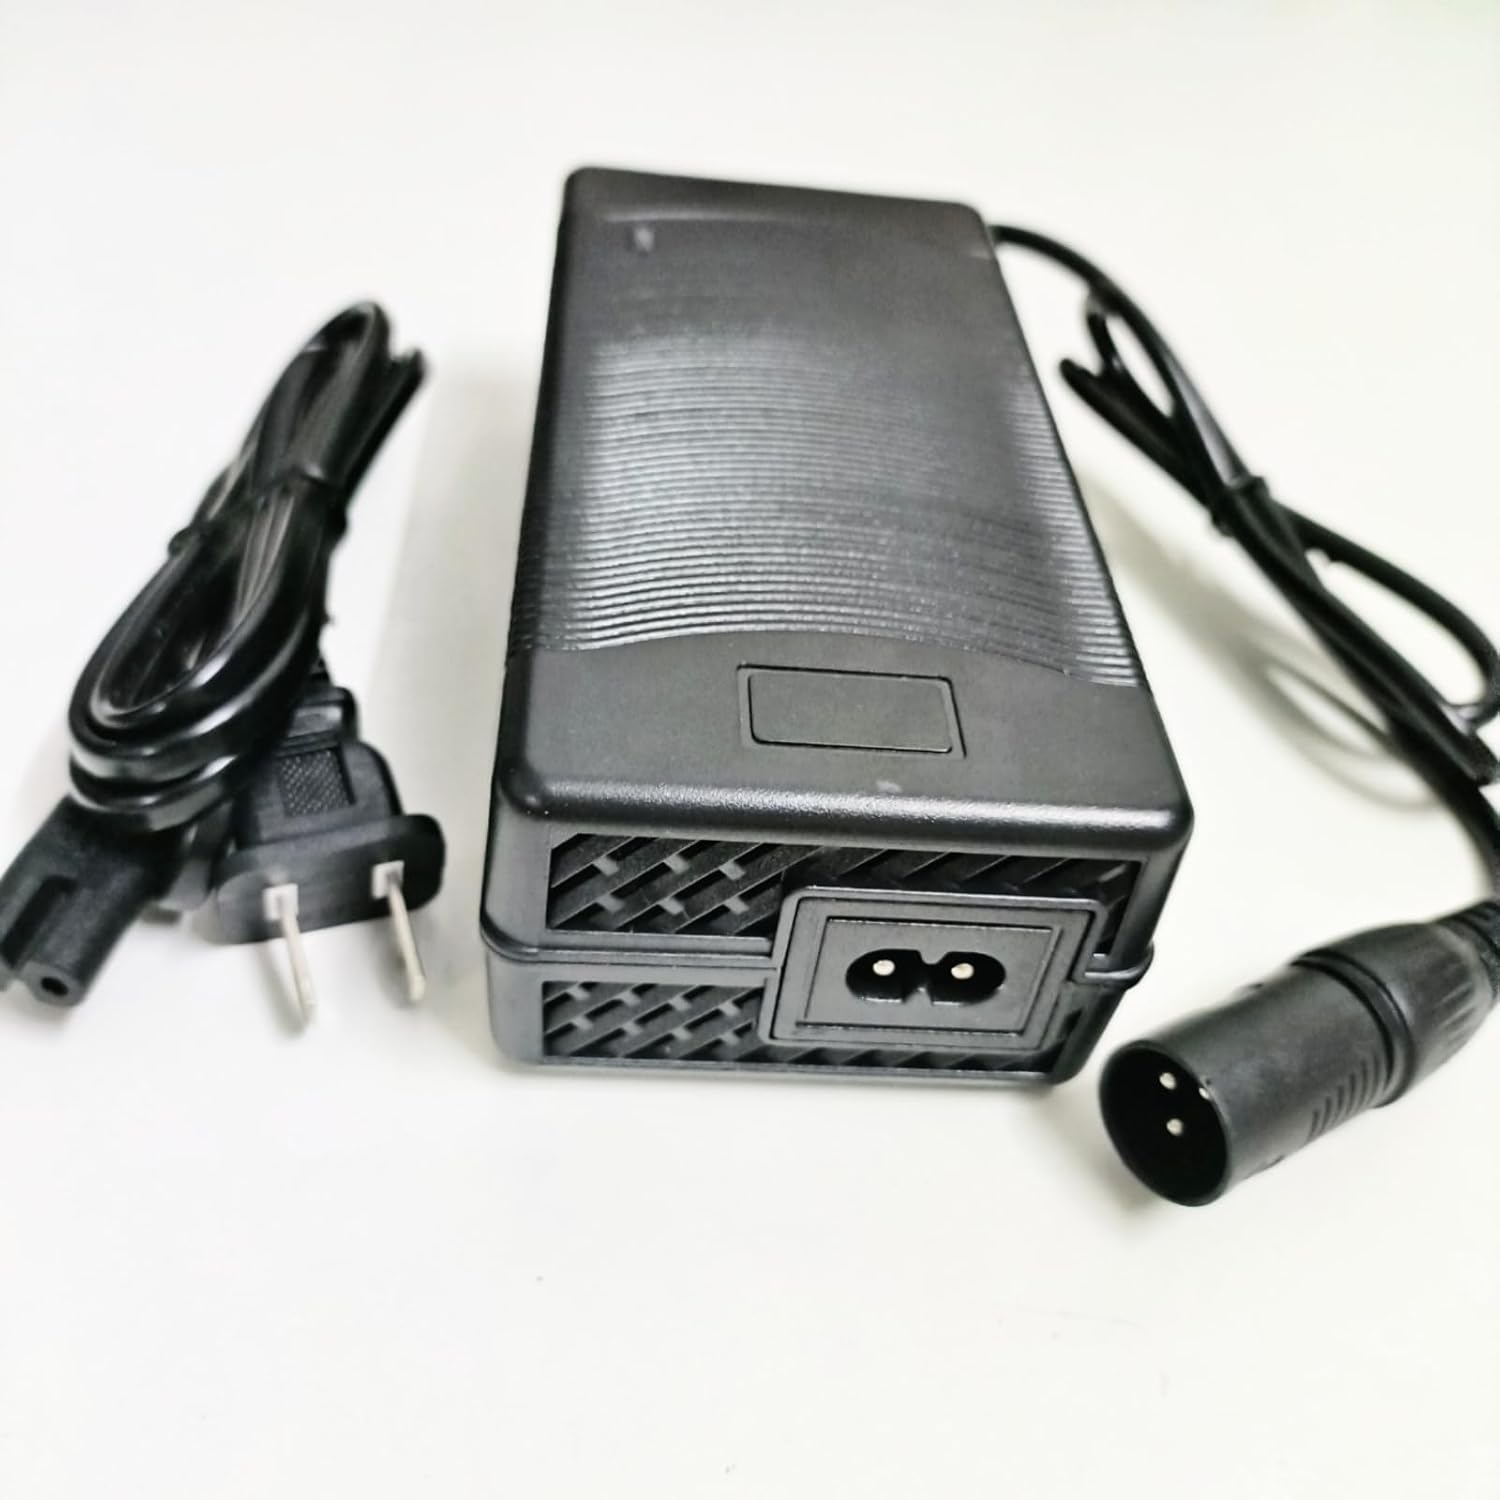
Image: Close-up view of the internal smart fan, designed for temperature control and efficient cooling during charging.

Image: View of the charger's internal circuit board, highlighting precise components and build quality.

Image: Graphic illustrating the charger's multiple protection features, including overcharge, magnetic field, temperature, foreign body detection, charging, and overvoltage protection.
5. Setup
Follow these steps to set up your battery charger:
- Inspect the Charger: Before each use, visually inspect the charger, power cord, and XLR connector for any signs of damage. Do not use if damaged.
- Connect to Battery: Plug the 3-pin XLR connector from the charger into the charging port of your mobility scooter or power chair. Ensure a secure connection.
- Connect to Power Outlet: Plug the AC power cord into the charger, then plug the other end of the AC power cord into a standard 100-240V AC wall outlet.
- Verify Charging Indicator: The LED indicator on the charger should illuminate RED, indicating that charging is in progress.

Image: Diagram showing the pin configuration of a 3-pin XLR male plug, indicating positive and negative terminals.
6. Operating Instructions
Once connected, the charger will automatically begin charging your 24V lead-acid battery. The charging process is indicated by the LED light:
- RED LED: Indicates that the battery is currently charging.
- GREEN LED: Indicates that the battery is fully charged, or the charger is disconnected from the battery. The charger will automatically shut off when charging is complete to prevent overcharging.
Charging times will vary depending on the battery's capacity and current charge level. For optimal battery life, it is recommended to charge your battery regularly and avoid deep discharge.

Image: Visual representation of the charger's LED indicator. The left image shows a red light, signifying 'charging'. The right image shows a green light, signifying 'finished' or fully charged.
7. Maintenance
Proper maintenance ensures the longevity and performance of your charger:
- Cleaning: Wipe the charger with a dry, soft cloth. Do not use liquid cleaners or solvents.
- Storage: Store the charger in a cool, dry place away from direct sunlight and extreme temperatures.
- Cable Care: Avoid bending or crimping the power cords excessively. Do not pull the cables to disconnect; always grasp the plug.
8. Troubleshooting
If you encounter issues with your charger, refer to the following common problems and solutions:
- Charger LED does not light up:
- Ensure the AC power cord is securely plugged into both the charger and the wall outlet.
- Check if the wall outlet is functional by plugging in another device.
- Verify the 3-pin XLR connector is firmly seated in the battery charging port.
- LED remains RED after extended charging:
- The battery may be deeply discharged or faulty. Consult your mobility device's manual or a technician.
- Ensure the battery capacity is within the recommended range (14-60 Ah for 24V lead-acid).
- Charger feels excessively hot:
- Ensure the charger is in a well-ventilated area and not covered.
- If overheating persists, disconnect immediately and contact support.
9. Specifications
| Feature | Specification |
|---|---|
| Model | SJT-150E |
| Input Voltage | 100-240V AC ~ 50/60Hz, 2A |
| Output Voltage | 24V (28.8V Max Charging) |
| Output Amperage | 5A max |
| Connector Type | 3-Pin XLR Male |
| Compatible Battery Type | 24V Sealed Lead Acid (SLA) Battery Pack |
| Recommended Battery Capacity | 14-60 Ah |
| Product Dimensions | 4.8 x 1.98 x 0.75 inches |
| Item Weight | 8 ounces |
| Special Features | OVP/OCP/Overload/Short-circuit Protection |
10. Warranty and Support
For warranty information or technical support, please refer to the contact details provided with your purchase or visit the HERISKEER official website. Keep your purchase receipt as proof of purchase.