1. Introduction
This manual provides detailed instructions for the installation, operation, and maintenance of the Samoser Refrigerator Water Inlet Valve. This component is designed as an aftermarket replacement for specific LG and Kenmore refrigerator models, controlling the flow of water to the ice maker and water dispenser.
2. Safety Information
- Always disconnect power to the refrigerator before attempting any installation or maintenance. Failure to do so can result in electrical shock or injury.
- Turn off the water supply to the refrigerator before beginning installation to prevent water leaks.
- Wear appropriate personal protective equipment, such as gloves and safety glasses, during installation.
- If you are unsure about any step, consult a qualified appliance technician.
- Ensure all connections are secure and leak-free before restoring power and water.
3. Setup and Installation
This section outlines the general steps for replacing a refrigerator water inlet valve. Specific procedures may vary slightly depending on your refrigerator model.
3.1. Pre-Installation Checks
- Verify that the Samoser Water Inlet Valve is the correct replacement part for your refrigerator model. Refer to Section 8 for compatibility information.
- Gather necessary tools, which may include screwdrivers, pliers, and a bucket or towels for water spills.
3.2. Installation Steps
- Disconnect Power and Water: Unplug the refrigerator from the electrical outlet and turn off the household water supply valve connected to the refrigerator.
- Access the Valve: Depending on your refrigerator model, you may need to pull the refrigerator away from the wall and remove a rear access panel to locate the water inlet valve.
- Drain Water: Place a towel or shallow pan under the existing valve to catch any residual water when disconnecting lines.
- Disconnect Water Lines: Carefully disconnect the water supply line and the lines leading to the ice maker and water dispenser from the old valve. Note their positions for re-connection.
- Disconnect Electrical Connectors: Unplug the electrical wiring harnesses from the old valve.
- Remove Old Valve: Unscrew or unclip the old water inlet valve from its mounting bracket.
- Install New Valve: Mount the new Samoser water inlet valve in the same position as the old one.
- Connect Electrical Connectors: Plug the electrical wiring harnesses into the corresponding ports on the new valve. Ensure connections are secure.
- Connect Water Lines: Reconnect the water supply line and the lines to the ice maker and water dispenser to the new valve. Hand-tighten connections, then use a wrench for a snug fit, being careful not to overtighten.
- Check for Leaks: Slowly turn on the household water supply valve. Inspect all connections for any signs of leaks. Tighten connections further if necessary.
- Restore Power: Plug the refrigerator back into the electrical outlet.
- Replace Access Panel: Reinstall any access panels removed earlier.
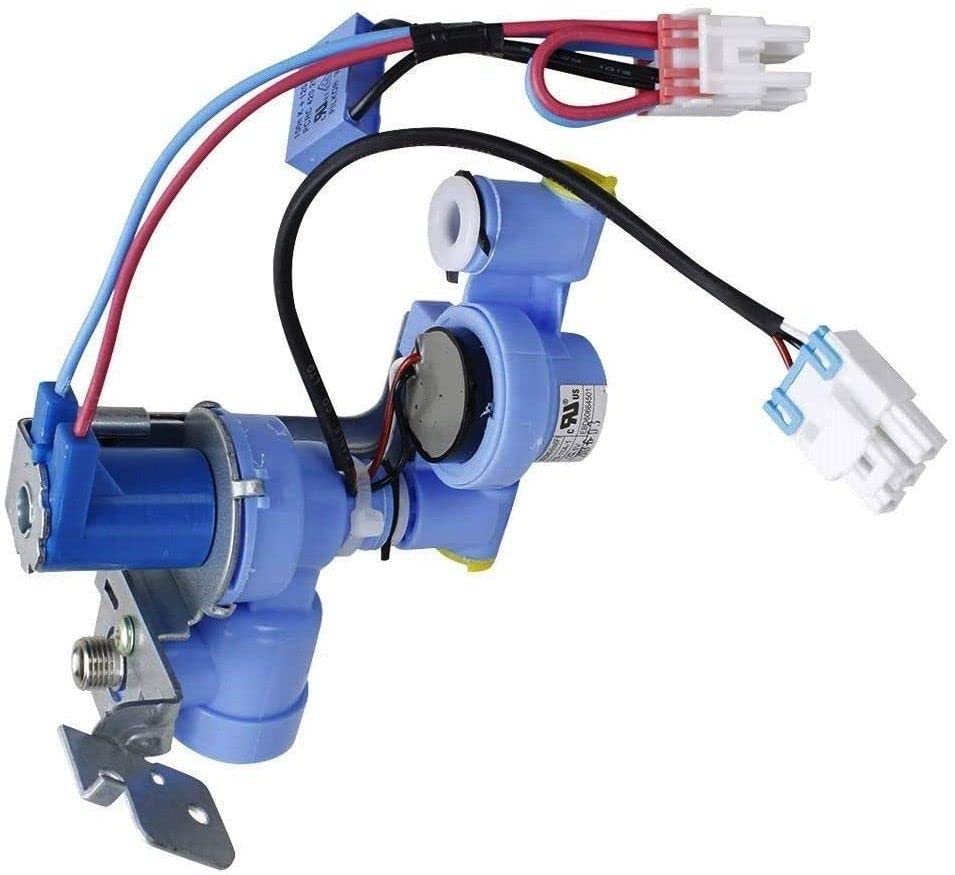
Figure 1: Samoser Refrigerator Water Inlet Valve. This image displays the Samoser Refrigerator Water Inlet Valve. It is a light blue plastic component with multiple ports for water lines and electrical connectors. Red, blue, and black wires are visible, leading to white plastic connectors. A metal mounting bracket is attached to one side of the valve.
4. Operating Instructions
Once the Samoser Water Inlet Valve is installed and power/water are restored, the refrigerator's water dispensing and ice-making functions should resume normal operation.
- Initial Water Dispense: Dispense several cups of water to flush any air from the lines and ensure proper water flow.
- Ice Maker Cycle: Allow several hours for the ice maker to produce its first batch of ice. Discard the first few batches to ensure clean ice.
5. Maintenance
The Samoser Refrigerator Water Inlet Valve is designed for long-term, maintenance-free operation. However, periodic checks can help ensure continued performance:
- Leak Inspection: Periodically check the area around the valve and water lines for any signs of water leaks. Address any leaks immediately by tightening connections or replacing faulty components.
- Water Filter: Ensure your refrigerator's water filter is replaced according to the manufacturer's recommendations to prevent sediment buildup that could affect valve performance.
6. Troubleshooting
If you encounter issues after installing the water inlet valve, consider the following:
- No Water Dispensed / No Ice Production:
- Verify the refrigerator is plugged in and receiving power.
- Ensure the household water supply valve is fully open.
- Check that all electrical connectors to the valve are securely attached.
- Inspect water lines for kinks or blockages.
- Confirm the water filter is not clogged and is correctly installed.
- Water Leakage:
- Immediately turn off the water supply and disconnect power.
- Inspect all water line connections for tightness. Overtightening can also cause leaks, so ensure a snug but not excessive fit.
- Check for damaged O-rings or seals on the water lines.
7. Specifications
| Attribute | Detail |
|---|---|
| Brand | Samoser |
| Part Number | 7957209331 7957237331 |
| Product Dimensions (L x W x H) | 1 x 1 x 1 inches |
| Item Model Number | 79572489417957204201 |
| UPC | 734665703999 |
| Manufacturer | Samoser |
8. Compatibility
This Samoser Water Inlet Valve is an aftermarket replacement part compatible with various LG and Kenmore refrigerator models. To confirm compatibility, locate your refrigerator's model number and compare it with the list below. You can often find the model number inside the refrigerator compartment or on a label on the back of the appliance.
Compatible Kenmore Models (partial list):
- 795.72043.110, 795.72043.112, 795.72043.313, 795.72043.316
- 795.72052.110, 795.72052.114, 795.72052.115, 795.72052.116
- 795.72053.110, 795.72053.112, 795.72053.114, 795.72053.117, 795.72053.118, 795.72053.316
- 795.72059.110, 795.72059.116
- 795.72063.110, 795.72063.113, 795.72063.317
- 795.72093.310, 795.72093.311, 795.72093.312, 795.72099.310
- 795.72183.210, 795.72373.310, 795.72373.312, 795.72483.410, 795.72483.411, 795.72489.411
- 795.72042.012, 795.72042.110, 795.72042.111, 795.72042.112, 795.72042.313, 795.72042.316
- 795.72043.012, 795.72043.111
- 795.72049.012, 795.72049.110, 795.72049.111, 795.72049.112, 795.72049.313, 795.72049.316
- 795.72052.111, 795.72052.112, 795.72052.113, 795.72052.313
- 795.72053.111, 795.72053.113, 795.72053.116
- 795.72059.111, 795.72059.112, 795.72059.113, 795.72059.114, 795.72059.115
- 795.72062.110, 795.72062.111, 795.72062.112, 795.72062.212, 795.72062.312, 795.72062.313, 795.72062.315, 795.72062.316
- 795.72063.111, 795.72063.112, 795.72063.315
- 795.72069.110, 795.72069.111, 795.72069.112, 795.72069.212, 795.72069.313, 795.72069.315, 795.72069.316
- 795.72092.310, 795.72092.311, 795.72092.312, 795.72099.311, 795.72099.312
- 795.72182.210, 795.72182.211, 795.72182.315, 795.72183.211, 795.72183.312, 795.72183.314, 795.72183.315
- 795.72189.210, 795.72189.211, 795.72189.315, 795.72193.310, 795.72193.311
- 795.72353.310, 795.72353.312, 795.72372.310, 795.72372.312, 795.72379.310, 795.72379.312
- 795.72482.410, 795.72482.411, 795.72489.410
Note: This is an aftermarket replacement part. If you are unsure about compatibility, please contact the seller for assistance.
9. Support
For further assistance regarding compatibility or installation, please contact the seller. They are committed to resolving your inquiries within 24 hours.