1. Introduction
Thank you for purchasing the Kapbom KA-3199 Retro Bluetooth Radio. This portable audio device combines classic aesthetics with modern functionality, offering multiple playback options including Bluetooth, FM radio, USB, Micro SD, and AUX input. It features a powerful 5W RMS speaker for excellent sound quality and a built-in flashlight for added utility. Please read this manual carefully before use to ensure proper operation and to maximize your listening experience.
2. Safety Information
- Do not expose the device to water, moisture, or extreme temperatures.
- Avoid dropping or subjecting the device to strong impacts.
- Do not attempt to disassemble or repair the unit yourself. Contact qualified service personnel.
- Keep the device away from heat sources and direct sunlight.
- Use only the specified charging cable and power adapter.
- Dispose of batteries according to local regulations.
3. Package Contents
Please check that all items are present in the package:
- 1 x Kapbom KA-3199 Portable Speaker
- 1 x AC Power Cable (1.5m)
- 1 x User Manual
4. Product Overview
Familiarize yourself with the various parts and controls of your Kapbom KA-3199 radio.
Front Panel Controls
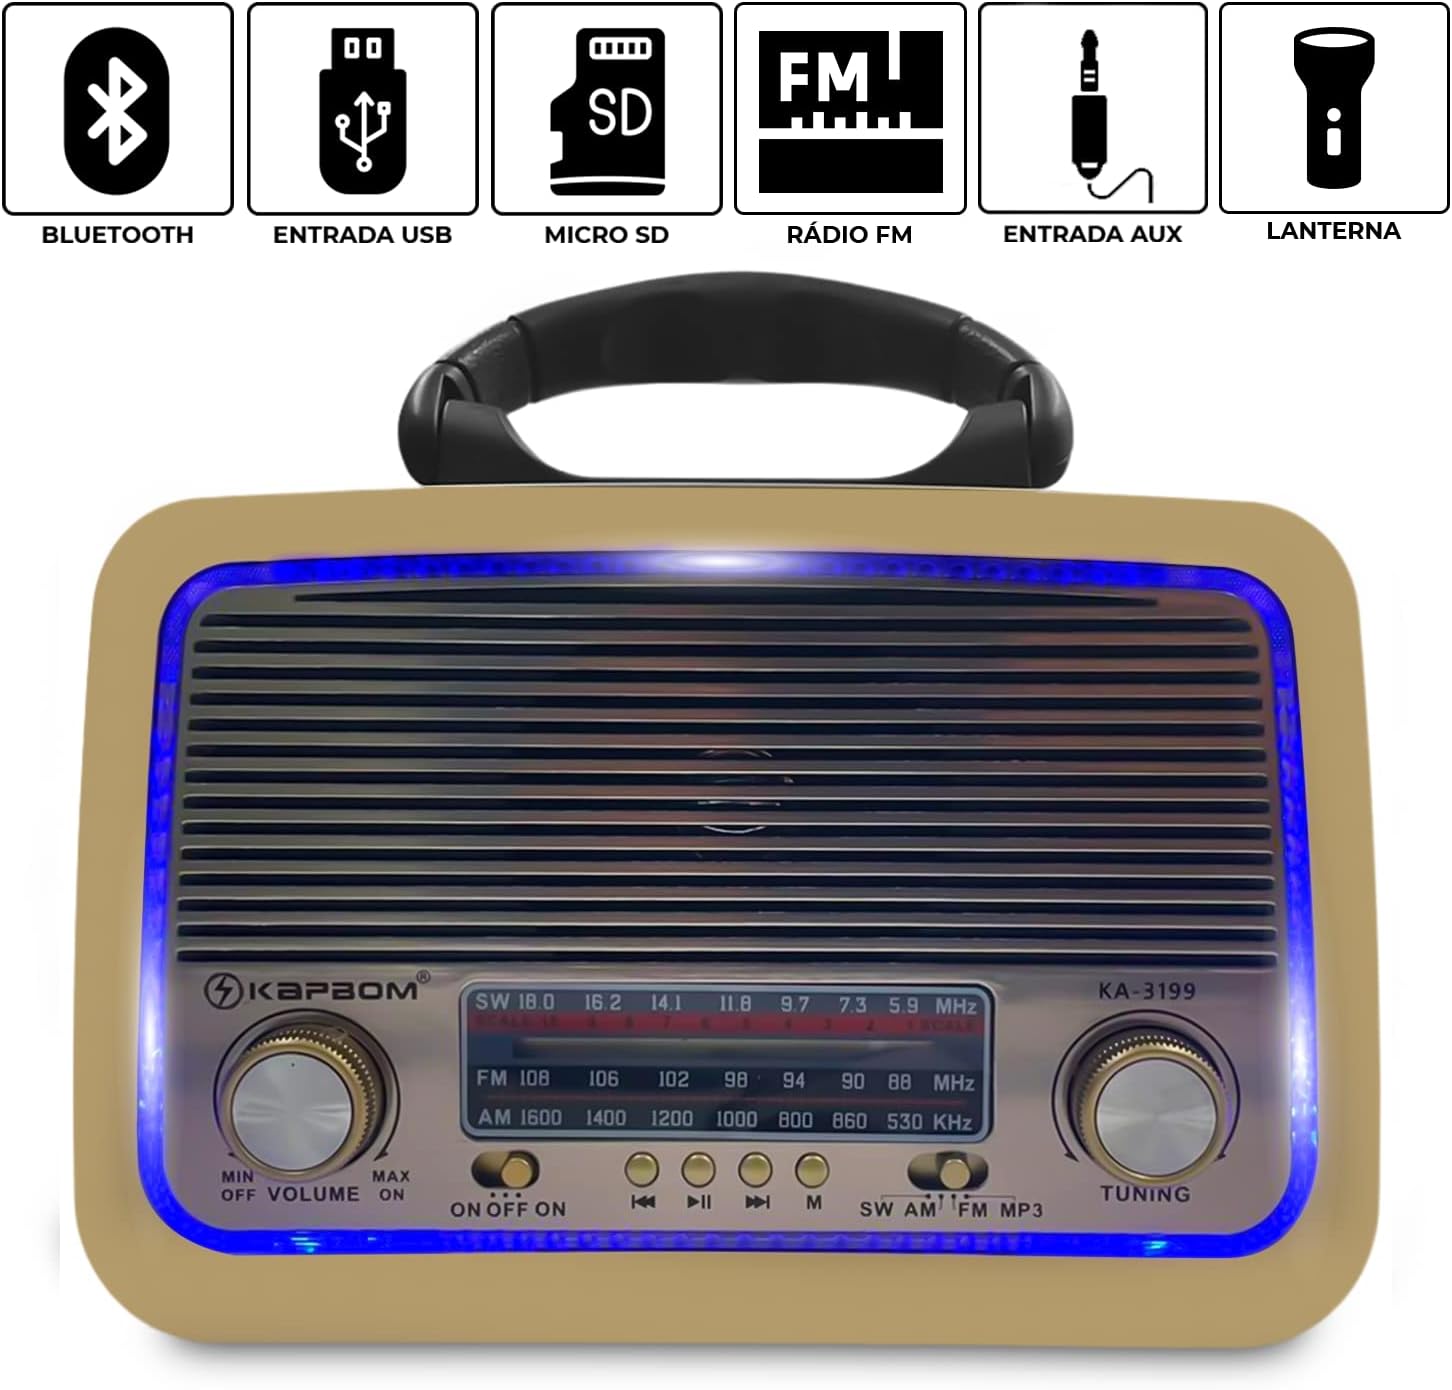
Figure 4.1: Front view of the Kapbom KA-3199 radio. This image highlights the main control panel, including the volume knob on the left, the tuning knob on the right, the mode selector switch (SW/AM/FM/MP3), and playback control buttons (Previous, Play/Pause, Next) located below the frequency display. Icons above the display indicate Bluetooth, USB, Micro SD, FM Radio, AUX, and Flashlight capabilities.
- Volume Knob (MIN/OFF/ON/MAX): Rotate to adjust volume. Turn to 'OFF' to power down the device.
- Tuning Knob: Rotate to tune into radio stations in FM, AM, or SW modes.
- Mode Switch (SW/AM/FM/MP3): Selects the operating mode (Shortwave, AM, FM Radio, or MP3 playback from USB/Micro SD/Bluetooth/AUX).
- Playback Control Buttons: For skipping tracks, playing/pausing audio in MP3/Bluetooth modes.
- Frequency Display: Shows the current radio frequency.
Side Panel and Rear Features

Figure 4.2: Side view of the Kapbom KA-3199 radio, illustrating the USB port, Micro SD card slot, and DC 5V charging input. These ports allow for various audio input methods and charging.

Figure 4.3: Side view of the Kapbom KA-3199 radio, highlighting the integrated flashlight. This feature provides illumination when needed.

Figure 4.4: Rear view of the Kapbom KA-3199 radio, displaying the battery compartment and the telescopic antenna. The antenna can be extended for improved radio reception.
- USB Port: For playing audio files from a USB flash drive.
- Micro SD Card Slot: For playing audio files from a Micro SD card.
- DC 5V Input: For charging the internal battery using the provided AC power cable.
- Flashlight: Integrated light source on the side.
- Telescopic Antenna: Extend for better FM/SW radio reception.
- Battery Compartment: Houses the internal rechargeable battery.
5. Setup
5.1. Charging the Battery
- Ensure the radio is powered off by turning the Volume Knob to 'OFF'.
- Connect the provided AC power cable to the DC 5V input port on the side of the radio.
- Plug the other end of the cable into a standard wall outlet.
- The charging indicator (if present) will illuminate. Allow approximately 3-4 hours for a full charge.
- Disconnect the charger once fully charged or when not in use.
5.2. Initial Power On
Turn the Volume Knob from 'OFF' to 'ON'. The radio will power on and typically default to the last used mode or FM radio mode.
6. Operating Instructions
6.1. Selecting a Mode
Use the Mode Switch (SW/AM/FM/MP3) on the front panel to cycle through the available audio sources.
6.2. FM Radio Operation
- Switch the mode to 'FM'.
- Extend the telescopic antenna for optimal reception.
- Rotate the Tuning Knob to scan for and select your desired FM radio station. The frequency will be displayed on the screen.
6.3. Bluetooth Mode
- Switch the mode to 'MP3'. The radio will automatically enter Bluetooth pairing mode, indicated by an audible prompt.
- On your mobile device, enable Bluetooth and search for available devices.
- Select 'KA-3199' from the list of devices to pair.
- Once paired, you can play audio from your device through the radio. Use the playback control buttons on the radio or your device to manage music.
6.4. USB/Micro SD Card Playback
- Switch the mode to 'MP3'.
- Insert a USB flash drive or a Micro SD card (pre-loaded with MP3 audio files) into the respective port on the side of the radio.
- The radio will automatically detect the storage device and begin playing audio files.
- Use the playback control buttons (Previous, Play/Pause, Next) to navigate through tracks.
6.5. AUX Input Mode
The device supports AUX input, though a dedicated AUX port is not explicitly shown in all images, it is listed as a compatible device. If an AUX port is present (often shared with another port or a 3.5mm jack), connect an external audio device using a 3.5mm audio cable. Switch the mode to 'MP3' and the radio should automatically detect the AUX input.
6.6. Using the Flashlight
The flashlight is typically activated by a dedicated switch or button on the side of the unit, near the light itself. Refer to the physical unit for the exact location and operation of the flashlight switch.
7. Maintenance
7.1. Cleaning
Wipe the exterior of the radio with a soft, dry cloth. Do not use abrasive cleaners, waxes, or solvents as they may damage the finish.
7.2. Storage
When not in use for extended periods, store the radio in a cool, dry place away from direct sunlight and extreme temperatures. Ensure the battery is partially charged (around 50%) before storage to prolong its lifespan.
7.3. Battery Care
To maintain battery health, avoid fully discharging the battery frequently. Recharge the battery regularly, even if the device is not used often.
8. Troubleshooting
| Problem | Possible Cause | Solution |
|---|---|---|
| No power | Battery discharged; Power switch off | Charge the battery; Turn the Volume Knob to 'ON' |
| No sound | Volume too low; Incorrect mode selected; Device not paired (Bluetooth) | Increase volume; Select correct mode; Pair Bluetooth device |
| Poor radio reception | Antenna not extended; Weak signal area | Extend the telescopic antenna; Move to an area with better signal |
| Bluetooth not connecting | Radio not in pairing mode; Device too far; Already connected to another device | Ensure radio is in MP3 mode; Keep devices within 10m; Disconnect from other devices |
| USB/Micro SD not playing | Incorrect file format; Corrupted files; Drive/card not inserted correctly | Ensure files are MP3; Try another drive/card; Reinsert securely |
9. Specifications
Detailed technical specifications for the Kapbom KA-3199 Retro Bluetooth Radio.
| Feature | Specification |
|---|---|
| Model | KA-3199 |
| Brand | Kapbom |
| Output Power | 5W RMS |
| Battery Capacity | 1200mAh |
| Battery Life (Average) | Up to 4 hours |
| Frequency Response | 150 - 20000 Hz |
| Sensitivity | 80 dB |
| Impedance | 8 Ohm |
| Speaker Diameter | 75 mm |
| Connectivity | Bluetooth, USB, Micro SD, AUX, FM Radio |
| FM Frequency Range | Up to 108 MHz |
| Display Type | LCD |
| Dimensions (L x W x H) | 20.5 cm x 8.5 cm x 15 cm |
| Special Features | Portable, Lightweight, Built-in Flashlight |
Figure 9.1: Dimensions of the Kapbom KA-3199 Retro Bluetooth Radio.

10. Warranty and Support
Specific warranty information for the Kapbom KA-3199 Retro Bluetooth Radio is not provided in this manual. Please refer to the retailer or manufacturer's website for details regarding warranty coverage and customer support. Keep your purchase receipt as proof of purchase for any warranty claims.