1. Introduction
This manual provides instructions for the Enhon 2 Set Tub Spout Diverter Repair Kit, designed to address common issues such as leaky tub spouts. The kit includes components necessary for repairing most standard tub spout diverters, ensuring proper water flow to your shower head.

Image 1: Enhon Tub Spout Diverter Repair Kit, showing two sets of diverter valve stems, cup seals, and gates.
Each kit contains:
- 2 x Diverter Valve Stems
- 2 x Diverter Gates
- 2 x Cup Seals
2. Product Components
The Enhon Tub Spout Diverter Repair Kit consists of three primary components:
- Diverter Valve Stem: The main rod that moves up and down to redirect water. Made of metal for durability.
- Diverter Gate: A plastic component that the stem interacts with to block or allow water flow.
- Cup Seal: A rubber washer that creates a watertight seal, preventing leaks.
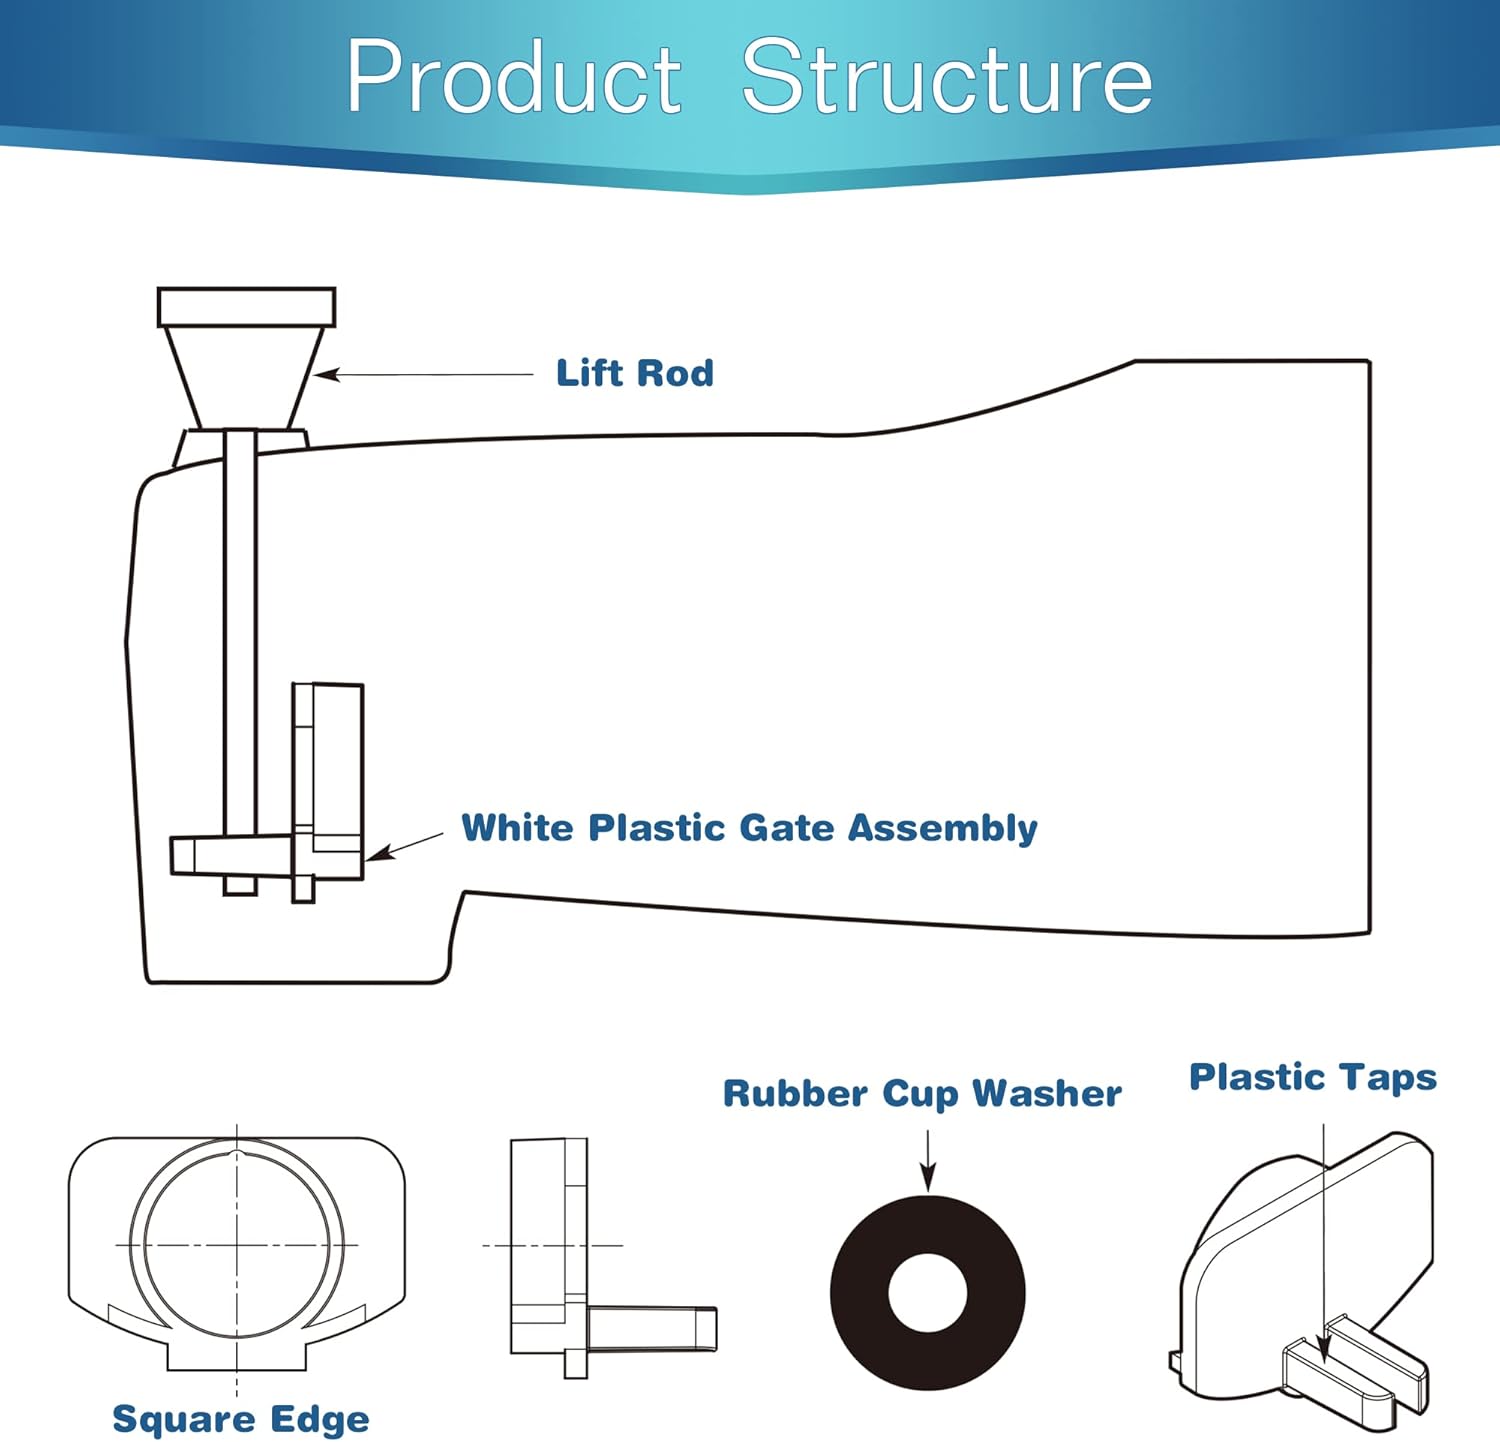
Image 2: Diagram illustrating the internal structure of a tub spout diverter, highlighting the lift rod, white plastic gate assembly, rubber cup washer, and plastic taps.
3. Installation Instructions
Follow these steps to replace your tub spout diverter components:
- Turn off Water Supply: Before beginning any plumbing work, ensure the main water supply to your bathroom is turned off.
- Remove Existing Tub Spout:
- For "Slip-fit" tub spouts with a set screw: Locate the set screw underneath the spout, typically near the wall. Loosen it with a 5/32" Allen wrench. Once loose, twist and pull the tub spout off.
- For "IPS" tub spouts without a set screw: These spouts are threaded onto a pipe. Use a strap wrench to turn the entire tub spout counter-clockwise until it detaches from the wall pipe.
- Access Diverter Assembly: Once the tub spout is removed, you will see the internal diverter assembly.
- Remove Old Diverter Components: Use a screwdriver to gently spread apart the two tabs that secure the old lift rod. Carefully remove the old diverter gate assembly parts, including the old diverter valve stem, gate, and cup seal.
- Install New Diverter Gate and Seal: Take a new diverter gate from the kit and place a new cup seal into the spout gate. Ensure the seal is seated correctly.
- Insert New Diverter Assembly: Carefully insert the new diverter gate with the rubber washer into the tub spout.
- Install New Diverter Valve Stem: Place the new diverter valve stem into its original position, ensuring it aligns correctly with the gate.
- Reattach Tub Spout: Slide the tub spout back onto the pipe. If it's a slip-fit type, tighten the set screw. If it's an IPS type, turn it clockwise until it is securely threaded onto the pipe.
- Restore Water Supply: Turn the main water supply back on and check for leaks.

Image 3: Visual guide on how to remove two common types of tub spouts: slip-fit with a set screw and IPS (threaded) without a set screw.
4. Operating Instructions
To operate the tub spout diverter:
- For Bathtub Fill: Ensure the diverter knob (lift rod) on the tub spout is in the down position. Water will flow directly from the tub spout into the bathtub.
- For Shower Mode: Pull the diverter knob (lift rod) upwards. This action engages the diverter gate and stem, redirecting water flow from the tub spout up to the shower head.
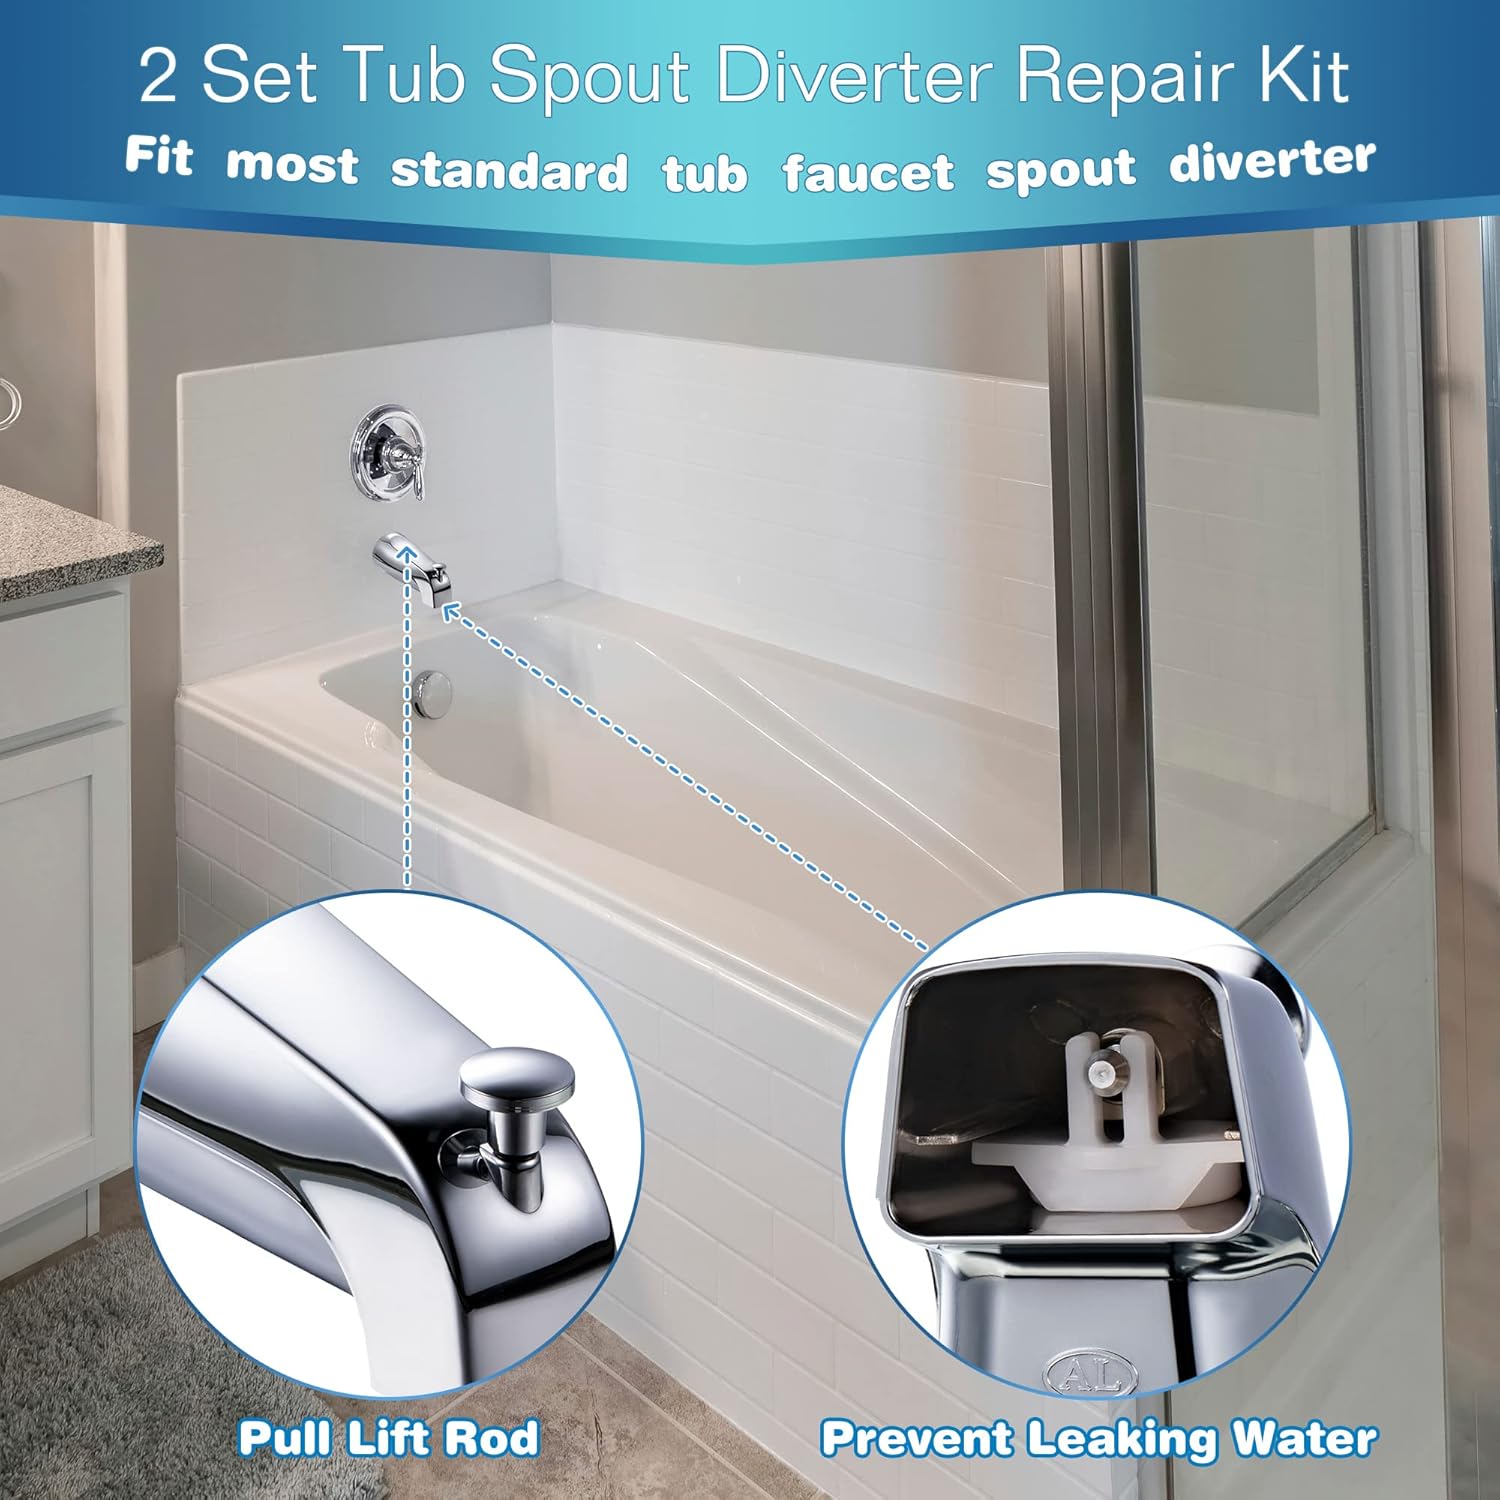
Image 4: Illustration of a tub spout with a diverter knob, demonstrating how pulling the lift rod diverts water to the shower head and prevents leaking from the spout.
5. Maintenance
Regular maintenance can extend the life of your tub spout diverter:
- Cleaning: Periodically clean the exterior of the tub spout with a soft cloth and mild, non-abrasive cleaner to prevent mineral buildup.
- Inspection: If you notice reduced water flow to the shower or persistent dripping from the tub spout in shower mode, inspect the diverter components for wear or damage.
- Seal Replacement: The rubber cup seal is a wear-and-tear component. If leaks persist after installation, consider replacing the cup seal again.
6. Troubleshooting
Common issues and their solutions:
- Issue: Water still leaks from the tub spout when the diverter is engaged (shower mode).
Solution: This indicates a faulty or worn diverter gate or cup seal. Replace both the diverter gate and cup seal using the new components from the kit. Ensure the cup seal is properly seated. - Issue: Diverter knob is stiff or difficult to pull up.
Solution: Mineral buildup or corrosion might be affecting the movement of the diverter stem. Disassemble the spout and clean the components. If the stem is corroded, replace it. - Issue: Tub spout is difficult to remove.
Solution: Ensure you have identified the correct type of tub spout (slip-fit or IPS). For slip-fit, ensure the set screw is fully loosened. For IPS, apply firm, steady counter-clockwise pressure with a strap wrench.

Image 5: Components of the repair kit (diverter valve stem, cup seal, diverter gate) highlighted as solutions for repairing a leaking tub spout diverter, emphasizing leakproof, durability, and waterproof material properties.
7. Specifications
| Brand | Enhon |
| Model Name | SO-Enhon-0674 |
| Material | Metal, Plastic, Rubber |
| Color | Chrome (Diverter Stem), White (Diverter Gate), Black (Cup Seal) |
| Installation Type | Screw-In (for spout attachment) |
| Diverter Stem Size | Approximately 2.4 inches |
| Diverter Gate Size | 1.26 x 0.94 inches |
| Rubber Cup Seal Size | 1.2 x 0.5 MM |
| Item Weight | 1.6 ounces (total package) |
| Product Dimensions | 1.54 x 0.91 x 0.31 inches (package) |
8. Warranty and Support
For any questions regarding installation, troubleshooting, or product performance, please refer to the seller's support channels. Specific warranty information is typically provided at the point of purchase or on the product packaging.